
Ranger 4WD V6-3.0L VIN U (1997)
Wheels: Service and Repair
Replacement
WARNING: NEVER RUN THE ENGINE WITH ONE WHEEL OFF THE GROUND, SUCH AS WHEN CHANGING A TIRE. THE
WHEELS STILL ON THE GROUND COULD CAUSE THE VEHICLE TO MOVE.
CAUTION: Replace wheels if they are bent, cracked, leaking air or heavily rusted or if the lug nuts often become loose. Do not use bent wheels that
have been straightened and do not use inner tubes in leaking wheels. Do not replace wheels with used wheels. Wheels that have been straightened, are
leaking air, or are used, may have structural damage and could fail without warning. Check for damage that could affect the runout of the wheels.
Wobble or shimmy will eventually damage the wheel bearings.
REMOVAL
1. Set parking brake and block diagonally opposite wheel.
^
On vehicles equipped with an automatic transmission, place selector lever in the PARK position.
^
On vehicles equipped with a manual transmission, place the shift lever in reverse.
2. If equipped, remove the wheel cover or hub cap.
3. With the weight of the vehicle still on the tires, break the lug nuts loose.
WARNING: DO NOT REMOVE AT THIS TIME.
4. Raise the vehicle with a jack until the wheel and tire clear the floor and support the vehicle on a jackstand. Remove the lug nuts. Remove the
wheel and tire assembly.
INSTALLATION
WARNING: WHENEVER A WHEEL IS INSTALLED, ALWAYS REMOVE ANY CORROSION, DIRT OR FOREIGN MATERIAL
THAT MAY BE PRESENT ON THE MOUNTING SURFACES OF THE HUB, DRUM OR ROTOR THAT CONTACTS THE WHEEL.
INSTALLING WHEELS WITHOUT PROPER METAL-TO-METAL CONTACT AT THE WHEEL MOUNTING SURFACES CAN
CAUSE THE LUG NUTS TO LOOSEN AND COULD ALLOW THE WHEEL TO COME OFF WHILE THE VEHICLE IS IN MOTION
CAUSING LOSS OF CONTROL.
1. Position the wheel on the hub and rotor or the axle flange 4W disc brakes.
2. Install the lug nuts making sure the cone end of the nuts faces inward.
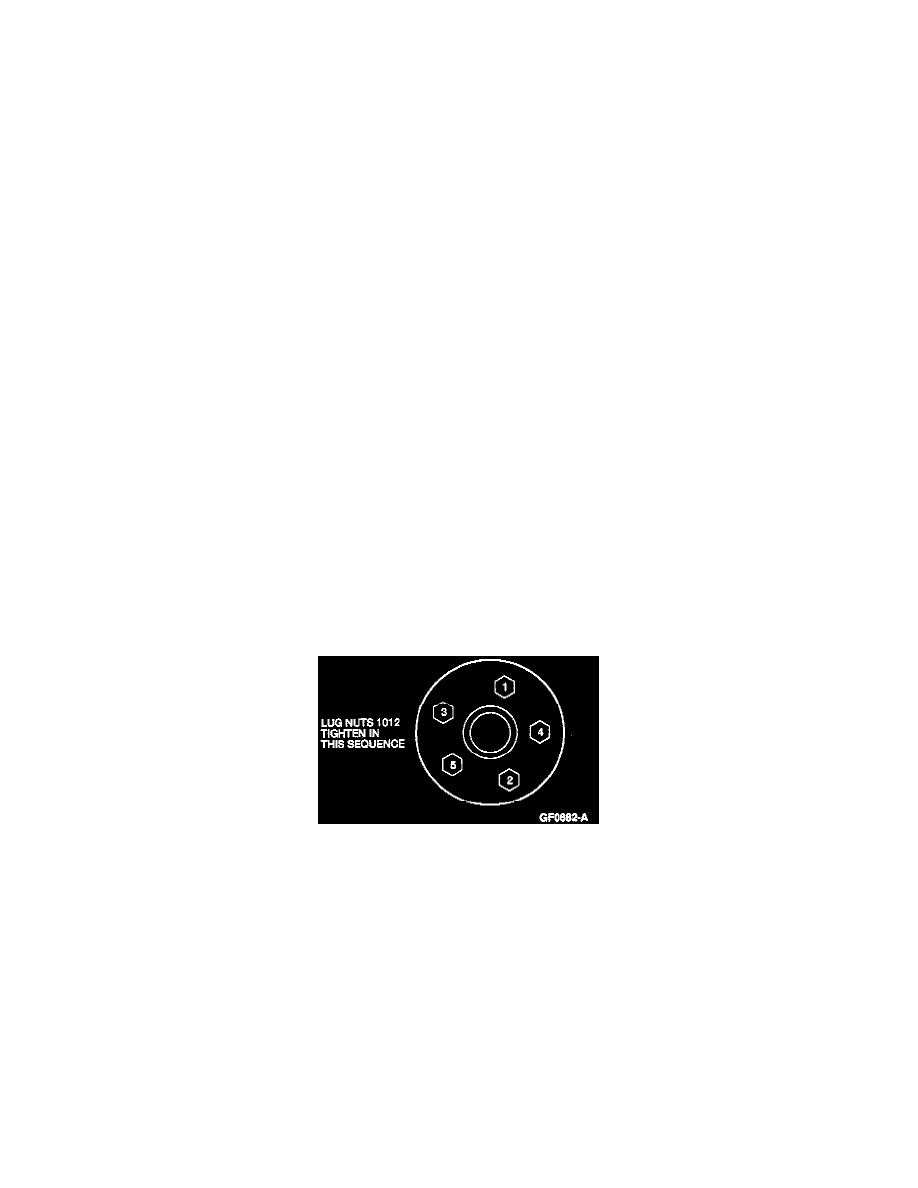
3. With the lug nuts loosely installed. Tighten each lug nut until snug using sequence shown below.
4. In a criss-cross pattern, tighten the remaining lug nuts until snug to minimize runout.
5. Remove the jackstand and lower the vehicle.
6. Evenly tighten the lug nuts in the torque sequence shown to 135 Nm (100 ft lbs.).
WARNING: IMPROPERLY TIGHTENED LUG NUTS COULD ALLOW THE WHEEL TO COME OFF WHILE THE VEHICLE IS
IN MOTION, CAUSING LOSS OF CONTROL. DO NOT USE A LUBRICANT ON THE LUG NUTS TO FACILITATE FUTURE
REMOVAL OF THE WHEEL ASSEMBLY.
7. Advise customer that wheels need to be retightened at 800 km (500 miles) after any wheel change or any other time the lug nuts have been
loosened. This is required to permit the wheel clamping system to seat properly so that the lug nuts will hold a uniform clamp load and remain
fully tightened.