
Ranger 4WD V6-3.0L VIN V Flex Fuel (1999)
Seat Belt: Service and Repair
Service Procedures
Automatic Locking Retractor-Evaluation of Lockability & Release
1. Extend the safety belt to latch the tongue into the buckle across an empty seat without slack in the safety belt, with the seat in the full down and
rearmost position, seat back in an upright position, and if applicable, the D-ring adjusted in the full down position.
2. Pull the shoulder belt to full extension to engage the retractor's Automatic Locking Retractor (ALR) feature. Then allow the belt to retract freely in
the ALR mode, and the retractor force set the proper belt tightness.
3. Pull on the shoulder belt to check that the belt has remained in the ALR mode. If the belt is not locked, install the belt and retractor assembly. The
safety belt should remain locked in the ALR mode across an empty seat.
4. To verify that the safety belt still automatically disengages from the ALR mode properly, with the D-ring adjusted to the full up position, if
applicable, unlatch the safety belt tongue from the buckle and allow the safety belt to retract to its stowed position. Pull on the shoulder belt to
verify that the retractor assembly has converted automatically out of the ALR mode. If the belt remains locked in the stowed position, the belt and
retractor assembly must be installed. The safety belt should extract freely.
Post Collision Inspection
1. Before installing the new safety belt assembly, the safety belt attaching areas must be inspected for damage and distortion. If the attaching points
are damaged and distorted, the sheet metal must be reworked back to its original shape and structural integrity.
WARNING: All safety belt assemblies including retractors, buckles, front seat belt buckle support assemblies (slide bar), shoulder belt
height adjusters, if so equipped, child safety seat tether attachments, and attaching hardware should be inspected after any collision. All
belt assemblies should be replaced unless a qualified technician finds the assemblies show no damage and operate properly. Belt
assemblies not in use during a collision should also be inspected and replaced if either damage or improper operation is noted.
NOTE: Safety belt assemblies should be periodically inspected to make sure they have not become damaged and that they remain in proper
operating condition, particularly if they have been subjected to severe stress.
2. Install the new safety belt(s) using the appropriate instructions. Perform the Component Test. See: Testing and Inspection/Component Tests and
General Diagnostics
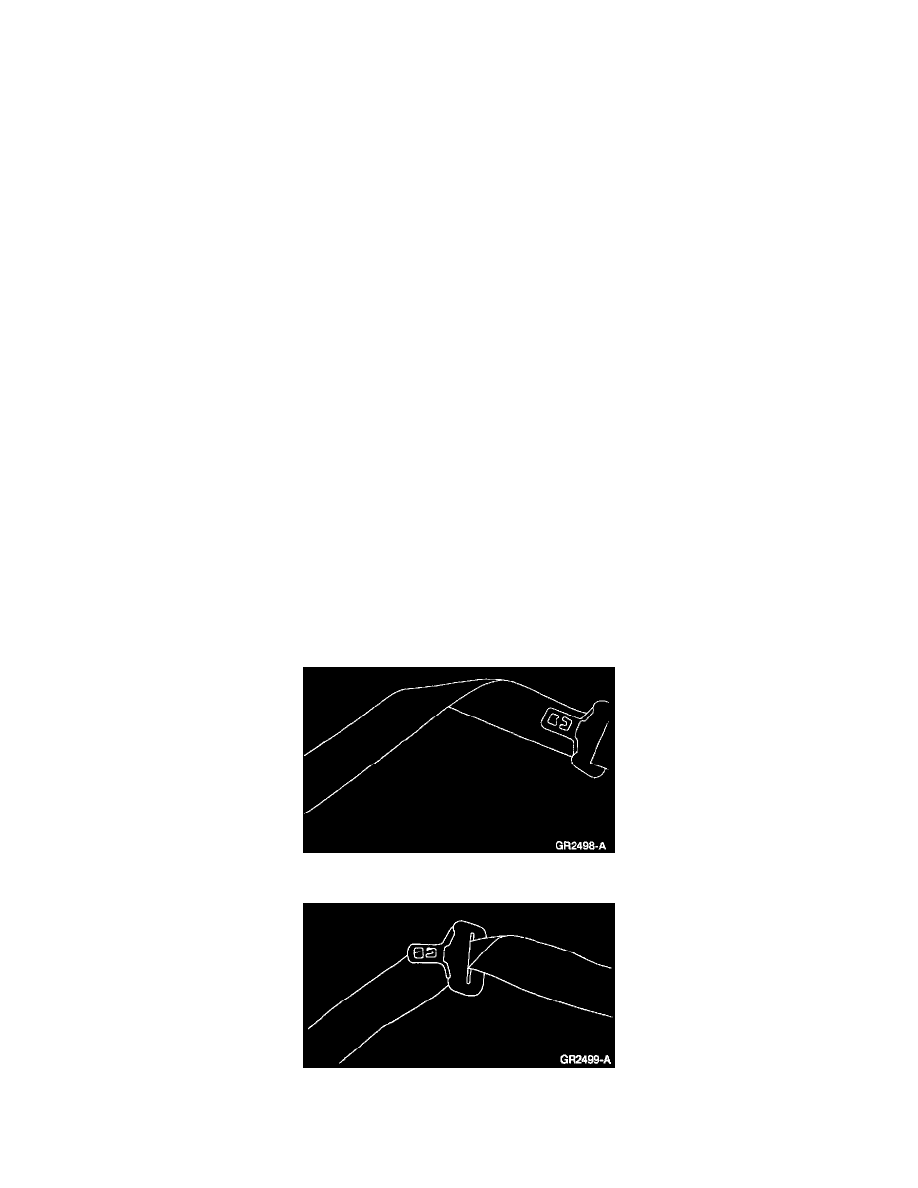
Safety Belt Tongue Rotated on Belt
1. Fold the safety belt as indicated.
2. Pull the safety belt tongue over the fold in the safety belt.
Center Facing Rear Seat