Ranger 4WD V6-4.0L (2009)

Engine Control Module: Removal and Replacement
Powertrain Control Module (PCM)
Removal
1. Retrieve the module configuration. Carry out the module configuration retrieval steps of the Programmable Module Installation procedure. See:
Powertrain Management/Computers and Control Systems/Information Bus/Testing and Inspection/Programming and Relearning
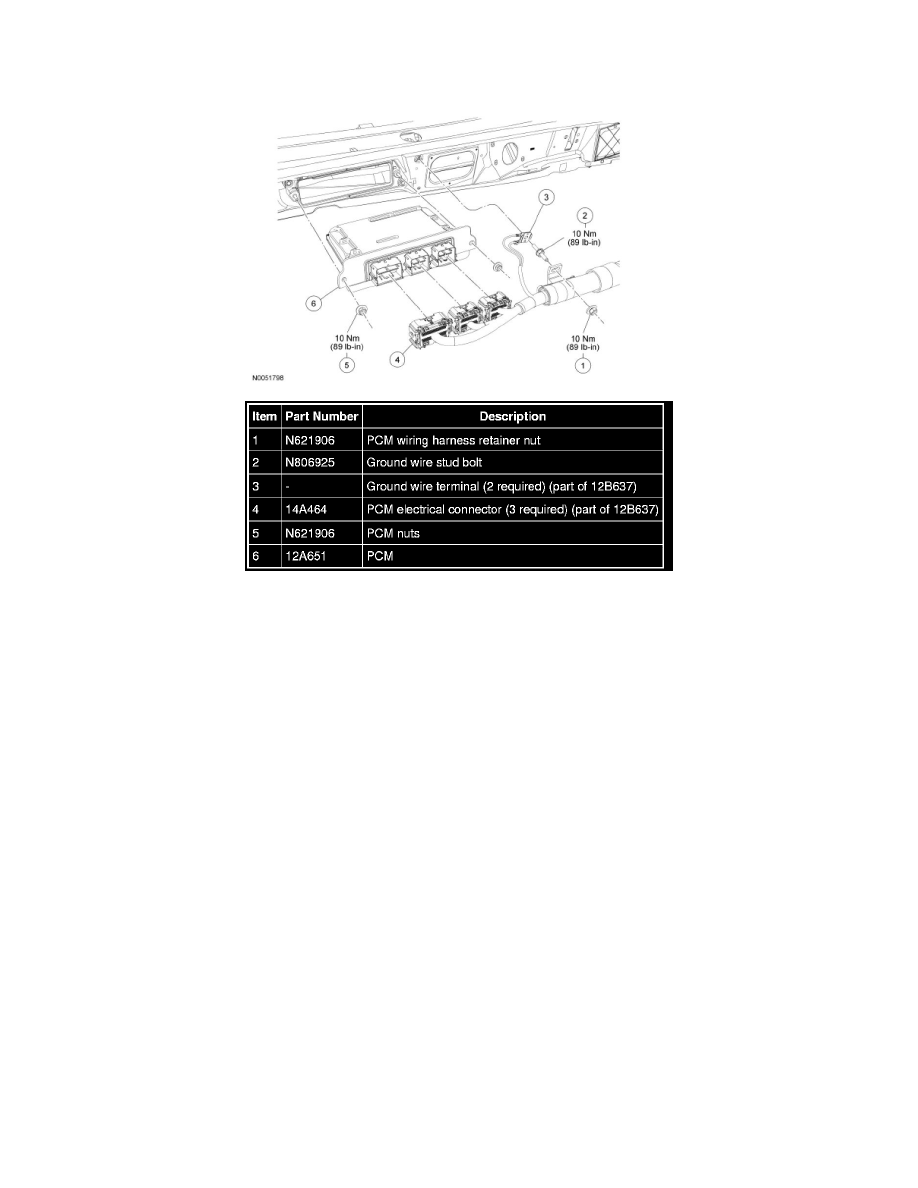
2. Remove the PCM wiring harness retainer nut.
3. Remove the ground wire stud bolt.
4. Disconnect the 3 PCM electrical connectors.
5. Remove the 2 nuts and the PCM.
Installation
1. Install the PCM and the 2 nuts.
-
Tighten to 10 Nm (89 lb-in).
2. Connect the 3 PCM electrical connectors.
3. Position the ground wire terminals and install the stud bolt.
-
Tighten to 10 Nm (89 lb-in).
4. Install the PCM wiring harness retainer nut.
-
Tighten to 10 Nm (89 lb-in).
5. NOTE: If a new PCM is installed, the parameters must be reset in both the PCM and the instrument cluster module or the vehicle will experience
a Passive Anti-Theft System (PATS) no-start. This will occur even if the vehicle is not equipped with PATS. PATS vehicles and non-PATS
vehicles have parameters in the instrument cluster module and the PCM and they both must be reset whenever a new PCM is installed. For
additional information on PATS, refer to Antitheft and Alarm Systems.
Restore the module configurations for the instrument cluster module and the PCM. Carry out the module configuration restore steps of the
Programmable Module Installation procedure. See: Powertrain Management/Computers and Control Systems/Information Bus/Testing and
