
Ranger 4WD V6-4.0L (2009)
retention of these parts.
1. With the vehicle in NEUTRAL, position it on a hoist.
2. Remove the torsion bar cover plate bolts and the torsion bar cover plate.
-
To install, tighten to 55 Nm (41 lb-ft).
3. NOTE: Before relieving the torsion bar tension, measure and record the measurement of the torsion bar adjustment bolt. This measurement will be
used as the preset depth for the new torsion bar adjustment bolt during installation.
Make preliminary adjustment references.
4. Relieve the torsion bar tension.
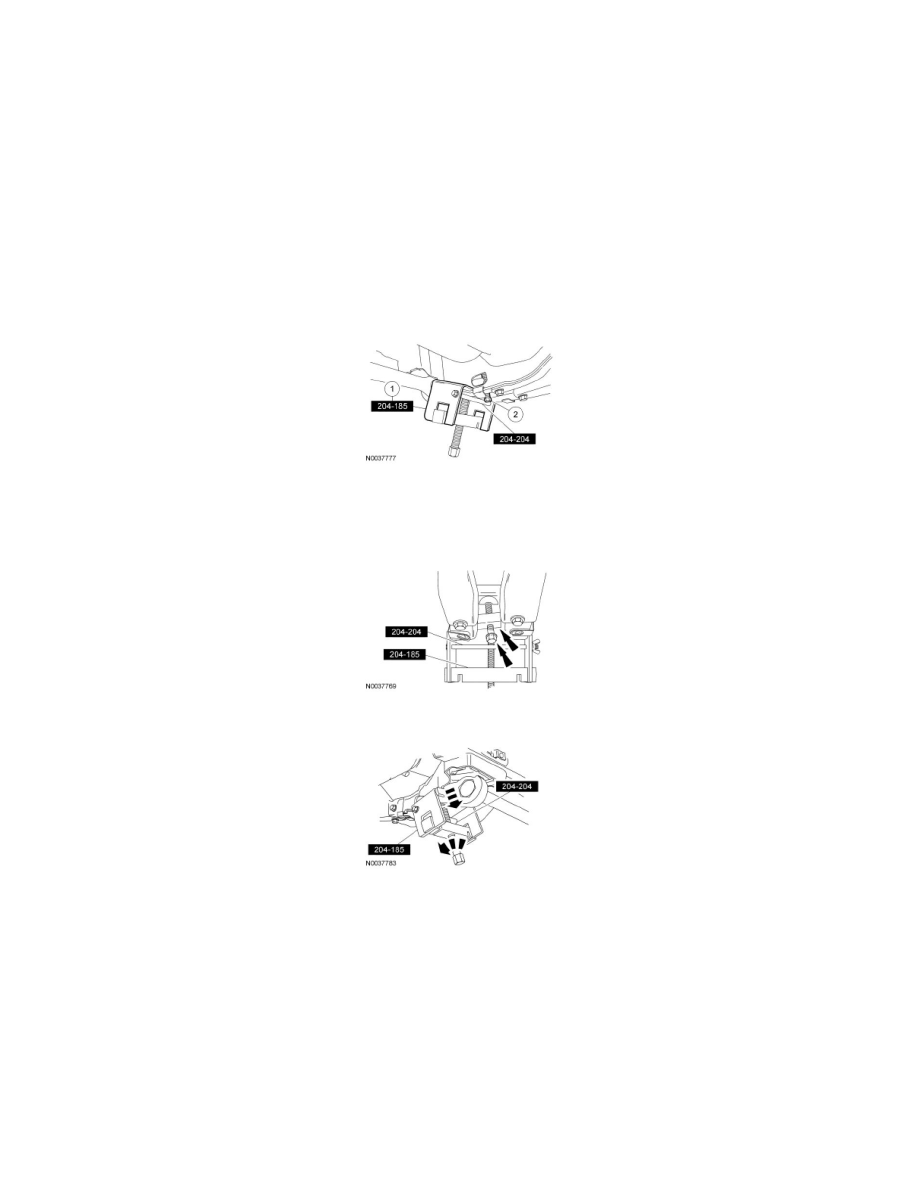
1. Position the Torsion Bar Remover/Installer and Adapter.
2. Tighten the Torsion Bar Remover/Installer until the torsion bar adjuster lifts off the adjustment bolt.
5. NOTICE: The torsion bar adjustment bolt is coated with dry adhesive and must be replaced if it is backed off or removed. Failure to do
so may cause the adjustment bolt to loosen during operation and cause a loss of vehicle alignment.
Remove and discard the torsion bar adjustment bolt and support nut.
6. Loosen the Torsion Bar Remover/Installer and Adapter until the tension is removed from the torsion bar.
7. Remove the torsion bar in the following sequence.
1. Mark the torsion bar and the adjuster for correct installation.
2. Remove the torsion bar insulator plate.
3. Grasp the torsion bar and pull it free from the lower arm.