
Taurus L4-153 2.5L HSC (1986)
Camshaft Gear/Sprocket: Service and Repair
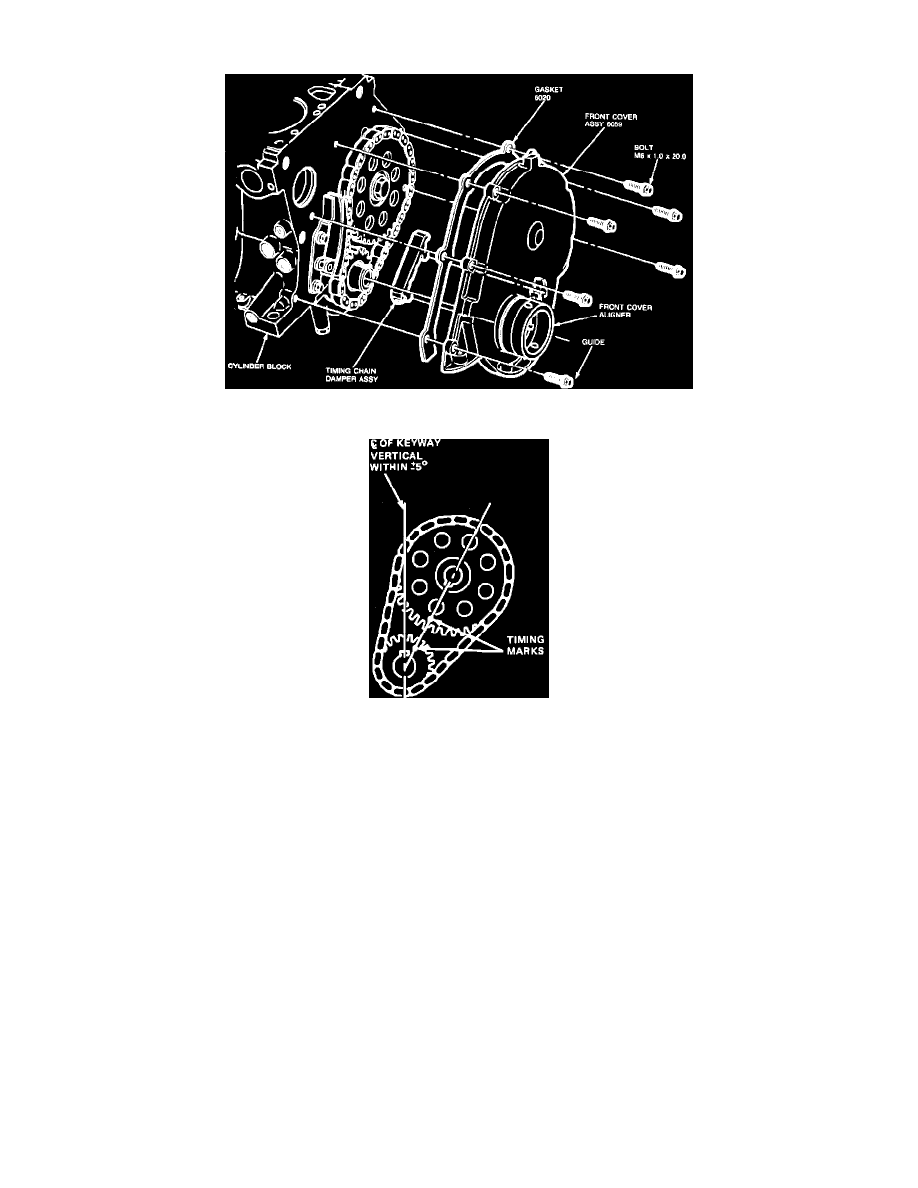
Fig. 7 Front cover removal
Fig. 9 Valve Timing Marks
1.
Remove dipstick, accessory drive pulley (if equipped), crankshaft pulley bolt, washer and pulley.
2.
Using front cover seal remover T74P-6700-A, remove front seal, then front cover attaching bolts and front cover, Fig. 7.
3.
Align camshaft and crankshaft sprocket timing marks as shown in Fig. 8.
4.
Remove camshaft sprocket bolt and washer.
5.
Remove sprockets and timing chain from engine as an assembly. Check timing chain vibration damper (located inside front cover) for wear.
Replace if necessary.
6.
Remove oil pan.
7.
Install sprockets and timing chain. Align timing marks as shown in Fig. 8. Oil timing chain, sprockets and tensioner after installation.
8.
With front cover seal removed, position front cover on engine.
9.
Position front cover alignment tool T84P-6019-C or equivalent onto end of crankshaft. Ensure crankshaft pulley key is aligned with key way in
tool.
10.
Install front cover bolts. Torque bolts to 6-9 ft. lbs., then remove front cover alignment tool.
11.
Coat new front cover oil seal with a suitable lubricant.
12.
Using tool No. T83T-4676-A or equivalent, install oil seal into front cover. Drive oil seal in until it is fully seated into front cover recess. Check
oil seal after installation to ensure spring is properly positioned in oil seal.
13.
Lubricate, then install crankshaft pulley. Do not install washer and bolt at this time.
14.
Install oil pan and accessory drive pulley (if equipped).
15.
Install crankshaft pulley bolt and washer. Torque crankshaft pulley bolt to specifications.