
Taurus V6-182 3.0L DOHC SHO (1992)
Accumulator HVAC: Service and Repair
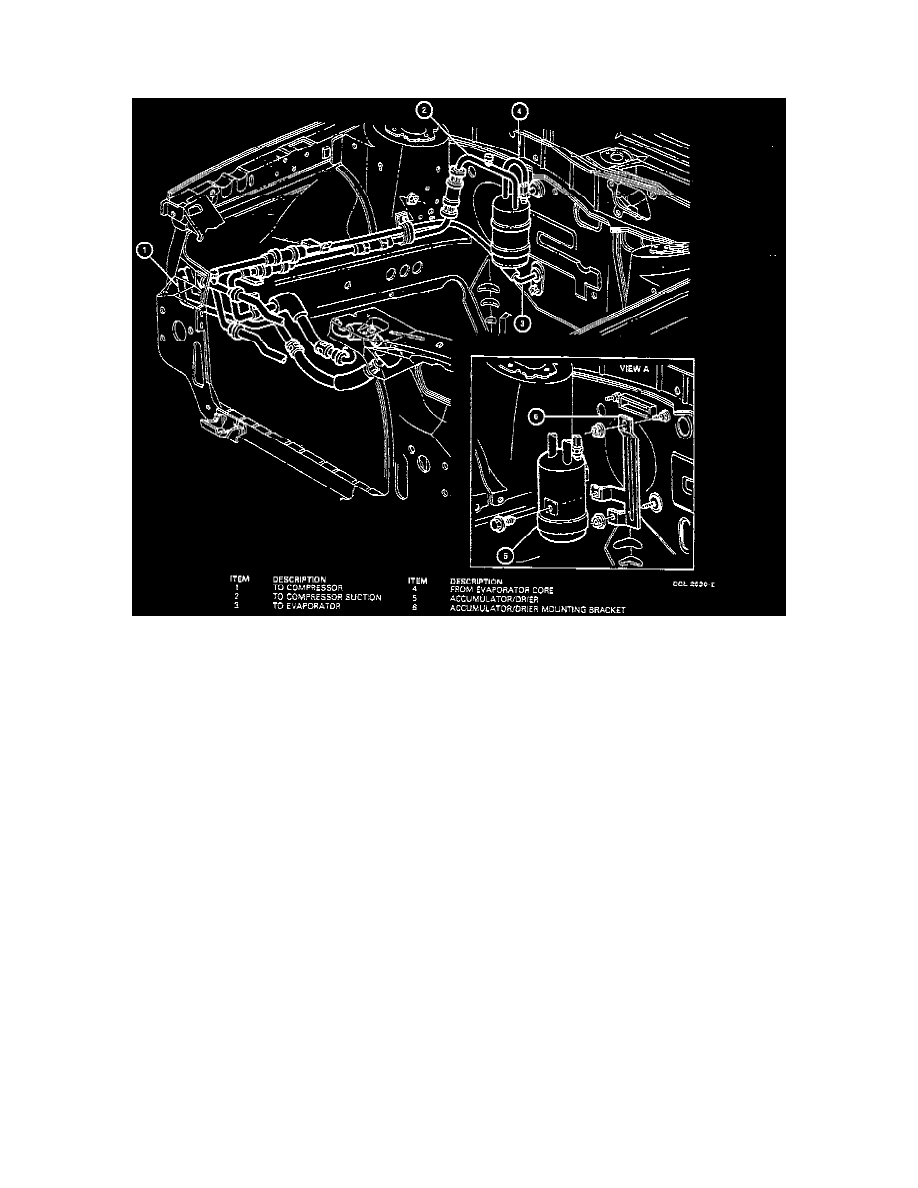
Removal and Installation
Suction Accumulator/Drier
REMOVAL
1. Recover the refrigerant from the A/C system. Observe all safety precautions.
2. Disconnect the suction hose at the A/C compressor. Cap the suction hose and the A/C compressor to prevent the entrance of dirt and moisture.
3. Disconnect the suction accumulator/drier inlet tube from the A/C evaporator core outlet. Use Spring Lock Coupling Disconnect Tool (3/4 inch)
T85L-19623-A to remove inlet tube.
4. Disconnect the wiring harness connector from the A/C cycling switch on top of the suction accumulator/drier.
5. Remove the screw holding the suction accumulator/drier in the suction accumulator/drier bracket and remove the suction accumulator/drier.
INSTALLATION
1. Position the suction accumulator/drier to the vehicle and route the suction hose to the A/C compressor.
2. Using new O-ring seals lubricated with clean refrigerant oil, connect the suction accumulator/drier inlet tube to the A/C evaporator core outlet.
CAUTION: Make sure the correct O-ring seals are installed on the A/C fittings.
3. Install the screw in the suction accumulator/drier bracket.
4. Using new O-ring seals lubricated with clean refrigerant oil, connect the suction hose to the A/C compressor. Install the suction line spring lock
coupling.
5. Leak test, evacuate, and charge the system. Observe all safety precautions.
6. Check the system for proper operation.