
Taurus V6-182 3.0L DOHC SHO (1992)
1
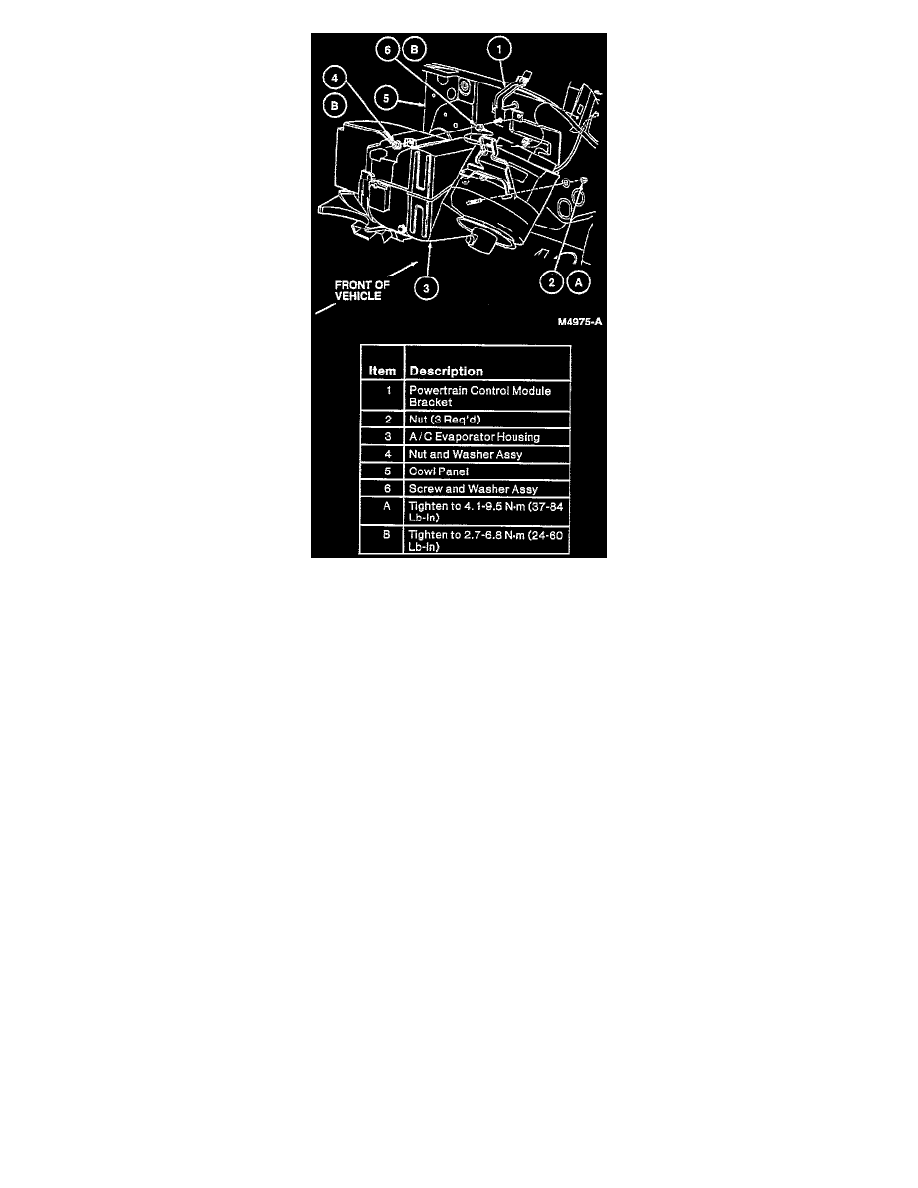
Position the A/C evaporator housing assembly against the dash panel and the cowl top panel at the air inlet opening. Install the screw and nut
retaining the support brackets to the cowl top panel. Tighten to 2.7-6.8 Nm (24-60 in lb).
NOTE: Install the N606676-S2 screw and washer assembly first to properly position the housing to the cowl.
2. Install the three nuts in the engine compartment retaining the A/C evaporator housing to the cowl panel. Tighten to 4.1-9.5 Nm (37-84 in lb).
3. Install the heater outlet floor duct to the A/C evaporator housing and tighten the two retaining screws.
4. Install the instrument panel, please refer to Body and Frame/Interior Trim/Dash Board/Service and Repair/ See: Body and Frame/Interior
Moulding / Trim/Dashboard / Instrument Panel/Service and Repair
5. Connect the condenser to the evaporator tube and the suction accumulator/drier inlet tube to the A/C evaporator core.
CAUTION: Make sure the correct type 0-ring seals are installed on the A/C fittings.
6. Connect the heater water hoses to the heater core.
7. Connect the black vacuum supply hose to the A/C vacuum check valve in the engine compartment.
8. Fill the radiator to the correct level with the previously removed coolant or specified mixture of coolant and water
9. Connect the battery ground cable.
NOTE: On vehicles equipped with Electronic Engine Control (EEC), when the battery has been disconnected and reconnected, some abnormal
drive symptoms may occur while the EEC processor relearns its adaptive strategy. The vehicle may need to be driven 10 miles or more to relearn
the strategy.
10. Leak-test, evacuate, and charge the A/C refrigerant system, please refer to Heating and Air Conditioning/Service and Repair/ See: Service and
Repair
11. Check the system for proper operation.