
Taurus V6-182 3.0L DOHC SHO (1992)
Heater Core: Service and Repair
Removal
With Automatic Temperature Control
NOTE: Vehicles may be equipped with an aluminum or a copper brass heater core. Use replacement cores made of copper brass. Always identify the
type of core being replaced because there is a difference in the heater core to heater case seals. Having the correct seal is essential to provide satisfactory
heater system performance. Identification can be made by looking at one of the core tubes after a hose has been removed. An aluminum core will have a
gray colored tube. A copper brass core will have a brass colored tube. If the core is copper brass, the seal removed with the old core can be used with the
new copper brass replacement core, providing it is not damaged during removal. If the core is aluminum, a new seal for the copper brass replacement
core will be required.
REMOVAL
1. Remove the instrument panel, refer to Body and Frame/Interior Trim/ Dash Board/Service and Repair/ See: Body and Frame/Interior Moulding /
Trim/Dashboard / Instrument Panel/Service and Repair
2. Remove the evaporator case assembly, please refer to Heating and Air Conditioning/Evaporator Case/Service and Repair/ See: Evaporator
Case/Service and Repair
NOTE: Whenever the evaporator case is removed, it will be necessary to replace the suction accumulator/drier.
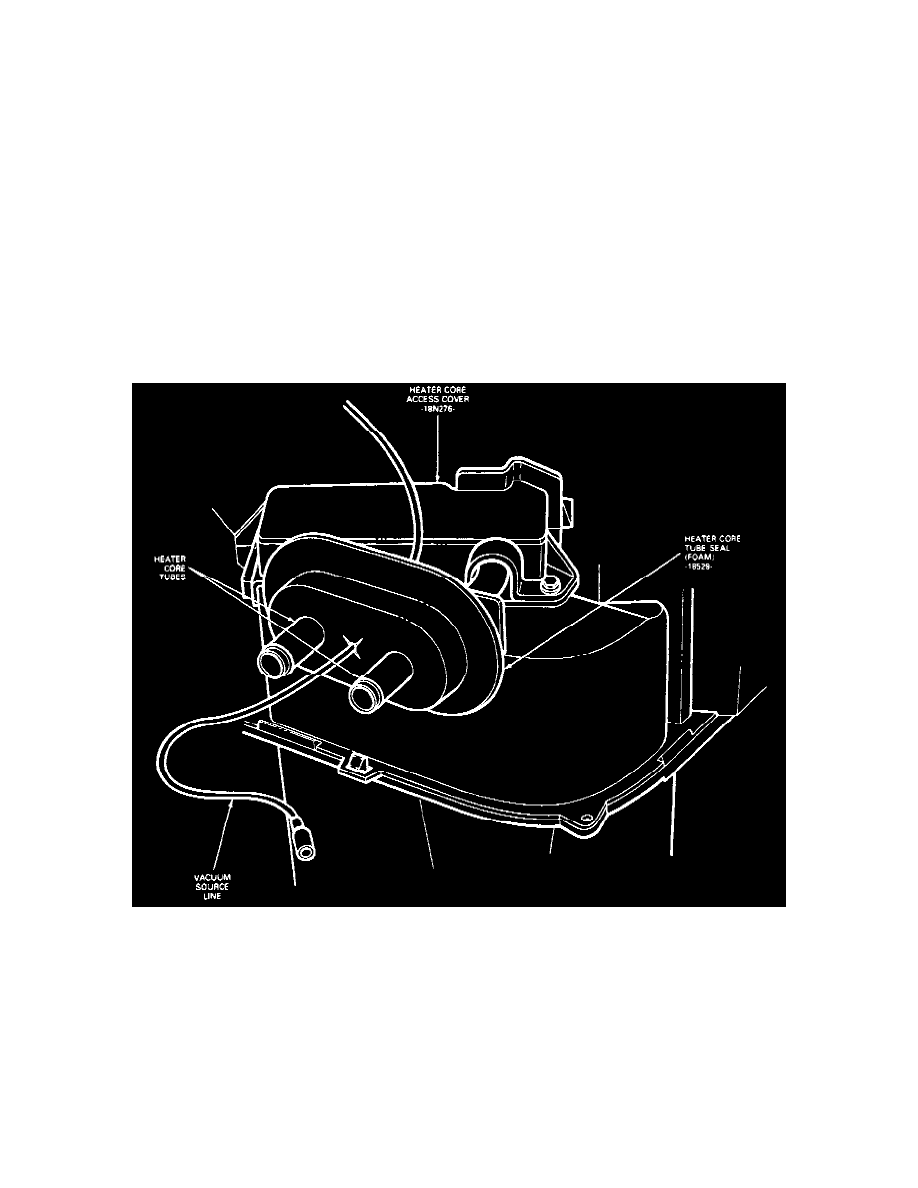
Fig 26 Vacuum Line Removal From Heater Core Seal
3. Remove the vacuum source line from the heater core tube seal.