Taurus V6-182 3.0L FF (1995)

Clutch: Service and Repair
Clutch, A/T
WITH AXOD-E (AX4S)
DISASSEMBLE
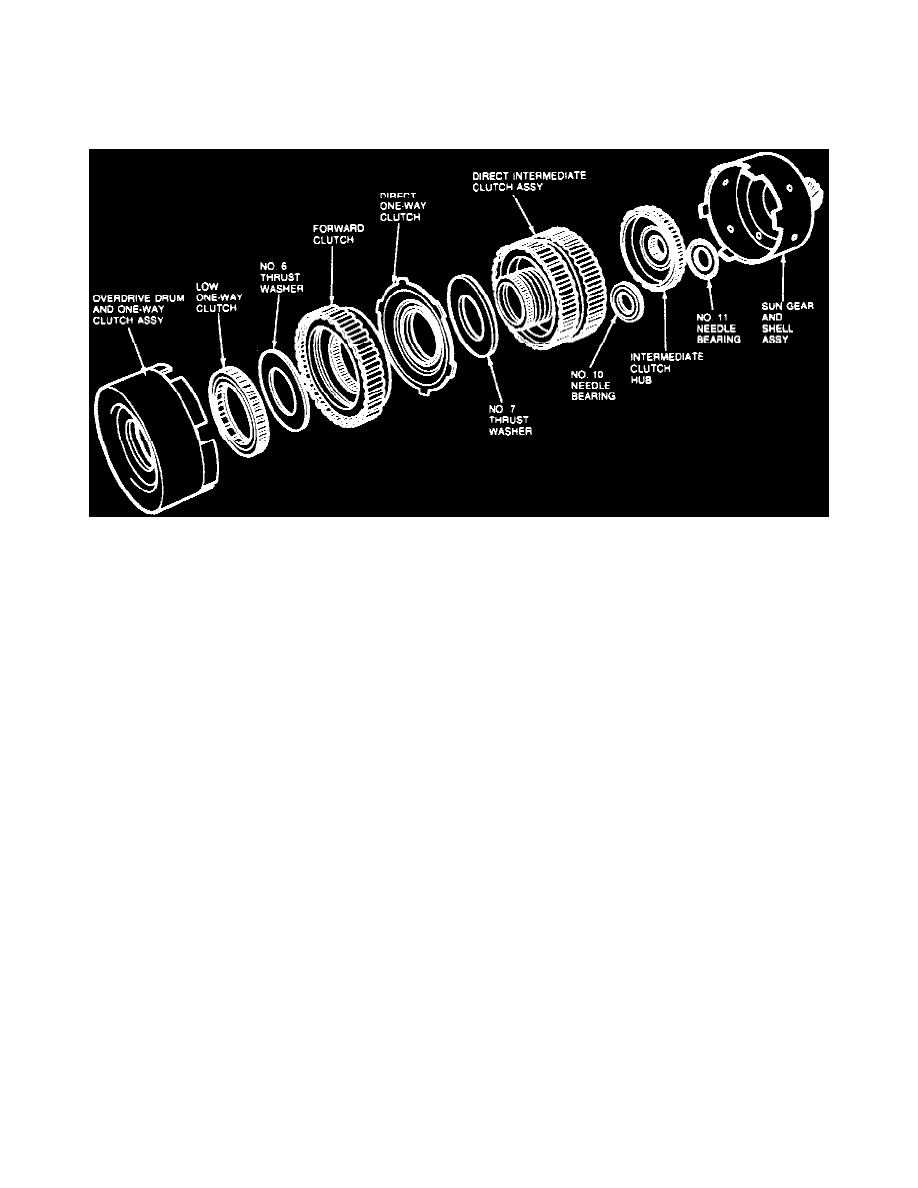
Shell Assembly, Forward, Direct, And Intermediate Clutches
1. Place assembly on overdrive drum, then remove sun gear and shell assembly.
2. Remove No. 11 needle bearing, intermediate clutch hub, and No. 10 needle bearing.
3. Turn assembly onto intermediate cylinder hub, then remove overdrive drum and one-way clutch assembly.
4. Remove No. 6 thrust washer.
5. Remove forward clutch assembly by prying up on each side with two screwdrivers.
NOTE: Direct clutch 0-ring seals retain forward clutch hub. Pry evenly and do not place screwdriver ends on or near forward clutch check ball.
6. Remove direct one-way clutch and No. 7 thrust washer.
ASSEMBLE
1. Place intermediate clutch assembly on bench, as shown in the Shell Assembly, Forward, Direct, And Intermediate Clutches image, then install No.
7 thrust washer into direct clutch. Ensure washer tabs are aligned with slots in direct clutch.
2. Install direct one-way clutch and align onto clutch pack splines.
3. Install two 0-ring seals, then the forward clutch assembly. Use caution not to damage the 0-ring seals on direct clutch hub.
