
Taurus V6-182 3.0L FF (1995)
DISASSEMBLE
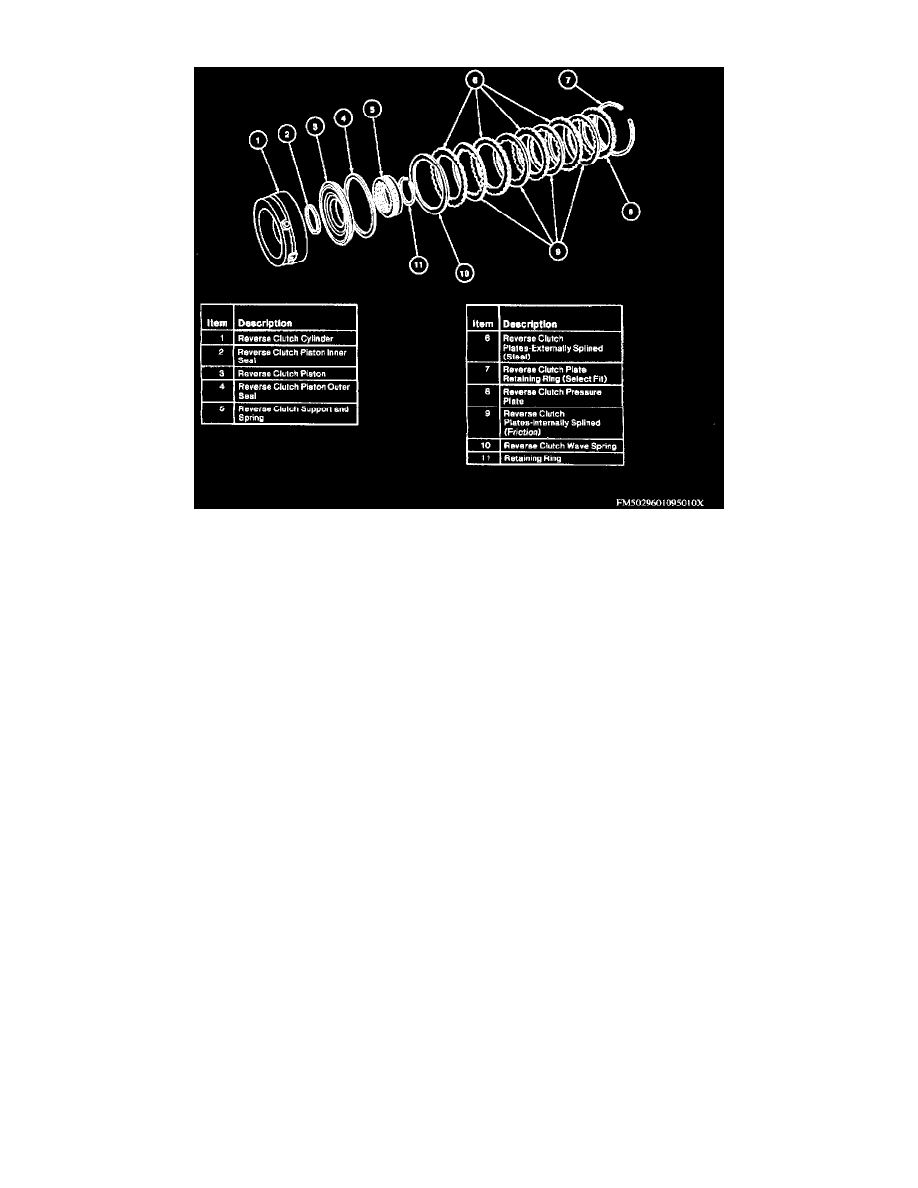
Exploded View Of Reverse Clutch
1. Remove reverse clutch pressure plate retaining ring, clutch pressure plate clutch pack and reverse clutch wave spring.
2. Using clutch spring compressor tool No. T65L-77515-A, or equivalent, compress reverse clutch support and spring. Use snap ring pliers to
remove retaining ring.
3. Remove clutch spring compressor and retaining ring.
4. Remove reverse clutch support and spring from reverse clutch hub.
5. Lift out clutch piston. Remove and discard reverse clutch piston outer seal and clean piston.
6. Remove and discard reverse clutch piston inner seal, then clean reverse clutch cylinder.
ASSEMBLE
1. Install new reverse clutch piston inner seal (lip toward bottom of cylinder).
2. Install new reverse clutch piston outer seal and reverse clutch piston using reverse clutch piston seal protector tool No. T94P-77001-PH or
equivalent.
3. Install reverse clutch support and spring onto reverse clutch cylinder.
4. Compress reverse clutch support and spring using clutch spring compressor tool No. T65L-77515-A or equivalent. Install retaining ring using snap
ring pliers.
5. Remove clutch spring compressor. Install wave spring, clutch pack, clutch pressure plate, and retaining ring.
6. Air check clutch assembly for proper operation.
7. Check clutch pack clearance using feeler gauge. Take two readings, 180° apart, and determine average of two readings. Clearance should be
0.038-0.064 inch.
8. If clearance is not within specifications, adjust clearance using snap ring with one of proper thickness.