
Taurus V6-183 3.0L VIN U FI (1993)
1. Clean valve cover gasket channel with soft cloth to remove all dirt.
2. Using a suitable solvent, clean off any remaining RTV sealant.
CAUTION: Check valve cover gasket for correct installation. New valve cover gasket will lay flat to the valve cover in both the channel
and fastener areas. If the valve cover gasket is installed incorrectly, oil leakage will occur.
3. Aligning fastener holes, lay new valve cover gasket onto channel.
4. Install valve cover gasket to each fastener by securing fastener head with a nut driver or socket. Seat fastener against valve cover and, at the same
time, roll valve cover gasket around fastener collar. If installed correctly, all fasteners will be secured by valve cover gasket and will not fall out.
NOTE: Using solvent, clean cylinder head and valve cover sealing surfaces to remove all silicone sealer and dirt. Lightly oil all bolt and stud
threads before installation.
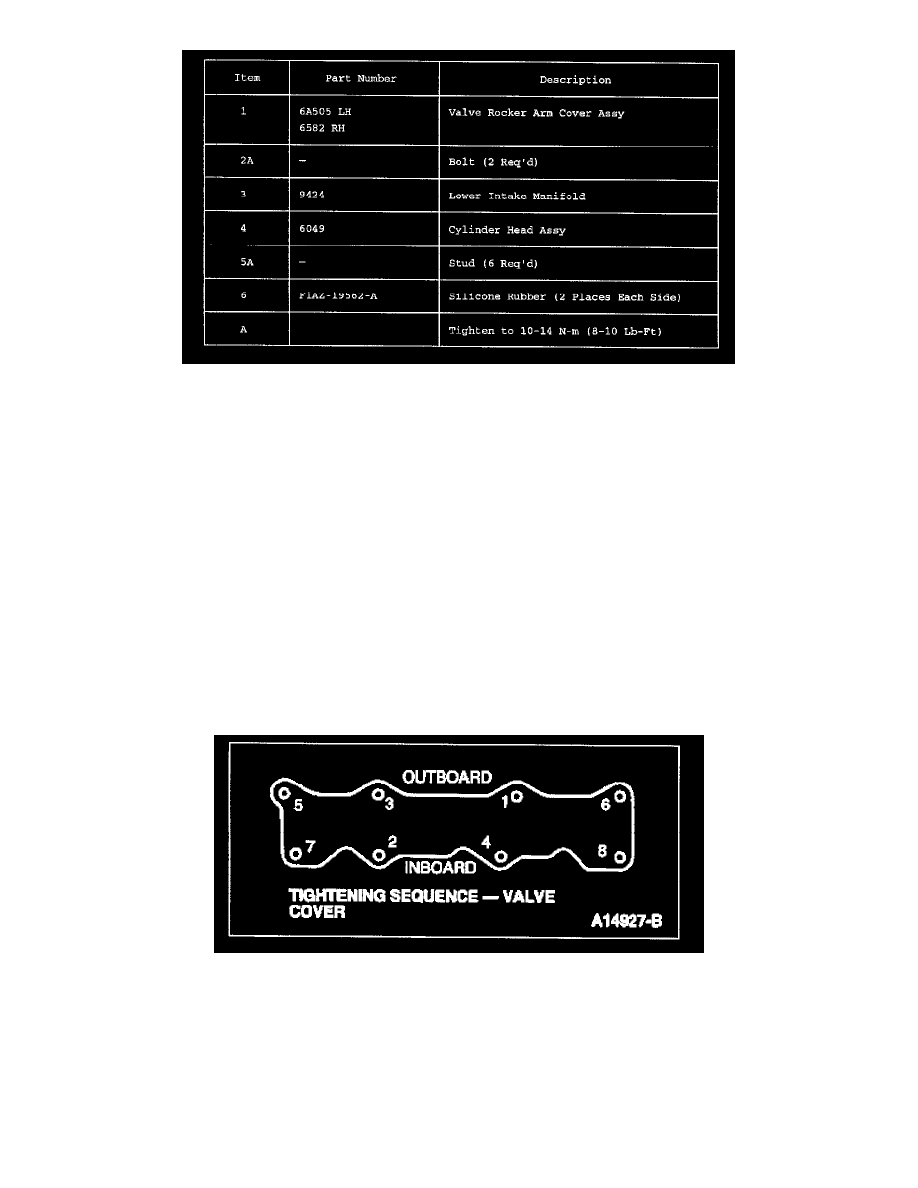
5. Apply bead of Silicone Gasket and Sealant F1AZ-1 9562-A (WSE-M4G320-A2) or equivalent at cylinder head to intake manifold rail step (two
places per rail) as shown.
CAUTION: Use a straight down approach when installing valve cover. Any adjustment after RTV sealer contact can roll valve cover
gasket from valve cover channel resulting in leaks.
6. Position valve cover on the cylinder head and hand tighten retaining bolts and studs. Then, tighten in sequence to 10-14 Nm (8-10 lb-ft).
7. If LH valve cover is being installed, perform the following:
-
Install oil filler cap (if removed).
-
Connect crankcase ventilation tube to nipple.
-
Install fuel charging wiring stand-offs to the appropriate inboard valve cover studs (two required).