
Taurus V6-183 3.0L VIN U FI (1993)
Evaporator Case: Service and Repair
With Manual A/C
REMOVAL
1. Disconnect the battery ground cable.
2. Drain the coolant from the radiator into a clean container.
3. Recover the refrigerant from the A/C system, please refer to Heating and Air Conditioning/Service and Repair/ See: Service and Repair
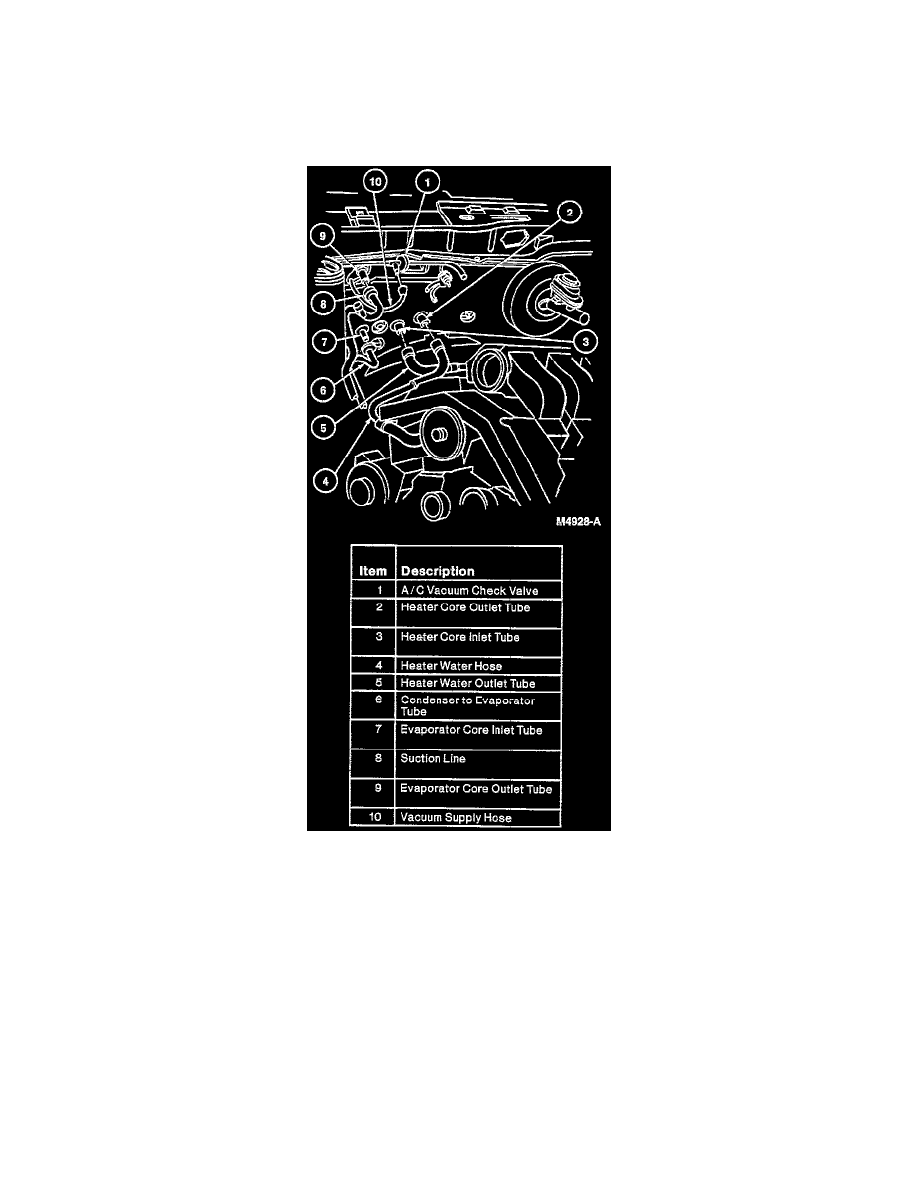
4. Disconnect the heater water hoses from the heater core. Plug the heater core tubes or blow any coolant from the heater core with low pressure air.
5. Disconnect the vacuum supply hose (black) from the A/C vacuum check valve in the engine compartment.
6. Disconnect the condenser to the evaporator tube and the suction accumulator/drier inlet tube from the A/C evaporator core at the dash panel. Cap
the refrigerant lines and the A/C evaporator core to prevent the entrance of dirt and excessive moisture.
7. Remove the instrument panel, please refer to Body and Frame/Interior Trim/Dash Board/Service and Repair/ See: Body and Frame/Interior
Moulding / Trim/Dashboard / Instrument Panel/Service and Repair
8. Remove the two screws retaining the heater outlet floor duct to the bottom of the A/C evaporator housing.
9. Remove the three nuts retaining the A/C evaporator housing to the dash panel in the engine compartment.
10. Remove the screws retaining the support bracket to the cowl top panel.
11. Remove the nut retaining the A/C evaporator housing to the Powertrain Control Module (PCM) mounting bracket.
12. Pull the A/C evaporator housing away from the cowl panel and remove the A/C evaporator housing from the vehicle.
INSTALLATION