
Taurus V6-183 3.0L VIN U FI (1993)
13.
Install instrument panel cluster opening finish panel.
14.
Install headlamp switch retaining nut, then install the headlamp switch knob.
15.
Install both upper and lower steering column shrouds.
16.
Install tilt lever to steering column.
17.
Install ignition switch lock cylinder.
18.
Install knee bolster.
19.
Connect battery negative cable, then remove memory saver.
20.
Check operation of headlamp switch.
Taurus
1.
Install memory saver, then disconnect battery negative cable.
2.
Remove knee bolster.
3.
Remove headlamp switch knob, then the headlamp switch retaining nut.
4.
Apply parking brake.
5.
Position gearshift selector in First gear position.
6.
Remove instrument panel cluster opening finish panel.
7. Remove and discard headlamp switch.
8.
Inspect headlamp switch electrical connector for heat damage. If the electrical connector exhibits obvious heat damage, it must be replaced.Obtain
harness kit part # F8DZ-11654-EA for non-autolamp and F8DZ-11654-DA for Taurus cars with autolamp and install harness connector according
to the instructions, autolamp and non-autolamp cars of this attachment. If the electrical connector does not exhibit obvious heat damage, proceed
to next step.
9.
NOTE: Perform the following step only if the headlamp switch electrical connector is not damaged.
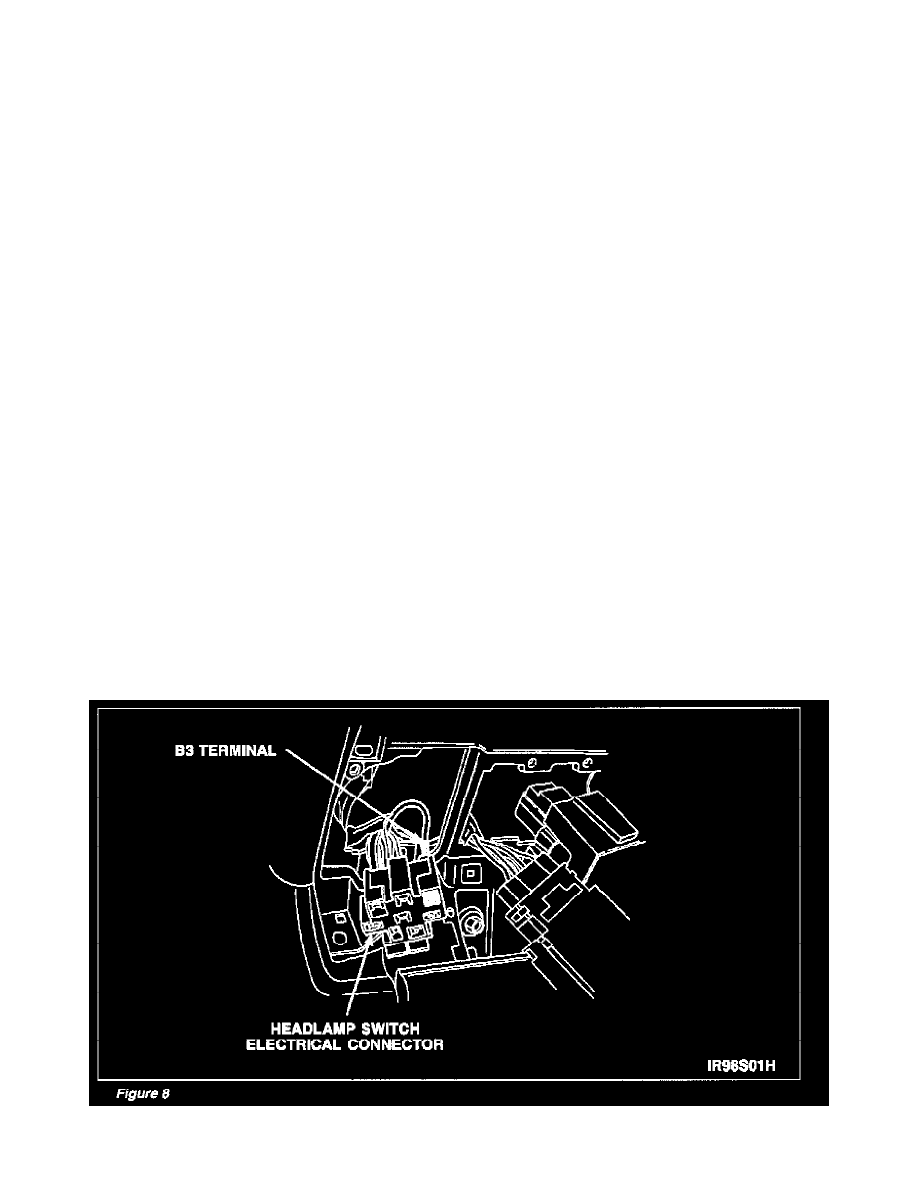
10.
On vehicle equipped with auto lamp option, remove terminal B3 from the headlamp switch electrical connector. See Figure 8. Cut terminal end off