
Taurus V6-183 3.0L VIN U FI (1993)
6.
Lower vehicle to a comfortable working height.
7.
Support strut assembly and remove three (3) nuts which hold the upper strut assembly to the strut tower. Then, remove the strut assembly from the
vehicle.
8.
If hand-held spring compressor is used, secure strut assembly in vise for stability.
9.
CAUTION: The strut assembly is under spring tension. Attempting to disassemble strut without properly compressing the spring can result in
injury. Using a suitable spring compressor, slightly compress the strut spring to relieve initial tension. Loosen the upper rod nut. Continue to
compress the spring until tension is relieved. Remove the upper rod nut.
10.
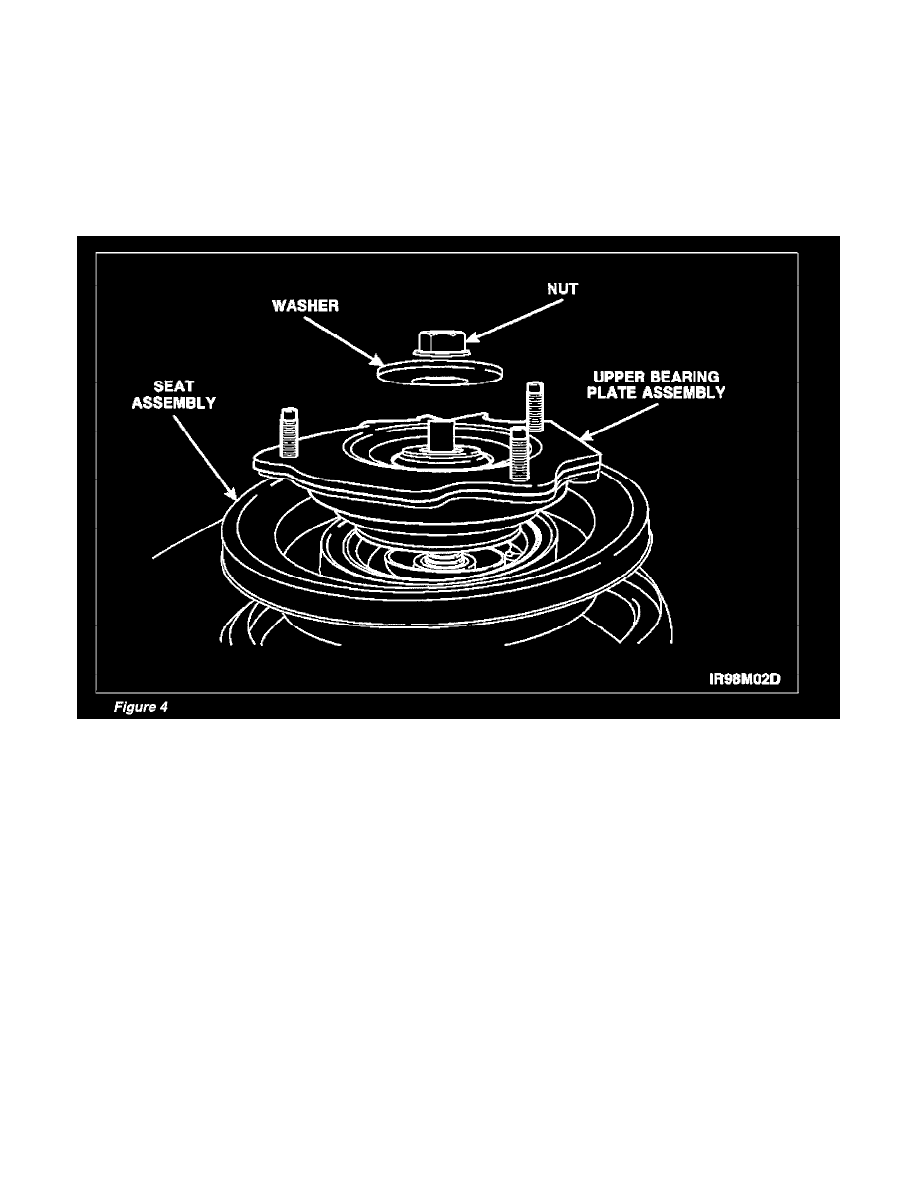
Remove the upper bearing plate assembly and coil spring from the strut. For the purpose of reassembly, carefully note the position of each part
during removal. See Figure 4.
11.
Remove spring compressor from spring.
12.
Install spring compressor on new spring.
13.
Compress new spring enough to assemble strut assembly.
14.
Install new coil spring and upper bearing plate assembly to strut assembly. Make sure spring is correctly seated in both spring seats.
15.
CAUTION: Do not over-tighten upper rod nut. Damage to nut or upper rod could result. Install upper rod nut. Tighten nut to 55-72 Nm (39-53
lb-ft).
16.
Remove spring compressor.
17.
If hand-held spring compressor is used, remove strut assembly from vise.
18.
Remove wire holding steering knuckle.
19.
Position strut assembly in vehicle.
20.
Install three (3) mount-to-strut tower nuts. Tighten nuts to 30-40 Nm (22-29 lb-ft).