
Taurus V6-183 3.0L VIN U FI (1993)
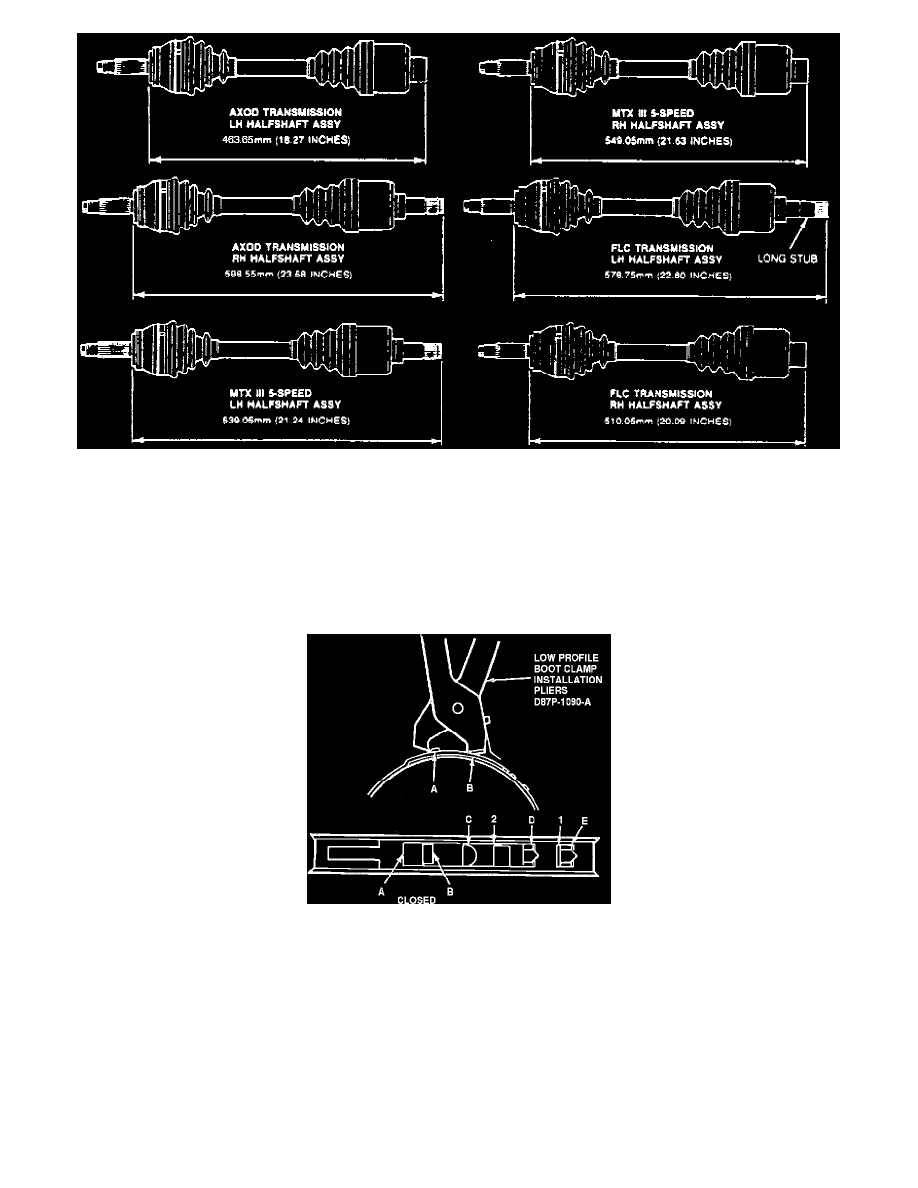
Fig. 16 Driveshaft Assembled Length
7. Remove excess grease from boot exterior. Move CV joint in or out as necessary to adjust driveshaft to the correct length. After driveshaft length
has been determined, expel any built-up air pressure from boot by inserting a dull screwdriver between boot and outer bearing, allowing air to
escape.
8. Install large boot clamp with crimping pliers tool D87P-1098-A, or equivalent.
9. Righthand inboard CV joints use a reusable low profile large boot clamp. Do not install clamp with crimping pliers. To install boot, proceed as
follows:
a. With boot seated in groove, install clamp.
Fig. 16 CV Boot Clamp Installation
b. Engage hook (C) in window.
c. Using low profile boot clamp installation pliers D87P-1090-A, or equivalent, place pincer jaws in closing hooks (A and B).
d. Pull closing hooks together. When 1 and 2 are above locking hooks (D and E), spring tab will press window over locking hooks and engage
clamp.
e. Position clamp replacer T95P-3514-A, or equivalent, on clamp ear and tighten tool through bolt until tool is in closed position.
f.
Install new circlip. Do not overexpand or twist the circlip during installation. To install properly, start one end in groove and work circlip over
stub shaft and into circlip groove.