
Taurus V6-183 3.0L VIN U FI (1993)
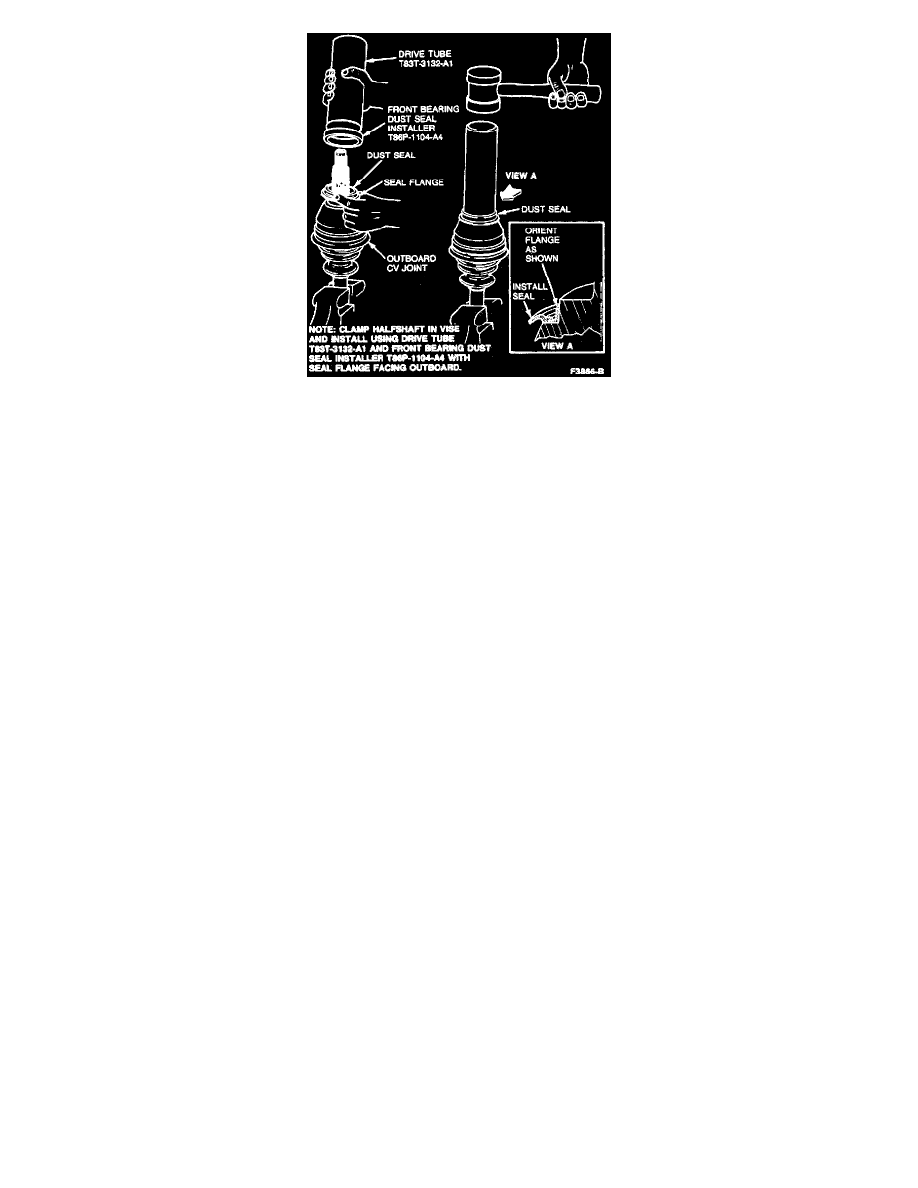
Dust Seal Installation
6. Install new dust seal, ensuring seal flange faces outboard toward bearing. Use Drive Tube T83T-3132-A1 and Front Bearing Dust Seal Installer
T86P-1104-A4 or equivalent.
7. Suspend the hub/bearing/knuckle assembly on the vehicle with wire and attach the strut loosely to the knuckle. Lubricate the CV joint stub shaft
splines with SAE 30 weight motor oil and insert shaft into hub splines as far as possible using hand pressure only. Check that splines are properly
engaged.
8. Temporarily fasten rotor to hub with washers and two lug nuts. Insert a steel rod into rotor diameter and rotate clockwise to contact knuckle.
CAUTION: Do not use power or impact-type tools to tighten the hub nut.
9. Install hub nut washer and new hub nut retainer. Rotate nut clockwise to seat CV joint. Tighten nut to 230-275 NM (170-202 ft-lbs). Remove steel
rod, washers and lug nuts.
10. Complete installation of front suspension components as outlined.
Note: Apply a small amount of Disc Brake Caliper Slide Grease D7AZ-19590-A (ESA-M1C172-A) or equivalent to pilot diameter of rotor.
11. Install rotor splash shield.
12. Install disc brake rotor to hub assembly.
13. Install disc brake caliper over rotor.
14. Ensure outer brake shoe spring hook is seated under upper arm of knuckle.
15. Install wheel and tire assembly, tightening wheel lug nuts finger-tight.
16. Lower vehicle and block wheels to prevent vehicle from rolling.
WARNING: REPLACEMENT LUG NUTS OR STUDS MUST BE OF THE SAME TYPE AND SIZE AS THOSE BEING REPLACED.
17. Tighten wheel lug nuts to 115-142 NM (85-104 ft-lbs).
18. Install wheelcover or hub cover and lower vehicle completely to the ground.
19. Remove wheel blocks.