
Taurus V6-195 3.2L DOHC SHO (1994)
13.
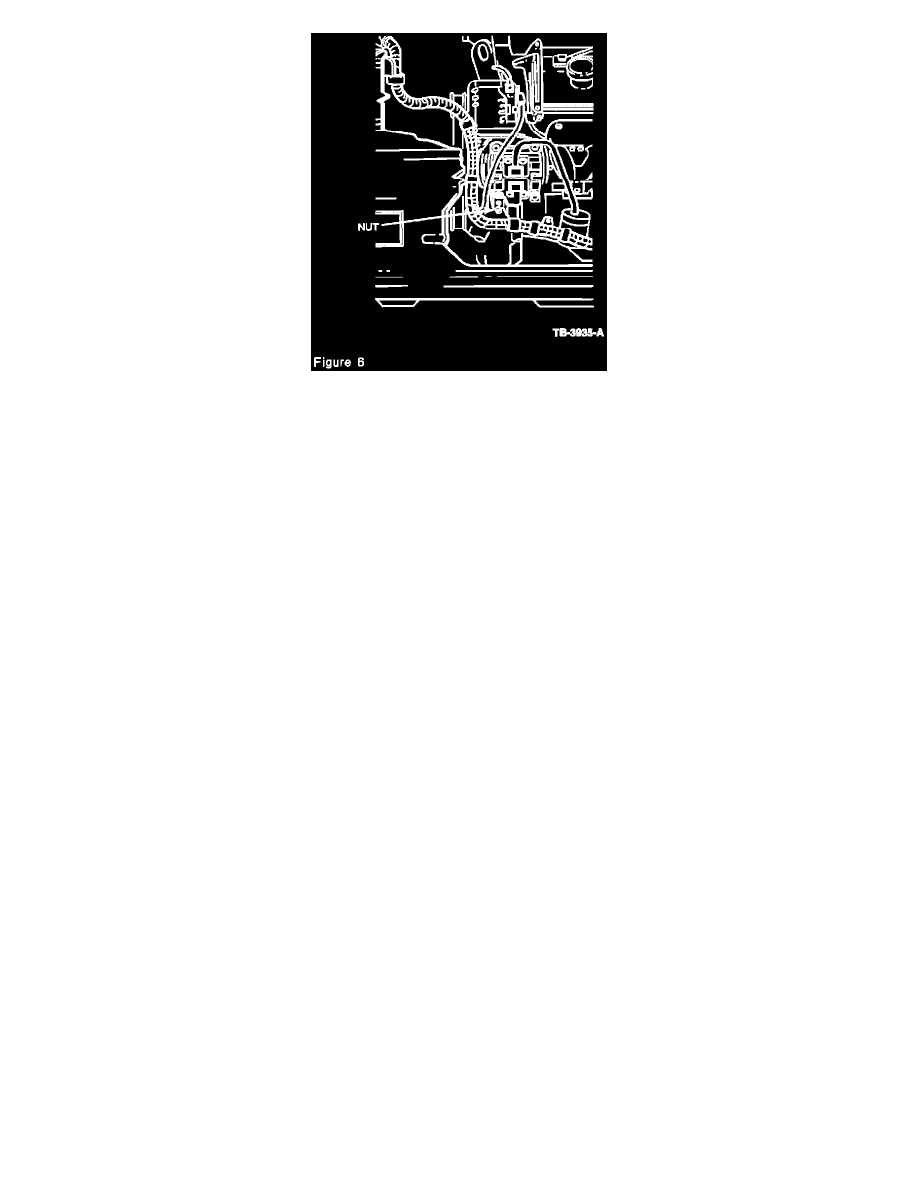
From underneath the vehicle, below the air conditioner compressor, remove the nut attaching the wire harness retaining bracket to the engine
block. Also disconnect wiring connector from AC compressor (Figure 6).
14.
Carefully remove harness from vehicle, paying attention to the routing location.
NOTE:
PULL WIRING DOWN FROM DRIVER SIDE AND PARTIALLY LOWER VEHICLE. NOW PULL WIRING HARNESS UP THROUGH
BATTERY TRAY OPENING.
15.
Install new wiring assembly (F4DZ-14300-B). Use the preceding steps as a guide and use the installation torque values given.
NOTE:
MAKE SURE EYELET IS INDEXED/SEATED PROPERLY TO ALTERNATOR, BEFORE YOU TIGHTEN.
PART NUMBER
PART NAME
CLASS
F4DZ-14300-B
Cable Assembly - Starter Motor
B
Relay To Battery
N80532O-S36
Nut & Washer
C
OTHER APPLICABLE ARTICLES: NONE
WARRANTY STATUS:
Eligible Under The Provisions Of Bumper To Bumper Warranty Coverage
OPERATION DESCRIPTION
TIME
942103A
Replace Wiring Harness
1.0 Hr.
Assembly
DEALER CODING
BASIC PART NO.
CONDITION CODE
14300
97, 93, X5
OASIS CODES: 203100, 601300