
Taurus V6-195 3.2L DOHC SHO (1994)
Tie Rod: Service and Repair
DISASSEMBLY
1. Install two long bolts and washers through bushings and attach gear to holding fixture T57L-500-B, or equivalent.
2. Loosen jam nuts on outer ends of tie rods, then remove tie rod ends and jam nuts.
3. Remove four clamps attaching bellows to tie rods and gear housing.
4. Drain power steering fluid, then remove bellows with breather tube. Use care not to damage bellows.
5. If pinion is to be removed, remove pinion before proceeding.
Fig. 14 Roll Pin From Bal Socket Removal
6. Thread point of Roll Pin Remover T78P-3504-N, or equivalent, into roll pin on ball socket and tighten tool finger tight, then remove roll pins.
7. If pinion was not removed, remove gear housing from holding fixture and place on bench to prevent damage to gear teeth.
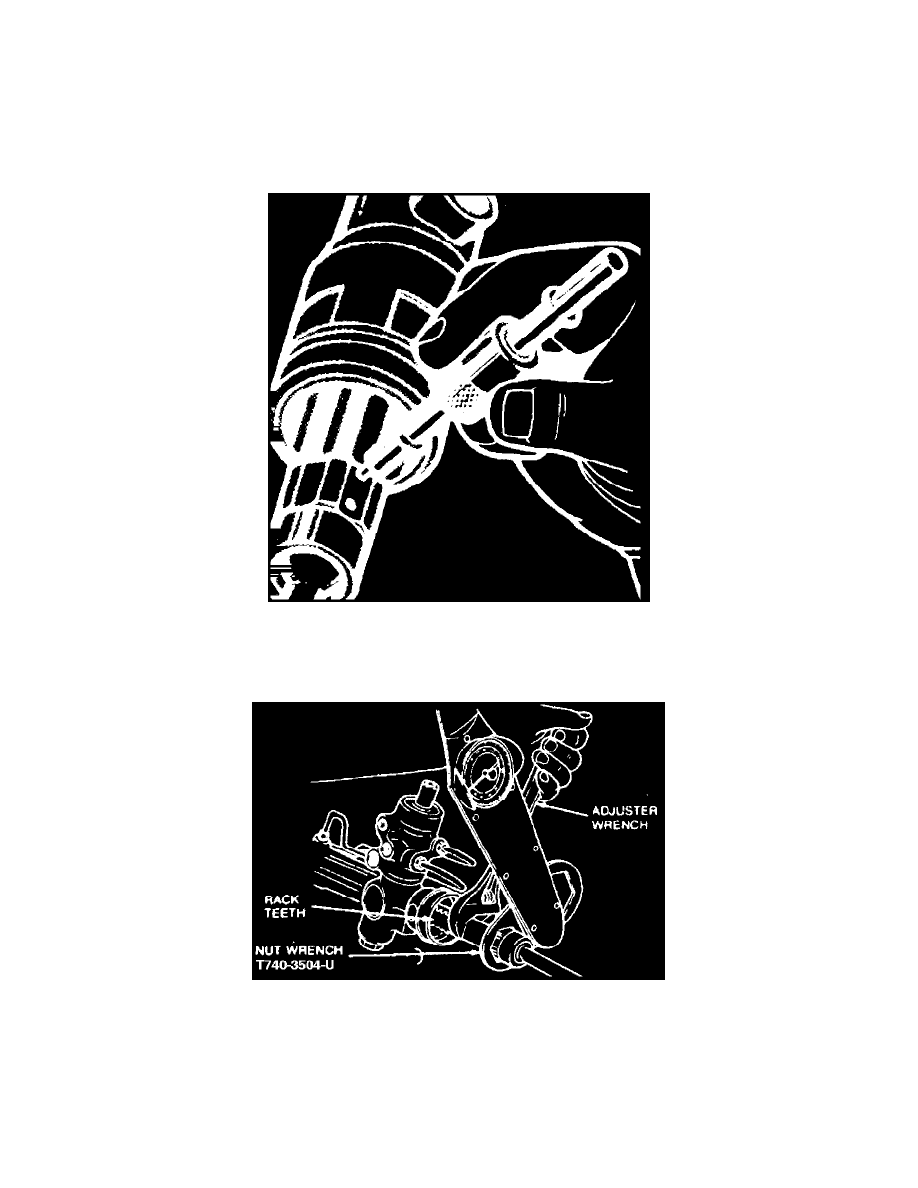
Fig. 15 Tie Rod & Ball Socket Removal
8. Position rack so that several teeth are exposed. Hold rack using an adjustable wrench on end teeth while loosening ball sockets with nut wrench
T74P-3504-U, or equivalent.
ASSEMBLY
1. On models equipped with tie rods retained by a rivet or pin, proceed as follows:
a. Install tie rod and ball socket assemblies onto rack. Hold one ball socket with 15/16 inch wrench while tightening other ball socket using nut
wrench T74P-3504-U, or equivalent. Both ball socket assemblies will be torqued simultaneously using this method. If pinion was not removed