
Taurus V6-195 3.2L DOHC SHO (1994)
Clutch: Service and Repair
Direct Clutch
DISASSEMBLE
1. Remove direct-intermediate cylinder bushing, if required, using suitable tools.
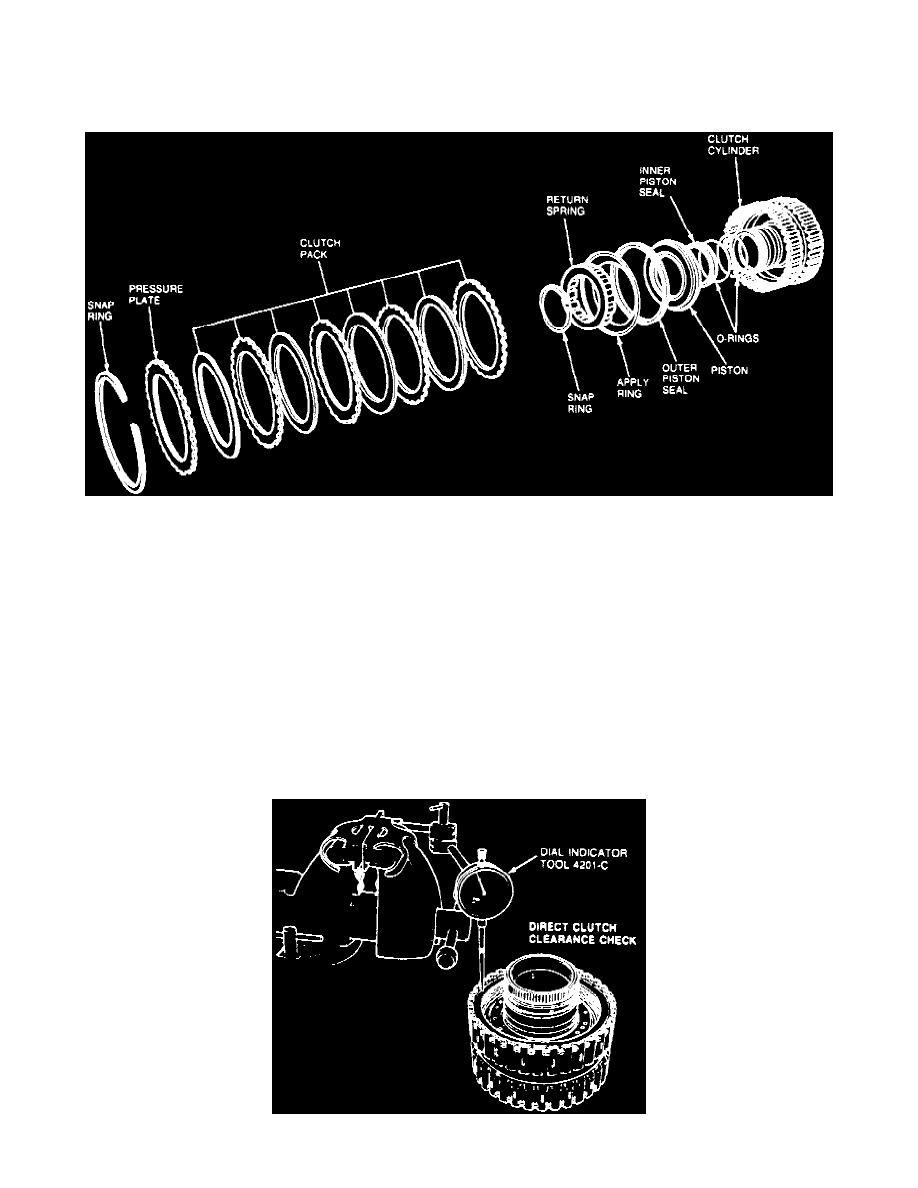
Direct Clutch Assembly
2. Remove snap ring, pressure plate, and clutch pack.
3. Remove return spring snap ring and return spring using Clutch Spring Compressor tool No. T65L-77515-A or equivalent.
4. Remove two piece piston assembly, then disassemble the two piece piston.
5. Remove piston inner and outer lip seals.
ASSEMBLE
1. Install inner and outer piston seals with lip seal facing toward bottom of cylinder, as shown in the Direct Clutch Assembly image.
2. Install piston assembly using Clutch Seal Lip Protector tool No. T86P-70548-A or equivalent.
3. Install piston outer ring and ensure check ball has free movement.
4. Install return spring in cylinder, aligning return spring notch with check ball in piston.
5. Install snap ring using tool No. T65L-77515-A or equivalent.
6. Install clutch pack, pressure plate, and snap ring into cylinder.
7. If removed, install direct clutch bushing using suitable tools.
8. Check direct clutch pack clearance as follows:
Measuring Direct Clutch Pack Clearance