
Taurus V6-195 3.2L DOHC SHO (1994)
2. Install oil pump guide pins tool No. T86P-70370-A and valve body guide pin tool No. T86P-70100-C or equivalent as shown in the Oil Pump To
Valve Body Installation image.
3. Install two valve body to oil pump attaching bolts. Tighten bolts.
With AXOD-E (AX4S)
DISASSEMBLE
CAUTION: When overhauling these valve bodies, be advised that many of the valves are aluminum and can be easily damaged. Ensure all check balls
are the correct size, as they are prone to shrinkage from erosion. An undersized ball will not seat properly. Do not mix components. Valve bodies, chain
covers, gaskets, and separator plates are unique to each model year and are not interchangeable.
1. Place valve body on workbench with separator plate facing up, then remove two Torx bolts attaching separator plate to valve body.
2. Remove separator plate and gasket.
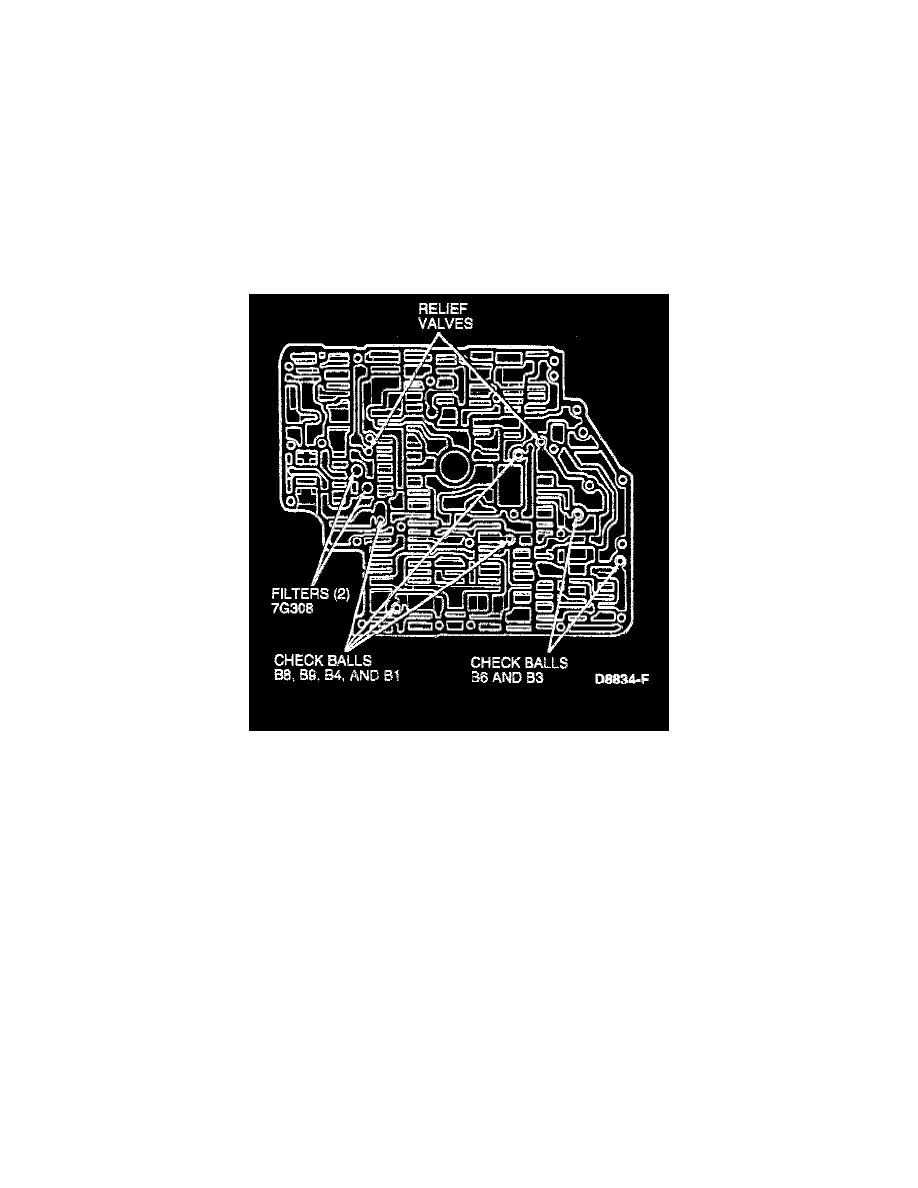
Valve Body Check Balls, Relief Valves, And Filter
3. Remove seven check balls, two relief valves, and bypass solenoid filter. Clean filter.