
Taurus V6-232 3.8L (1989)
Intake Manifold: Service and Repair
Removal and Installation
***THIS ARTICLE INCLUDES UPDATES MADE BY TSB #94-10-10, DATED MAY 18, 1994***
1.
Relieve fuel system pressure as outlined under MAINTENANCE PROCEDURES/FUEL SYSTEM PRESSURE RELIEF.
2.
Drain cooling system, then remove air cleaner assembly, intake duct and heat tube.
3.
Disconnect accelerator cable and speed control cable (if equipped) from throttle body.
4.
Disconnect transaxle linkage, then remove accelerator cable mounting bracket and position bracket and cables aside.
5.
Disconnect thermactor air supply hose from check valve, if equipped.
6.
Disconnect flexible fuel lines from steel lines, then fuel lines from injector fuel rail.
7.
Disconnect upper radiator hose from thermostat housing, then coolant bypass hose from manifold.
8.
Disconnect heater tube from intake manifold, then remove tube support bracket attaching nut.
9.
Disconnect heater hose from rear of tube, then remove tube.
10.
Disconnect vacuum lines, then all necessary electrical connectors.
11.
Remove A/C compressor support bracket, if equipped.
12.
Disconnect PCV lines, then remove throttle body assembly.
13.
Remove EGR valve, then the wiring retainer bracket and position aside.
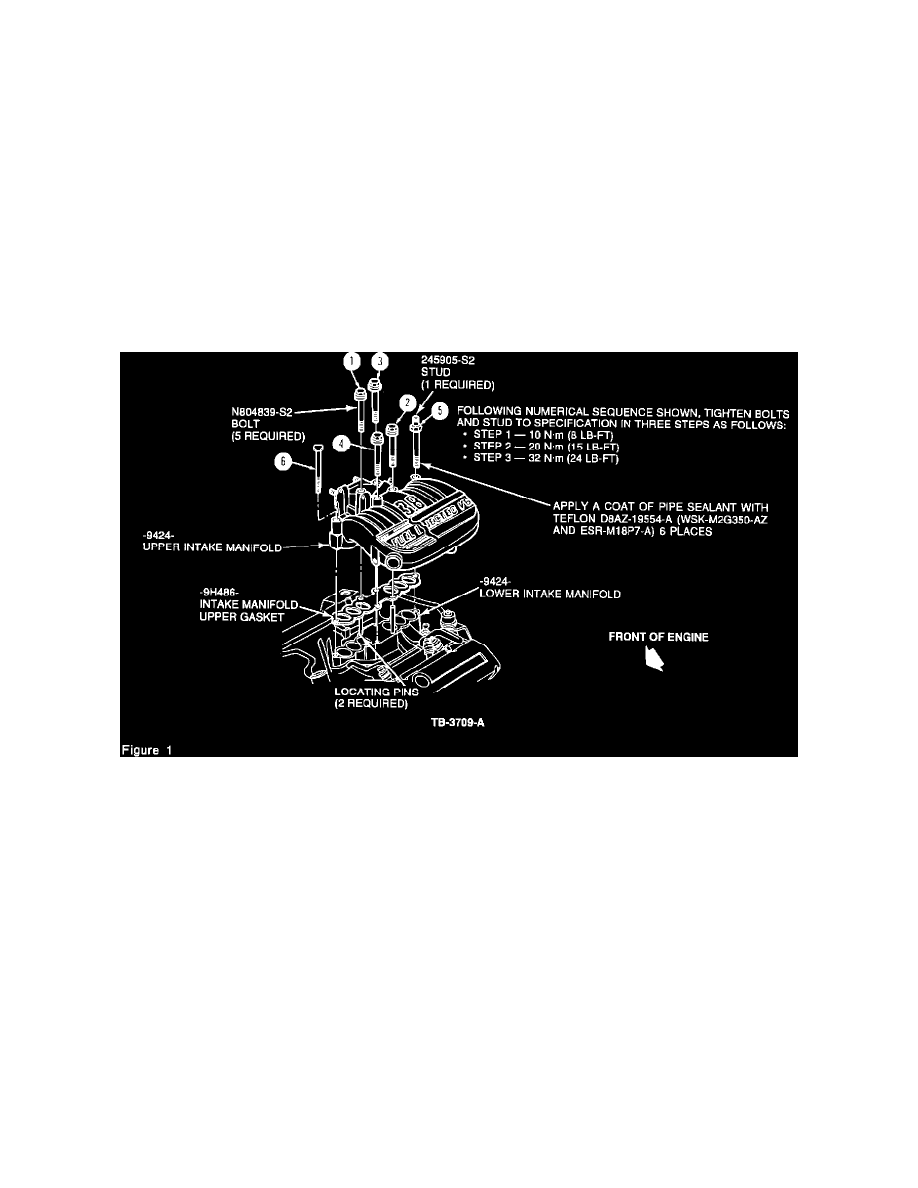
14.
Remove upper intake manifold attaching bolts, Fig. 1, then the upper manifold.
15.
Remove injectors and fuel rail assembly.
16.
Remove heater outlet hose.
17.
Remove lower manifold attaching bolts and lower manifold.
CAUTION: It may be necessary to pry on front of lower manifold to break the seal. Ensure care is taken not to damage sealing surfaces.
18.
Reverse procedure to install, noting the following: