
Taurus V6-3.0L DOHC VIN S (2000)
5.
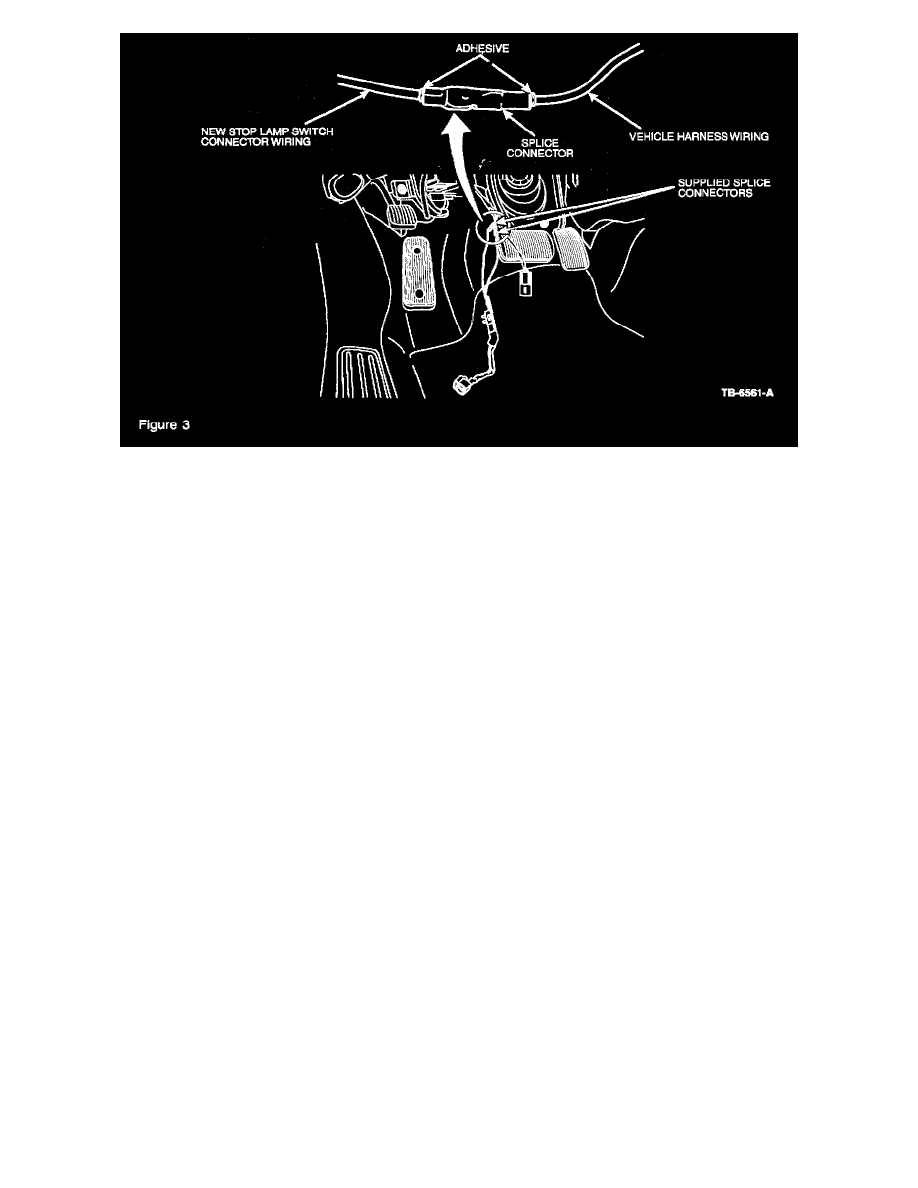
Install the "new" stop lamp repair harness, (1F1Z-14A411-BA - Wagon) or (1F1Z-14A411-CA - Sedan) (Figure 3).
a.
Obtain the stop lamp switch connector repair harness, (wagon or sedan), see parts list.
b.
Use the "new" harness assembly as a guide and measure back along the vehicle harness to locate the area to be spliced, then remove the tape
from the splice area.
c.
Select one (1) wire from the vehicle wire harness by matching the wire color to the wire color in the repair harness, then cut the vehicle
harness wire.
d.
Strip 6 mm (1/4") of insulation from the vehicle harness wire and from the corresponding wire in the repair harness.
e.
Splice the two (2) wires together using splice connectors F2AZ-14488-A and appropriate crimp tool.
f.
Test the integrity of the splice after crimping. Grasp the wires at each end of the splice and pull gently. If any wire is not attached securely,
replace the splice connector and crimp firmly.
g.
Repeat these steps for the remaining wire.
h.
Using the Rotunda Heat Gun R07-10300 or equivalent, heat each splice connector thoroughly until the tubing shrinks and sealant flows from
each end.
6.
Wrap the spliced wire with black vinyl tape.
7.
Route the wire harness back around the brake pedal bracket and install the push-pin retainers.
CAUTION
DO NOT SECURE THE ADJUSTABLE PEDAL MOTOR CONNECTOR WITH THE TIE STRAP. ROUTE THE TIRE STRAP BETWEEN THE
ADJUSTABLE PEDAL MOTOR CONNECTOR AND THE BRAKE PEDAL BRACKET. ALSO BE SURE TO USE THE SMALLER OF THE
TWO HOLES TO ROUTE THE TIE STRAP THROUGH.
NOTE
VEHICLES EQUIPPED WITH ADJUSTABLE PEDALS DO NOT REQUIRE THE USE OF THE TIE STRAP FOR THIS REPAIR. ONLY THE
FIXED PEDAL CONFIGURATION REQUIRES THE TIE STRAP.