
Taurus AWD V6-3.5L (2009)
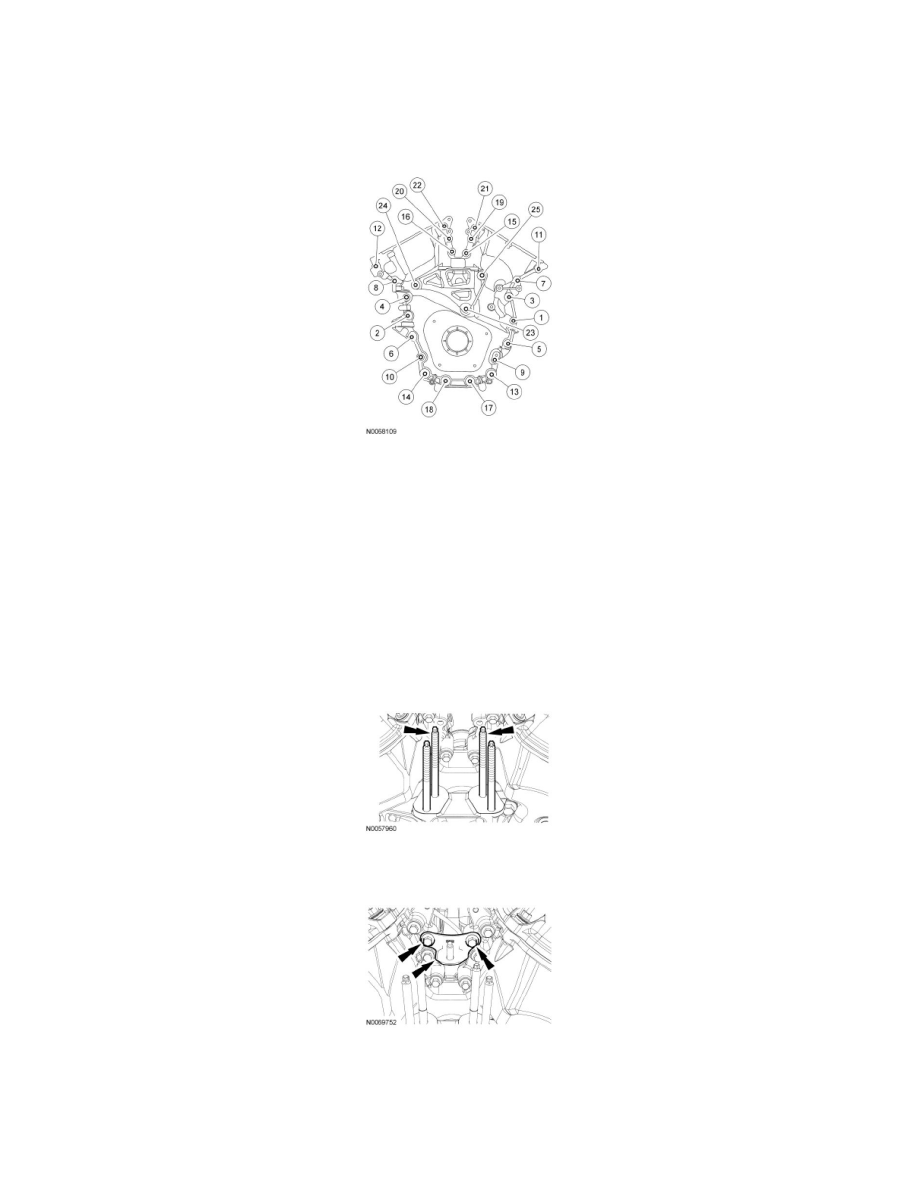
Install the remaining engine front cover bolts. Tighten all of the engine front cover bolts and engine mount bracket bolts in the sequence shown in
2 stages:
-
Stage 1: Tighten bolts 1 thru 22 to 10 Nm (89 lb-in) and bolts 23, 24 and 25 to 15 Nm (133 lb-in).
-
Stage 2: Tighten bolts 1 thru 22 to 24 Nm (18 lb-ft) and bolts 23, 24 and 25 to 75 Nm (55 lb-ft).
13. NOTICE: The thread sealer on the engine mount studs (including new engine mount studs if applicable) must be cleaned off with a wire
brush and new thread sealer applied prior to installing the engine mount studs. Failure to follow this procedure may result in damage to
the engine mount studs or engine.
Install the engine mount studs in the following sequence.
1. Clean the front cover engine mount stud holes with pressurized air to remove any foreign material.
2. Clean all the thread sealer from the engine mount studs (old and new studs).
3. Apply new thread sealer to the engine mount stud threads.
4. Install the 2 engine mount studs.
-
Tighten to 20 Nm (177 lb-in).
14. Install the engine mount bracket and the 2 bolts.
-
Tighten to 24 Nm (18 lb-ft).
15. NOTE: Apply clean engine oil to the crankshaft front seal bore in the engine front cover.
Using the Crankshaft Vibration Damper Installer and Front Crankshaft Seal Installer, install a new crankshaft front seal.