
Taurus AWD V6-3.5L (2009)
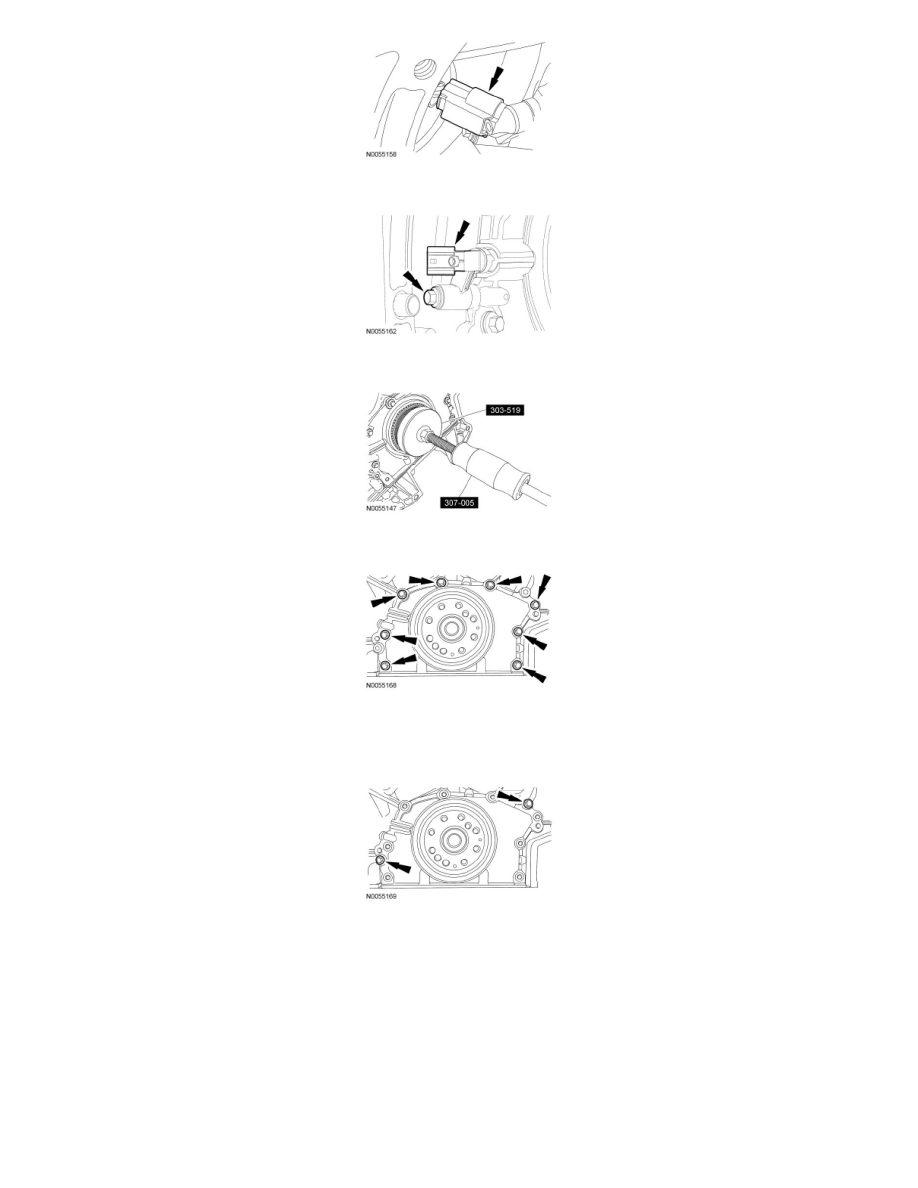
4. Remove the bolt and the CKP sensor.
5. Using the Crankshaft Rear Oil Seal Remover and Slide Hammer, remove and discard the rear crankshaft seal.
6. Remove the 8 crankshaft rear seal retainer bolts.
7. Install the 2 M6 oil pan bolts (finger-tight) into the 2 threaded holes in the crankshaft rear seal retainer.
-
Alternately tighten the 2 bolts one turn at a time until the crankshaft rear seal retainer-to-cylinder block seal is released.
-
Remove the crankshaft rear seal retainer.
8.
NOTICE: Only use a 3Mâ„¢ Roloc(R) Bristle Disk, (2-in white, part number 07528) to clean the crankshaft rear seal retainer plate. Do
not use metal scrapers, wire brushes or any other power abrasive disk to clean the crankshaft rear seal retainer plate. These tools cause
scratches and gouges that make leak paths.
Clean the crankshaft rear seal retainer plate using a 3Mâ„¢ Roloc(R) Bristle Disk, (2-in white, part number 07528) in a suitable tool turning at the
recommended speed of 15,000 rpm.
-
Thoroughly wash the crankshaft rear seal retainer plate to remove any foreign material, including any abrasive particles created during the
cleaning process.
9.
NOTICE: Place clean, lint-free shop towels over exposed engine cavities. Carefully remove the towels so foreign material is not dropped
into the engine. Any foreign material (including any material created while cleaning gasket surfaces) that enters the oil passages or the oil
pan, may cause engine failure.