
Taurus X AWD V6-3.5L (2009)
1. For additional information, refer to the procedures.
Seat Backrest Cover - Third Row
Seat Backrest Cover - Third Row
Removal and Installation
1. Release the backrest trim cover lower J-strip, open the trim cover and release the inner J-clips.
2. Remove the head restraint(s).
3. NOTICE: Use care when separating the seat back trim cover from the hook-and-loop strip, or the hook-and-loop strip may be torn from
the seat back foam.
Release the hook-and-loop strips, invert the backrest trim cover and remove the 3 rows of hog rings.
4. Remove the head restraint guides.
-
For bench seats, remove 4 head restraint guides.
-
For 50/50 seats, remove 2 head restraint guides.
5. Remove the backrest trim cover.
-
Pull the strap through the trim cover.
6. To install, reverse the removal procedure.
Seat Cushion Cover - Third Row
Seat Cushion Cover - Third Row
Removal and Installation
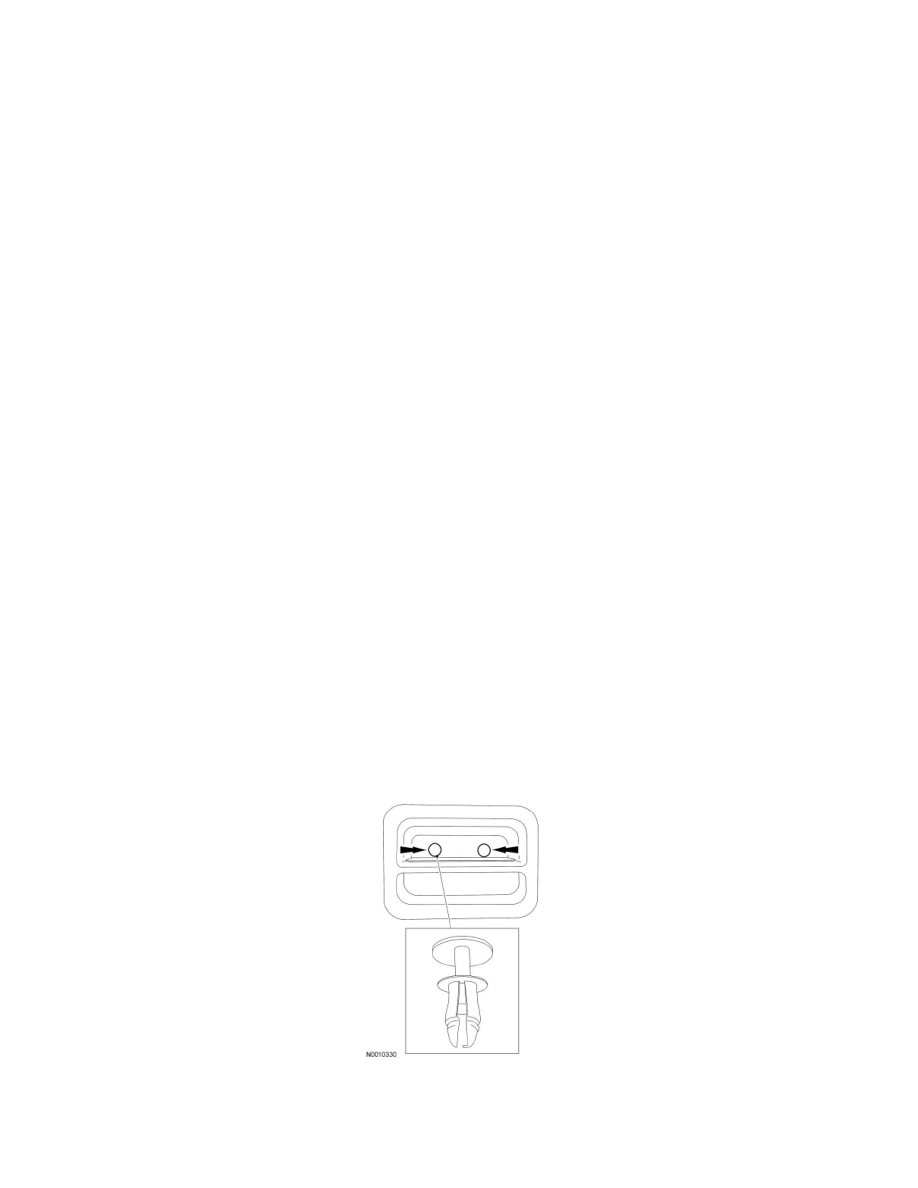
1. NOTE: If damaged when removed, install new plastic rivets.
Remove the 2 rivets and pull the cushion handle out of the pocket.
-
Using an appropriate tool, from under the rivet head, pry the rivet up.
-
When removing the plastic rivet, make sure not to get under the insert or the rivet will not come out.
-
Another method that can be used to remove the plastic rivets is to drive a screw partially into the rivet head and pull the screw and rivet head
out. This will require new plastic rivets be installed.
2. Separate the pivot release cable and casing and remove the pivot release handle.
3. Remove the 2 screws on each side at the bottom of the load floor panel.