
Tempo L4-140 2.3L HSC (1986)
Exhaust Manifold: Service and Repair
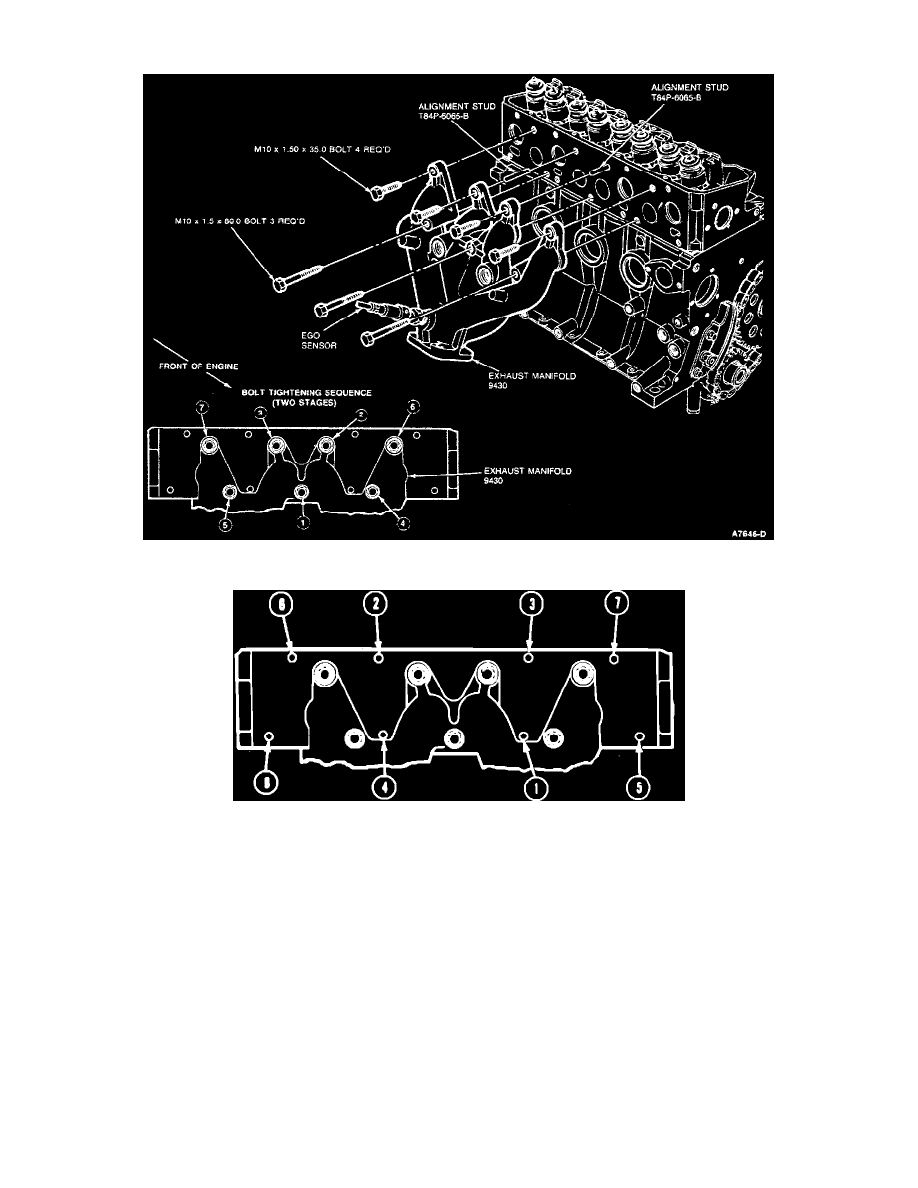
Exhaust Manifold Replacement
Fig. 5 Intake Manifold Bolt Tightening Sequence
1. Disconnect battery ground cable and drain coolant from engine.
2. Disconnect accelerator cable.
3. Remove air cleaner assembly and heat stove duct from heat shield.
4. Disconnect all vacuum lines from intake manifold.
5. Remove thermactor belt from pulley, thermactor hose and thermactor pump from engine.
6. Remove exhaust pipe to exhaust manifold nuts and disconnect exhaust pipe from exhaust manifold.
7. Remove exhaust manifold heat shield.
8. Disconnect Exhaust Oxygen (EGO) sensor electrical connector.
9. Disconnect thermactor check valve hose from tube assembly. Remove EGR valve bracket nuts and EGR valve bracket.
10. Disconnect water inlet hose from intake manifold.
11. Disconnect EGR hose from EGR valve.
12. Remove bolts, intake manifold and gasket from engine.
13. Remove bolts and exhaust manifold from engine.
14. Reverse procedure to install.
^
Torque exhaust manifold bolts in two steps and in sequence shown in figure to 7-10 Nm (5-7 ft lb) and then to 27-41 Nm (20-30 ft lb).
^
Torque intake manifold bolts in sequence shown in Fig. 12 to 20-31 Nm (15-23 ft lb).