
Tempo V6-182 3.0L (1993)
2.
Disconnect the electric connector.
3.
Connect the electrical connector to the new PFE sensor.
4.
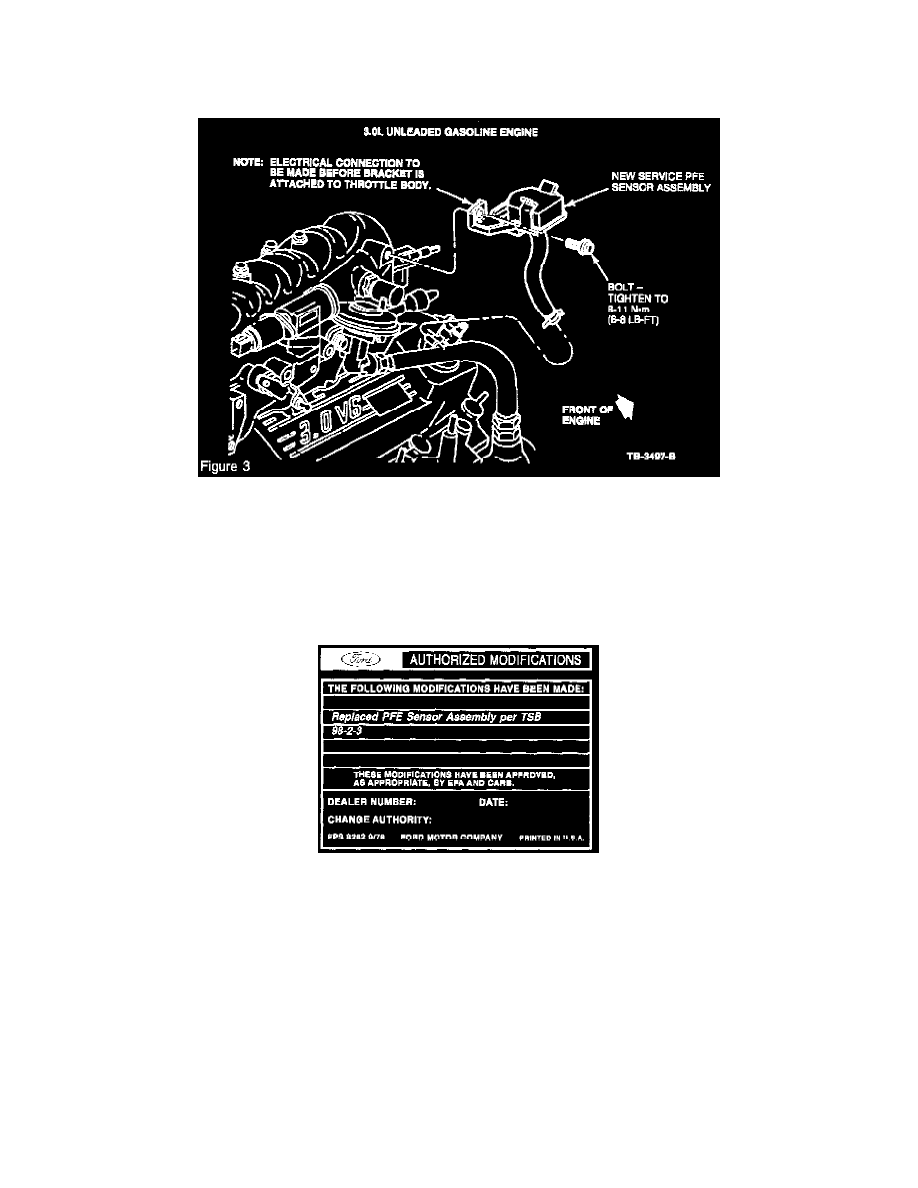
Install the new service assembly (sensor, bracket and hose). Attach the bracket with the existing bolt in the same location as the old PFE sensor
assembly on the intake manifold. Torque bolt to 8-11 N.m (6-8 lb-ft). Refer to Figure 3.
5.
Install the PFE sensor hose to the EGR tube with the clamp provided.
6.
Clear DTC from Continuous Memory.
7.
Re-run Self Test and verify that pass codes are received in KOEO, KOER and continuous.
Obtain an Authorized Modification Decal (FPS 8262 - obtainable through DOES II, 25/pkg) and list the date, dealer number, and summary of
modifications performed. Select a prominent place adjacent to the Vehicle Emission Control Information Decal suitable for installing the Authorized
Modifications Decal. Clean the area, install the decal, and cover it with a clear plastic decal shield.
The Large Port Service Kit contains the following parts:
^
One (1) PFE Sensor (with a large diameter pressure port)
^
One (1) PFE Hose (large diameter)
^
One (1) PFE Engine Mounting Bracket
^
One (1) PFE Hose Clamp
^
One (1) Instruction Sheet
PART NUMBER
PART NAME
F43Z-9J433-BB
PFE Sensor Assembly (1988-94 2.3L HSC Engine)
F4PZ-9J433-AA
PFE Sensor Assembly (1992-94 3.0L Engine)