
Thunderbird L4-140 2.3L SOHC Turbo (1984)
Camshaft: Service and Repair
1.
Drain cooling system, then remove air cleaner assembly.
2.
Disconnect ignition wires from spark plugs and rocker arm cover and position aside.
3.
Disconnect all vacuum hoses necessary for camshaft removal.
4.
Remove rocker arm cover attaching bolts and the cover.
5.
Remove alternator drive belt.
6.
Remove alternator mounting bracket attaching bolts and position bracket aside.
7.
Remove upper radiator hose and disconnect lower hose.
8.
Remove fan shroud. On models equipped with electric fan, remove fan and shroud as an assembly.
9.
Remove timing belt cover attaching bolts and the cover.
10.
Loosen cam idler attaching bolts. Move idler to the unloaded position and retighten attaching bolts.
11.
Remove timing belt from camshaft and auxiliary sprockets.
12.
Raise and support vehicle.
13.
Remove right and left engine mount nuts and washers.
14.
Raise engine as far as possible using a suitable transmission jack with a block of wood positioned between jack and engine. Install wood blocks
between No. 2 crossmember pedestals and engine mounts, then remove jack and lower vehicle.
15.
Depress valve springs using tool No. T74P-6565-A or equivalent and remove camshaft followers.
16.
Remove camshaft sprocket attaching bolt, then the sprocket using tool No. T-74P-6565-A, or equivalent.
17.
Remove seal using tool No. T74P-6700-A, or equivalent.
18.
Remove camshaft retainer attaching screws, then retainer.
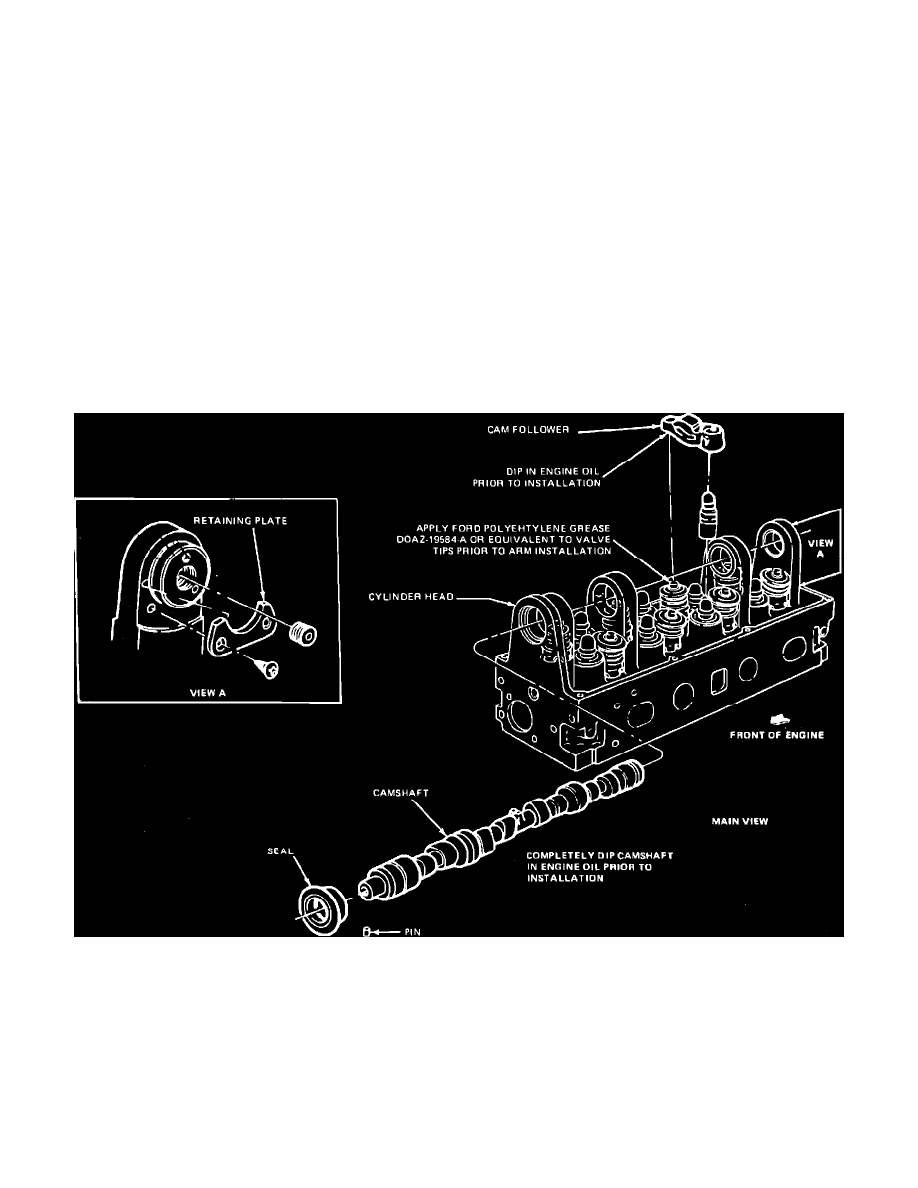
Fig. 10 Camshaft replacement
19.
Remove camshaft from cylinder head, Fig. 10.
20.
Reverse procedure to install. The camshaft sprocket attaching bolt should be replaced. If a new bolt is not available, coat threads of
original bolt with D8AZ-19554-A sealer or equivalent, or wrap teflon tape around threads prior to installation.