
Thunderbird L4-140 2.3L SOHC Turbo (1984)
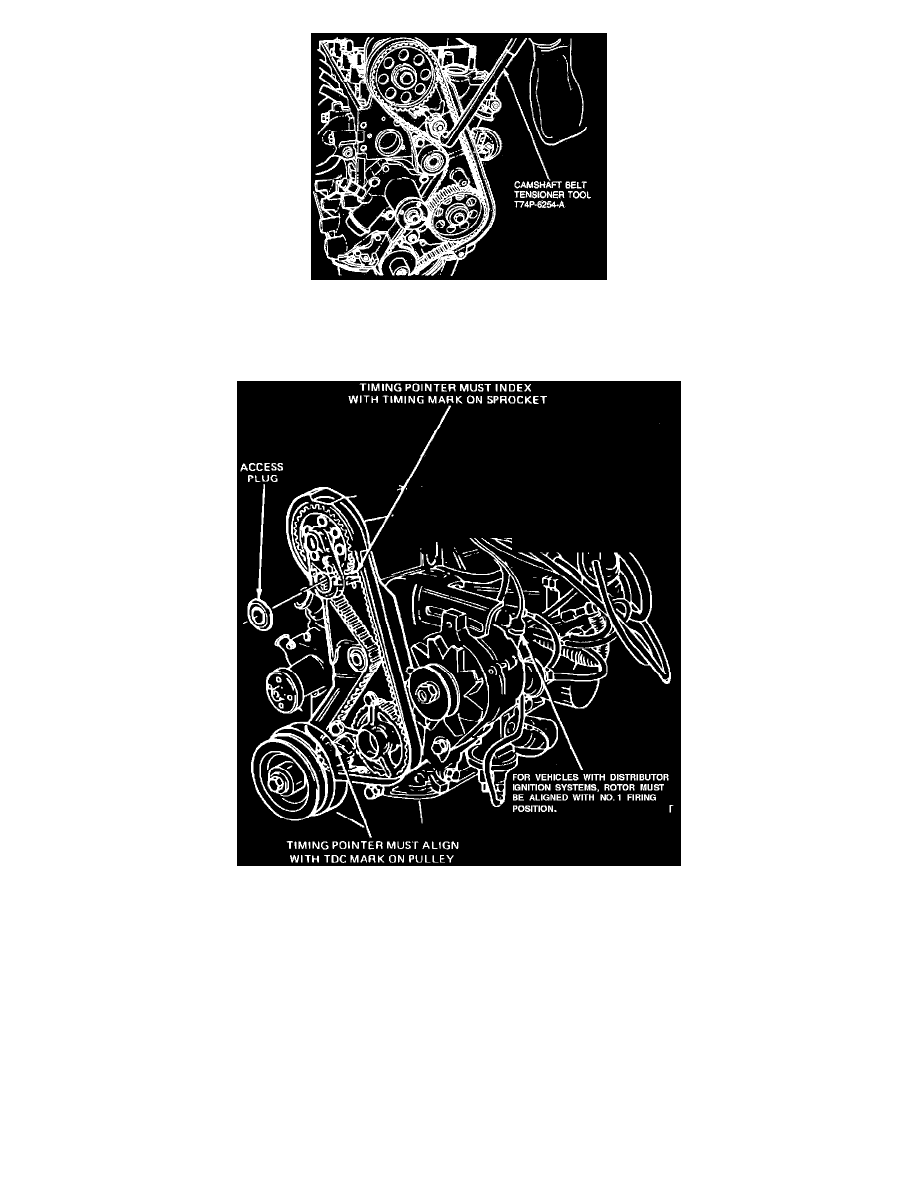
7. Using tool, T74P-6254-A positioned on tension spring roll pin, retract tensioner, then tighten adjustment screw to hold tensioner in retracted
position.
8. Remove crankshaft pulley and belt guide.
9. Remove timing belt and inspect for signs of wear and damage. Replace as necessary.
10. Position the camshaft and crankshaft sprocket as shown.
11. Remove distributor cap, then set distributor rotor to No. 1 firing position by turning the auxiliary shaft as necessary.
12. Install timing belt on crankshaft sprocket, then working counterclockwise, position belt on auxiliary sprocket and camshaft sprocket. Ensure timing
marks do not change position.
13. Align belt on sprockets, then loosen tensioner adjustment bolt to allow tensioner to move against the belt.
14. Remove spark plugs. Failure to remove spark plugs may result in timing belt jumping time during next step.
15. Rotate the crankshaft two complete turns in normal rotation to remove slack from belt. Tighten tensioner adjustment and pivot bolts to
specifications.
16. Recheck timing mark alignment, then install crankshaft pulley and belt guide.