
Thunderbird L4-140 2.3L SOHC Turbo (1984)
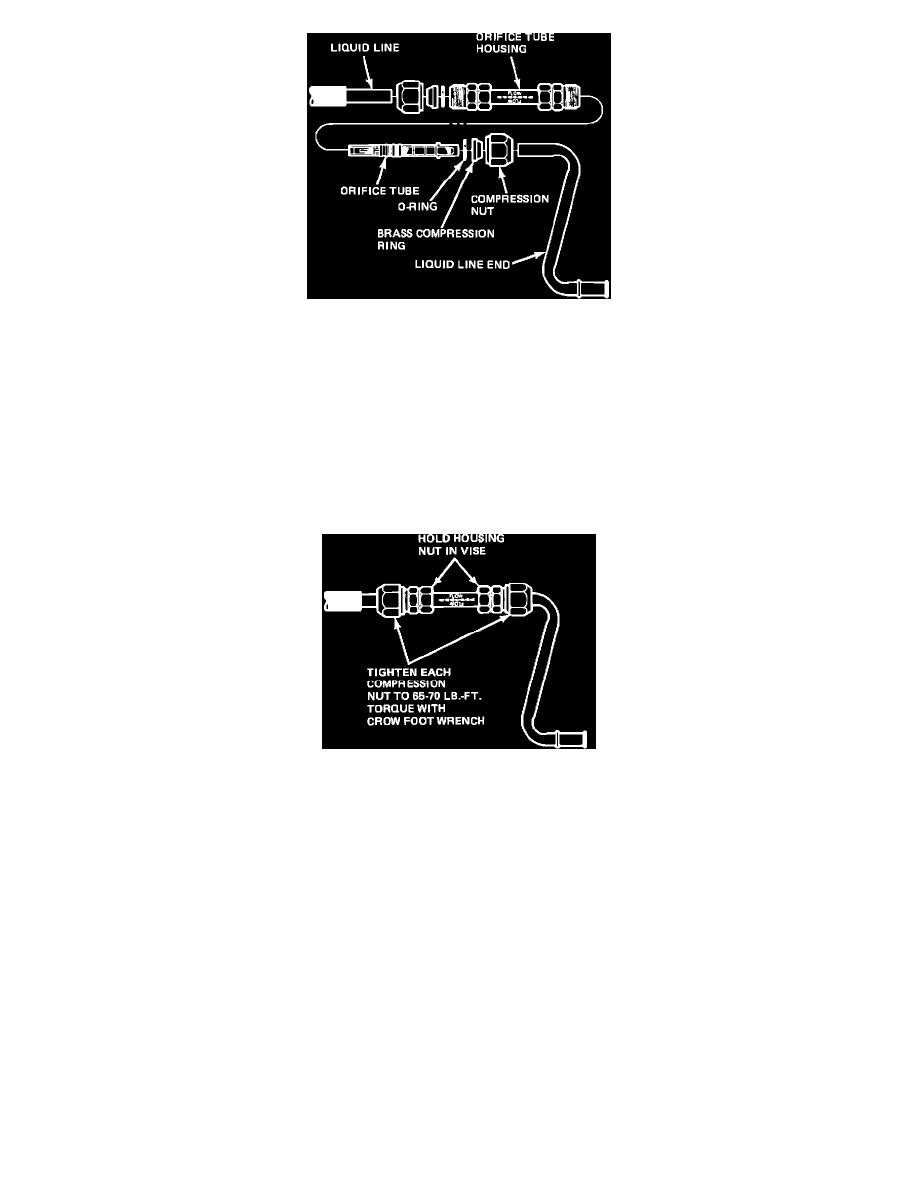
Figure 7 - ORIFICE TUBE KIT DISASSEMBLED
4.
Cut a 2-1/2 inch section from the tube at the orifice tube location (Figure 6). Do not cut closer than one inch from the start of a bend in the
tube.
5.
Flush the two pieces of liquid line to remove any contaminants.
6.
Lubricate the O-rings with clean refrigerant oil and assemble the orifice tube kit (with orifice tube installed) to the liquid line as shown in
Figure 7. Be sure the flow direction arrow is pointing toward the evaporator end of the liquid line and the taper of each compression ring is
toward the compression nut.
NOTE:
The inlet tube will be positioned against the orifice tube tabs when correctly assembled.
Figure 8 - ORIFICE TUBE KIT INSTALLED
7.
While holding the hex of the tube in a vise, tighten each compression nut to 65-70 ft.lbs. torque with a crow foot wrench (Figure 8).
8.
Assemble the liquid line to the vehicle using new O-rings lubricated with clean refrigerant oil. Use only the specified O-rings at the spring
lock coupling.
9.
Leak test, evacuate and charge the system following the approved procedures given in Section 36-32 of the shop manual.
NOTE:
Remove the orifice tube from the housing with pliers. The orifice tube removal tool cannot be used.
PART NUMBER
PART NAME
CLASS
E5VY-19D695-A
Orifice Tube Kit
R
OTHER APPLICABLE ARTICLES: None
WARRANTY STATUS: "INFORMATION ONLY"