
Thunderbird L4-140 2.3L SOHC Turbo (1984)
Hall Effect Sensor: Technical Service Bulletins
Distributor Stator - Replacement
Article No. 84-21-15-S
DISTRIBUTOR - STATOR REPLACEMENT ON CARS WITH EEC IV
FORD 1983-84 ESCORT, TEMPO, FORD, T-BIRD, CROWN VICTORIA
LINCOLN-MERCURY 1983-84 LYNX, TOPAZ, MERCURY, COUGAR, GRAND MARQUIS
LIGHT TRUCKS 1984 VEHICLES
This article is being republished to add Light Truck applications.
The stator assembly is now available for the listed vehicles. The procedure to be used when servicing the stator are as follows:
1983 1.6L EFI ENGINE DISTRIBUTOR W/TFI
Stator Replacement
1.
Remove drive coupling spring. Use a small screwdriver or ice pick. Do not damage drive coupling or spring.
2.
a. Use an air hose to blow dirt and oil from the drive end of the distributor.
b.
Put a small paint dot on the drive coupling and the shaft to note orientation for re-assembly.
FIGURE 20
c.
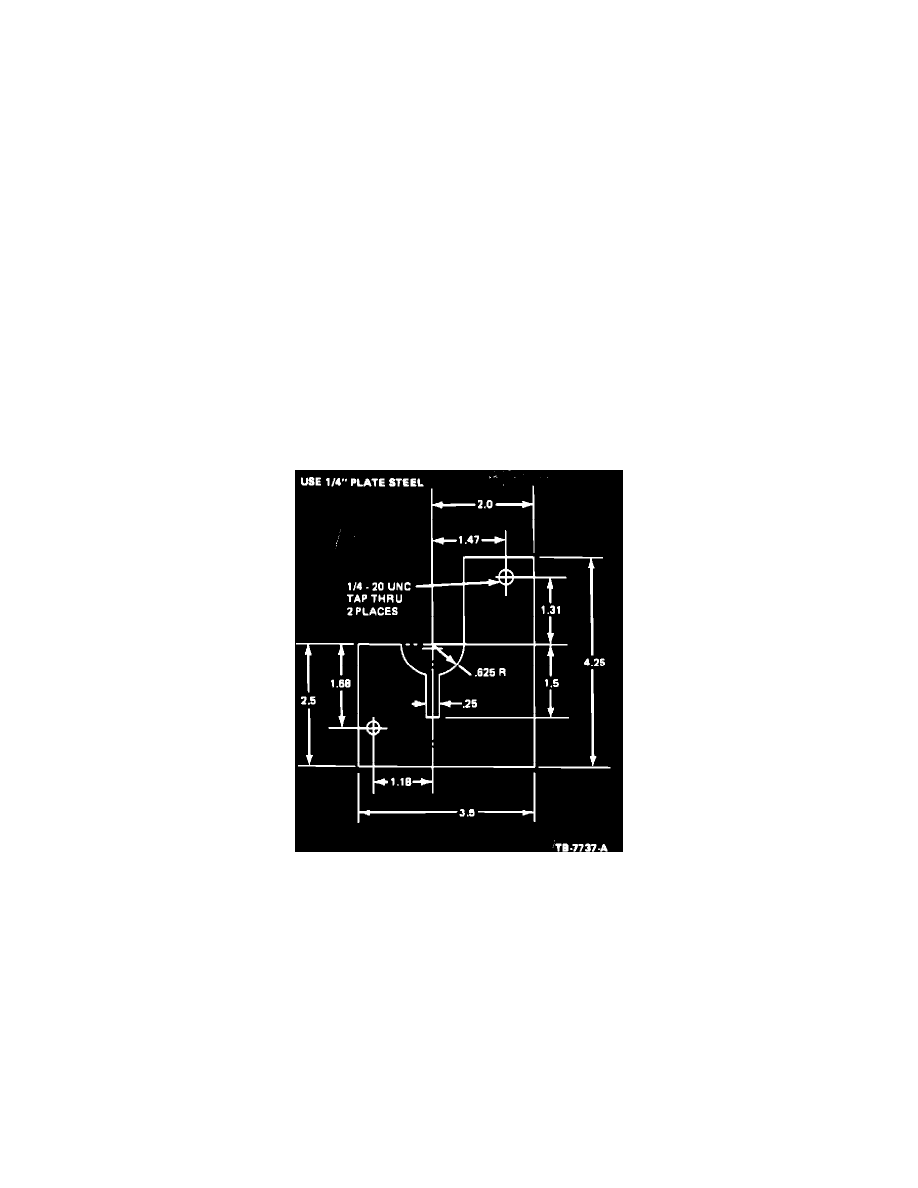
Place the distributor support tool (Figure 20) in a vise and tighten or open vise jaws enough to support drive coupling.
d.
Line-up the drive pin with the slot in the base.
3.
With someone holding the distributor steady on the support tool , use a 5/32" diameter drift and hammer to drive the pin out of the shaft.
4.
Remove the distributor from the fixture. Remove the drive coupling from the fixture.
5.
To prevent damage to the shaft oil seal and the bushing, check for burrs around the drive pin hole and the end of the shaft. Remove all burrs with
emery paper and wipe shaft clean.
6.
Remove shaft assembly by gently pulling up on the shaft plate.
7.
Remove two screws holding the T.F.I. module to the base, 8. Remove T.F.I. module, wipe grease from base and module, keep surfaces free of dirt.
9.
Remove the octane rod retaining screw.
10.
Remove octane rod.
11.
Remove the two screws retaining the stator connector in the distributor. (Retain the screws for reassembly.)
12.
Remove the stator assembly from the top by gently lifting.