
Thunderbird V6-232 3.8L (1982)
Oil Pan: Service and Repair
Removal
1. Disconnect the cable from the battery negative terminal.
2. Remove the air cleaner assembly including the air intake duct.
3. Remove the fan shroud attaching bolts and position the shroud back over the fan.
4. Remove the oil level dipstick.
5. Remove the screws attaching the vacuum solenoids to the dash panel. Lay the solenoids on the engine without disconnecting the vacuum hoses or
electrical connectors.
6. Raise the vehicle.
7. Remove the exhaust manifold to exhaust pipe attaching nuts.
8. Drain the crankcase.
9. Remove the oil filter.
10. Remove the bolts attaching the shift linkage bracket to the transmission bellhousing.
11. Disconnect the transmission cooler lines at the radiator.
12. Remove the four (4) converter cover retaining bolts and remove the cover.
13. Remove the engine damper to Number 2 crossmember bracket attaching bolt. The damper must be disconnected from the crossmember.
14. Disconnect steering flex coupling. Remove two bolts attaching steering gear to main crossmember and let steering gear rest on the frame away
from the oil pan.
15. Remove the nut and washer assembly attaching the front engine insulator to the chassis.
16. Raise the engine 2-3 inches and insert wood blocks between the engine mounts and the vehicle frame.
NOTE: It may be necessary to raise the engine as much as 5 inches to provide adequate pan-to-crossmember clearance. When raising the engine
in one of these vehicles watch the clearance between the transmission dipstick tube and the thermactor downstream air tube. If the tubes contact
before adequate pan-to-crossmember clearance is provided, lower the engine and remove the transmission dipstick tube and the downstream air
tube. Clamp Cutters and Crimping Tools will be needed to disconnect the tube from the catalyst.
17. Remove the oil pan attaching bolts. Work the oil pan loose and remove.
18. Lower the oil pan onto the crossmember. Remove the oil pick-up tube attaching bolts and the tube support bracket attaching nut. Lower the
pick-up tube/screen assembly into the pan and remove the oil pan through the front of the vehicle.
19. Remove the oil pan seal from the main bearing cap. Discard the seal.
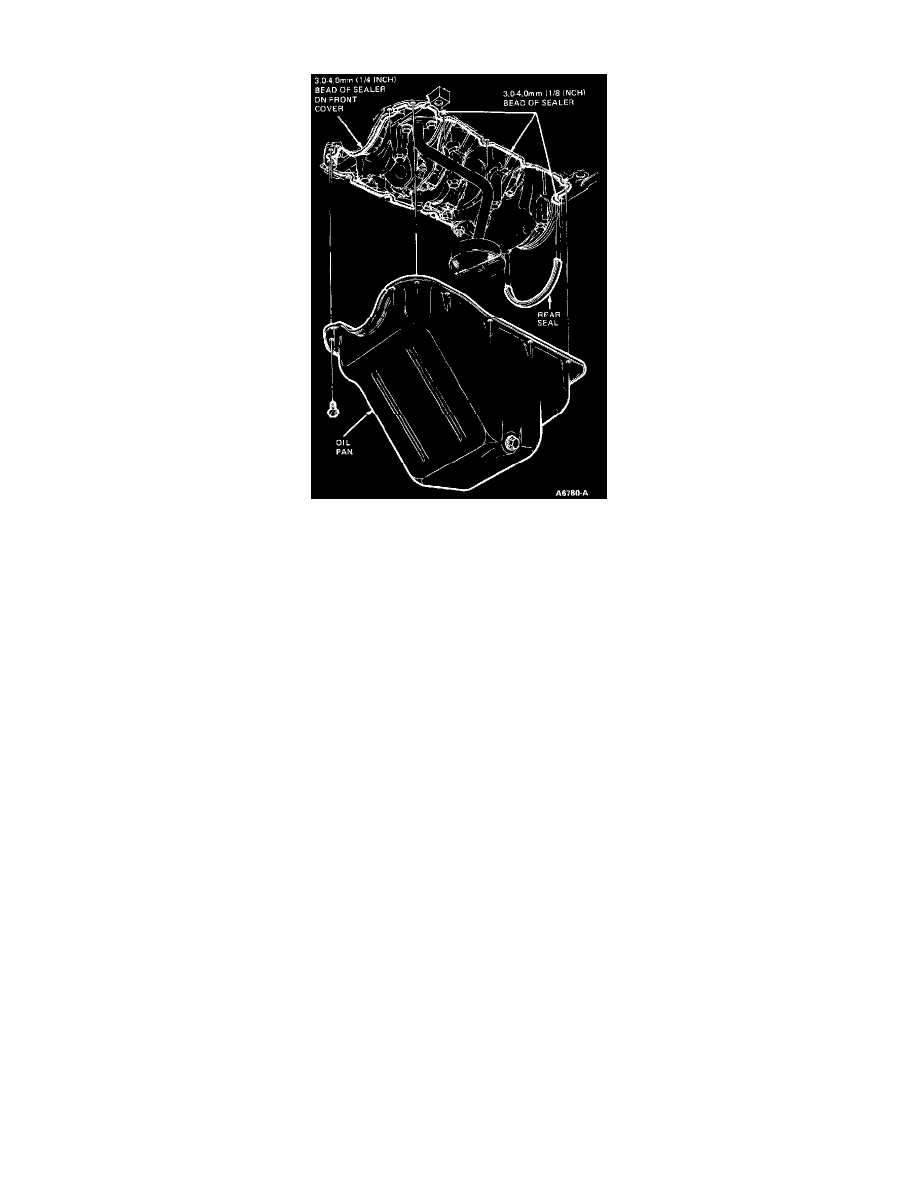
Installation
NOTE: When using silicone rubber sealer, assembly must occur within 15 minutes after sealer application. After this time, the sealer may start to
set-up, and its sealing effectiveness may be reduced.
1. Clean the gasket surfaces on the cylinder block, oil pan, and oil pick-up tube.
2. Trial fit the oil pan to the cylinder block. Make sure enough clearance has been provided to allow the oil pan to be installed without the sealant