Thunderbird V6-232 3.8L SC (1989)

LINCOLN-MERCURY: 1989-91 COUGAR
This TSB article is being republished in its entirety to provide a list of alternate suppliers and required materials.
ISSUE:
A service repair procedure has been developed to ensure good paint adhesion to the bumper covers.
ACTION:
If service is required, use the following procedure to ensure good paint adhesion to the bumper covers.
NOTE:
IF COMPLETE REPAINT OF THE COVER IS REQUIRED BECAUSE OF MULTIPLE BLISTERS OR PEELED AREAS, STRIP THE
COVER BY SANDING.
1.
Wash the bumper cover with water and a mild detergent. Rinse and let it dry.
2.
Wipe the area to be repaired with a wax/grease remover.
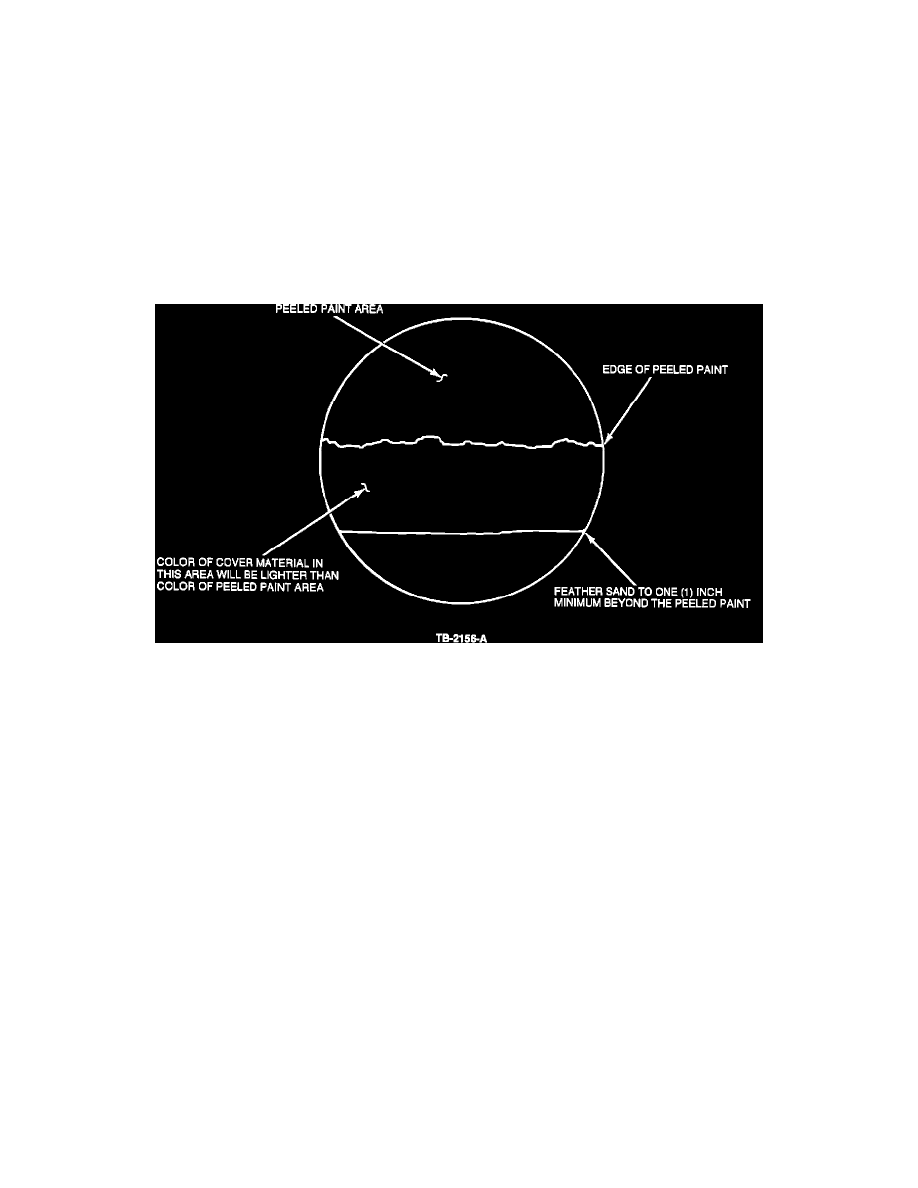
Figure 1
3.
Sand the unpainted area with 400 grit paper and feather about one inch into the painted area, Figure 1. Sand the entire fascia, not just the peeled
area.
NOTE:
DO NOT USE EXCESSIVE FORCE, JUST ENOUGH TO ROUGHEN THE SURFACE.
4.
Finish sanding the area with 600 grit paper.
5.
Check the feathered edge of paint for good adhesion.
a. Carefully slide the edge of your fingernail from the unpainted area to the painted area.
b. If the paint lifts, go back and start again with Step # 3.
6.
Blow off the area with compressed air to remove any dirt and sanding residue.
7.
Tack wipe to remove any contamination.
8.
Wipe the area with a suitable anti-static wash solution.
9.
Wipe the area with a wax and grease remover using a lint-free cloth.
10.
Tack wipe to remove any remaining contamination.
11.
Apply a clear sealer to the unpainted area.
12.
Apply primer/filler to the unpainted area and feather into the existing paint.
