
Thunderbird V6-232 3.8L SC (1989)
Evaporator Core: Service and Repair
1.
Disconnect battery negative cable.
2.
Remove instrument panel as follows:
a. Disconnect main wiring at assembly, on left hand side of fire wall.
b. Disengage wiring assembly tabs from dash panel, and push assembly into passenger compartment.
c. Remove four steering column lower trim cover attaching screws, and pull trim cover away from dash panel.
d. Remove six steering column lower opening reinforcement attaching screws, then the reinforcement.
e. Remove lower and upper shrouds from steering column, then disconnect steering column electrical connectors.
f.
Remove the shift interlock switch.
g. Disconnect the steering column lower universal joint.
h. While supporting the steering column, remove four retaining nuts then the steering column.
i.
Remove parking brake bracket-to-instrument panel attaching screw.
j.
Reinstall the steering column lower opening reinforcement and attaching screws.
k. Remove right and left cowl side trim panels.
l.
Remove center console container and mat.
m. Remove two console-to-floor pan retaining screws (found below the container and mat).
n. On models with 5-speed transmission, remove gear shift knob.
o. Remove two rear finish panel attaching screws, then tilt the finish panel forward, disconnect the electrical connector and remove finish panel.
p. Remove two front console-to-instrument panel attaching screws, then the console.
q. Remove two instrument panel-to-floor retaining nuts.
r.
Squeeze sides of glove compartment together to disengage tabs and pivot glove compartment down.
s. Disconnect electrical connectors, heater/air conditioning lines and control cables from behind the dash panel.
t.
Remove right and left instrument panel-to-cowl side attaching screws.
u. Remove right and left upper finish panels.
v. Remove four instrument panel-to-cowl top retaining screws.
w. Remove right and left roof rail trim panel, and door frame weather strip.
x. Pull instrument panel away from cowl carefully, and remove any remaining electrical connectors.
y. Remove instrument panel from vehicle.
3.
Discharge refrigerant from A/C system at service access gauge port valve located on the suction line.
4.
Disconnect liquid line and accumulator dryer inlet tube from the evaporator core at dash panel.
5.
Cap refrigerant lines and evaporator core tubes to prevent dirt and moisture from entering the system.
6.
Remove high and low pressure hoses and cap openings to prevent dirt and moisture from entering the system.
7.
Disconnect heater hoses from heater core tubes and plug the hoses. Cap heater core tubes to prevent coolant loss from heater core during removal
of evaporator case.
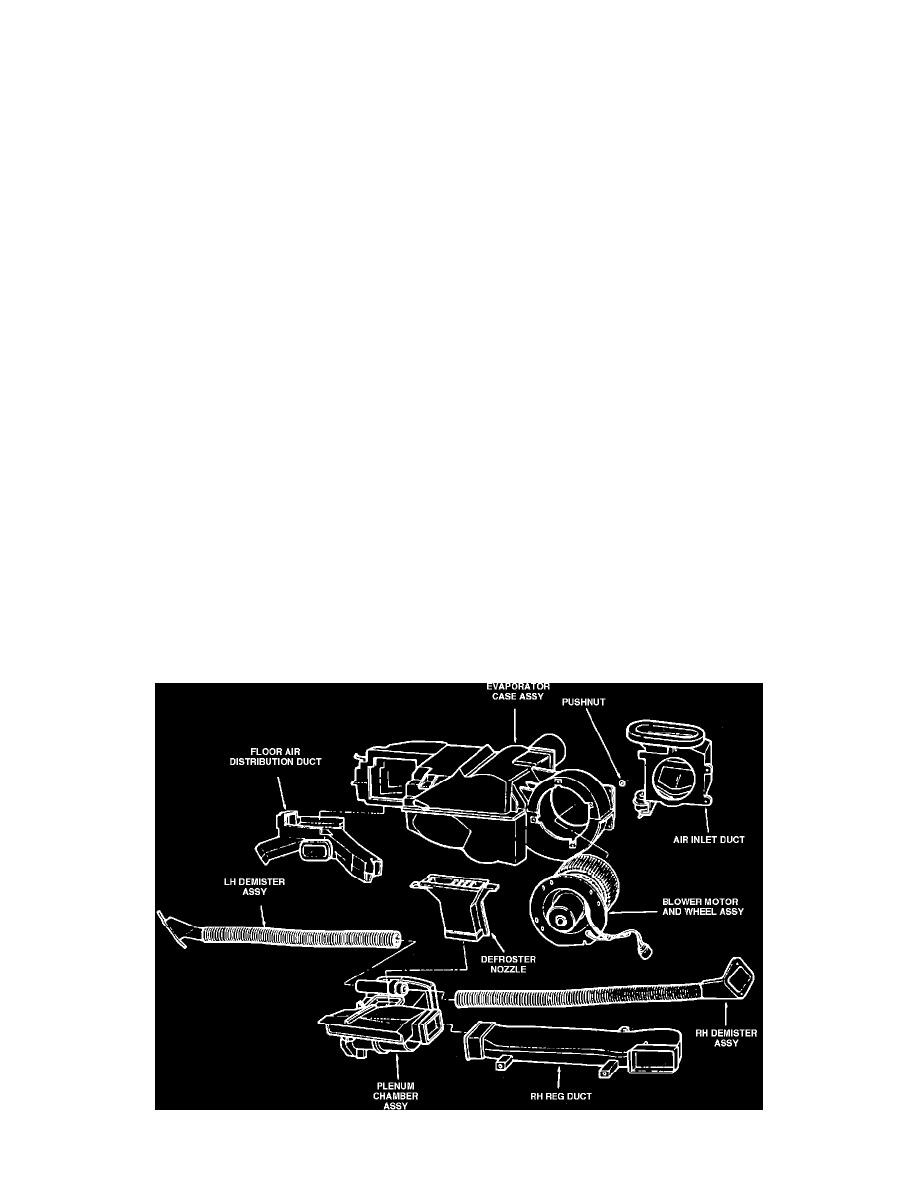
Fig. 35 Evaporator core & heater housing assembly