
Thunderbird V8-281 4.6L SOHC (1994)
23.
Remove floor console panel. Refer to the 1994 Thunderbird/Cougar Service Manual, Section 01-12-4 and 01-12-5.
NOTE:
PROTECT THE INSTRUMENT PANEL SURFACE DURING THE FOLLOWING PROCEDURE.
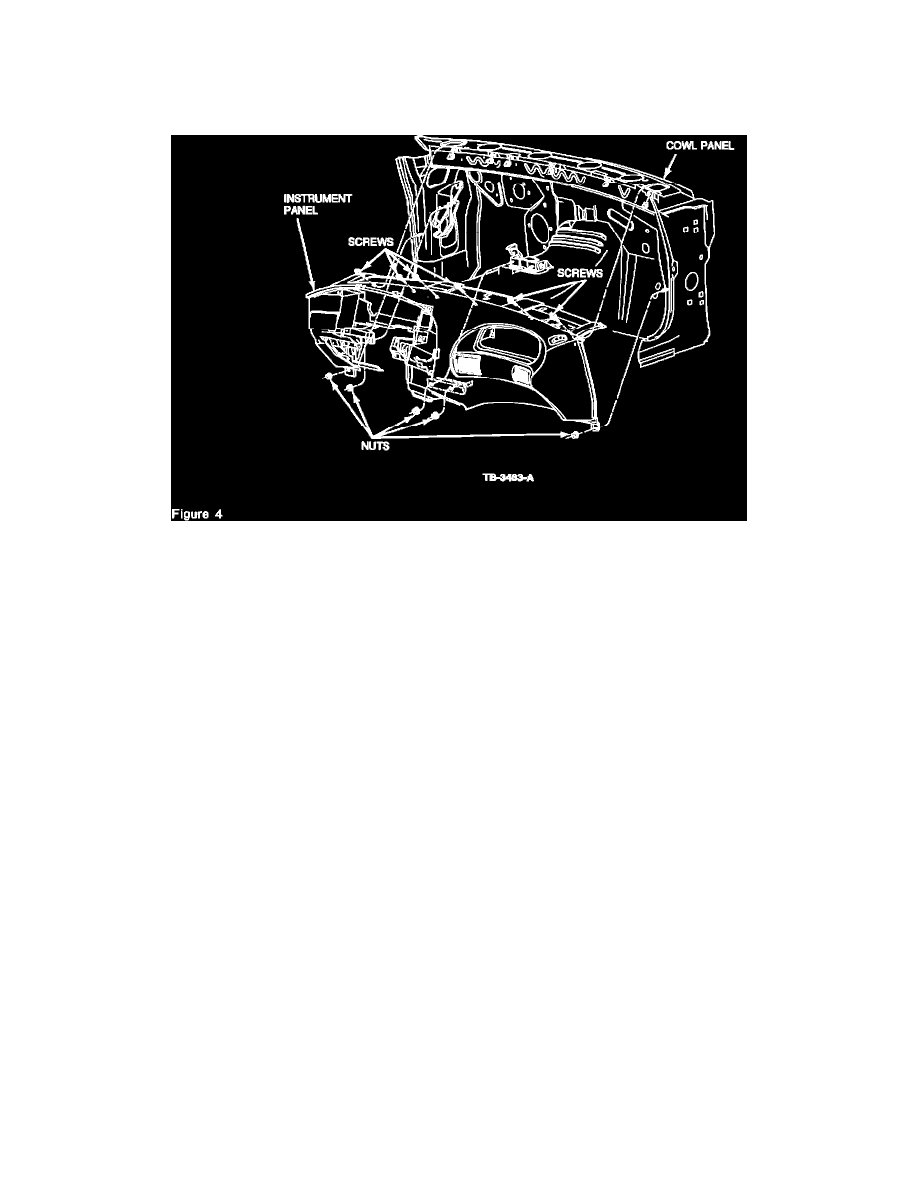
24.
Remove two (2) nuts and one (1) bolt from the instrument panel-to-console mount, Figure 4.
25.
Remove two (2) nuts retaining the LH side of instrument panel to cowl side, Figure 4.
26.
Remove the nut attaching the RH side of instrument panel to cowl side, Figure 4.
NOTE:
THE FOLLOWING THREE STEPS REQUIRE TWO TECHNICIANS.
27.
Remove 6 bolts from the top of the instrument panel, Figure 4.
28.
Carefully pull the instrument panel away from windshield glass, checking for and disconnecting any remaining wiring connectors.
29.
Remove the instrument panel from the vehicle.
30.
Recover the R-134a refrigerant from the A/C system at the service access gauge port valve, following the proper recovery procedure.
CAUTION:
OBSERVE ALL SAFETY PRECAUTIONS.
31.
Disconnect the liquid line and the suction accumulator/drier inlet tube from the evaporator core at the cowl panel. Cap refrigerant lines and
evaporator core to prevent the entrance of dirt and excess moisture.
32.
Place a drain pan or suitable container under heater hose connections at the cowl panel.
33.
Disconnect heater hoses from heater core tubes and plug hoses with suitable 5/8" (16 mm) and 3/4" (19 mm) plugs. Cap heater core tubes to
prevent coolant loss from heater core during removal of evaporator core.
34.
Disconnect vacuum supply hose from in-line vacuum check valve in engine compartment.
35.
Remove the suction accumulator drier from its bracket then remove the bracket.
36.
Remove the three (3) retaining nuts attaching the evaporator housing to the cowl panel (under the hood).
37.
Remove one (1) screw at the base of the evaporator housing and one (1) screw at the evaporator housing-to-cowl panel bracket.