
Thunderbird V8-302 5.0L (1984)
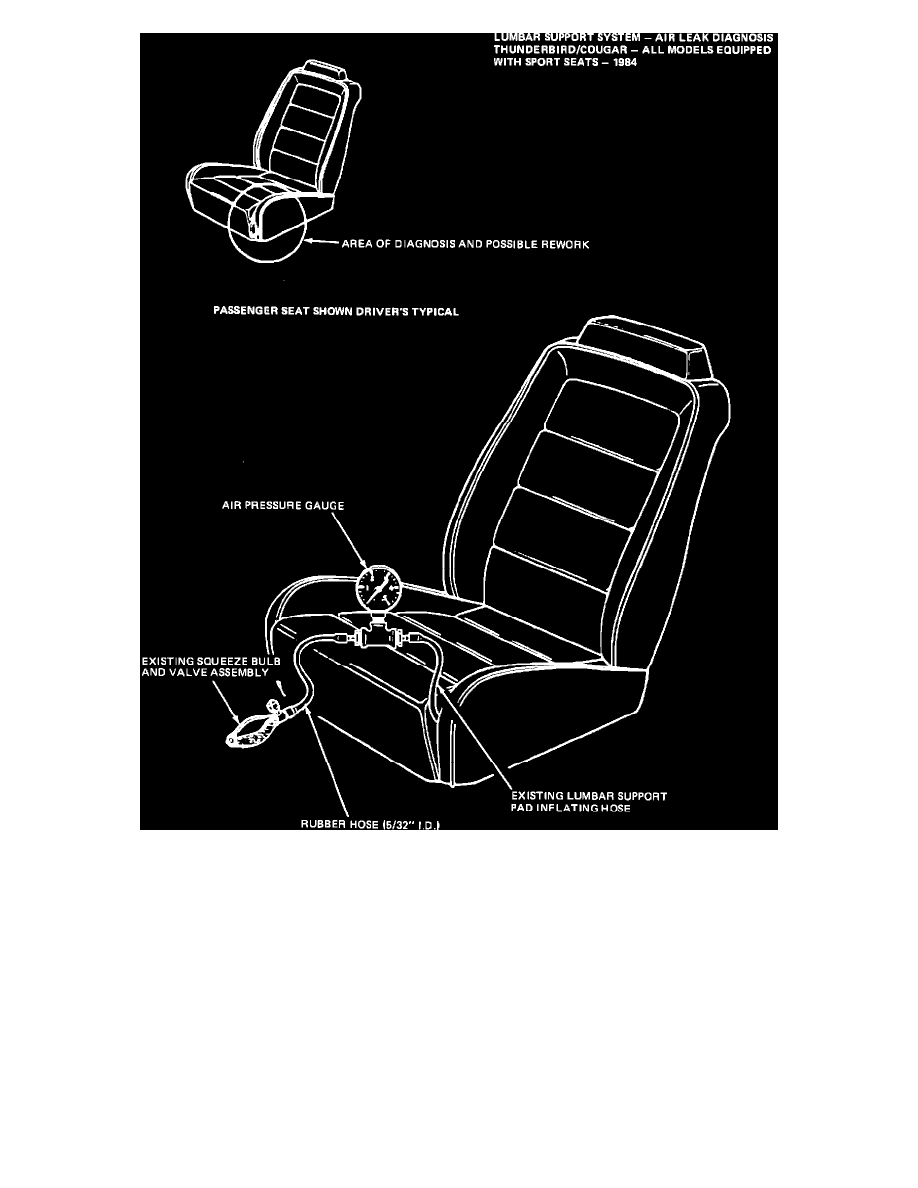
FIGURE 7
2.
Check the hose connections at the squeeze bulb and valve assembly which is located at the front inboard side of the seat cushion and the
connection at the rear of the seat on the inboard side at the junction of the seat back and seat cushion. If a poor connection is found, service as
required (Figures 7 and 8).
3.
Disconnect the hose from the squeeze bulb and valve assembly. Then, connect an air pressure gauge (having maximum reading capacity of five (5)
P.S.I.) and the rubber hose procured in Step 1 as shown in Figure 7.
4.
Inflate the lumber support system to 4 P.S.I.
5.
The lumbar support system should retain this pressure for a period of four (4) hours however, a loss of .5 P.S.I. is considered acceptable. If the
system retains an acceptable amount of pressure, remove the gauge, then, install the squeeze bulb and valve assembly and release the vehicle. If
not, proceed to Step 6.
6.
Inflate the lumbar support system to 4 P.S.I. Then, using a small "C" clamp or similar tool, pinch the hose closed between the gauge and the
squeeze bulb and valve assembly. This will isolate the squeeze bulb and valve assembly from the remainder of the system.
7.
If the system retains an acceptable amount of pressure replace the squeeze bulb and valve assembly. Then, repeat Stops 4 and 5. If the system does
not retain an acceptable amount of pressure, proceed to Step 8.