
Thunderbird V8-302 5.0L (1984)
12.
Remove the seat back trim cover and pad assembly as outlined in Section 41-28 of the appropriate car shop manual.
13.
Inspect the inflating tube, tube connections and the lumbar support pad for poor connections or damage and service as required. If visual
inspection does not reveal the source of the pressure loss, proceed to Step 14.
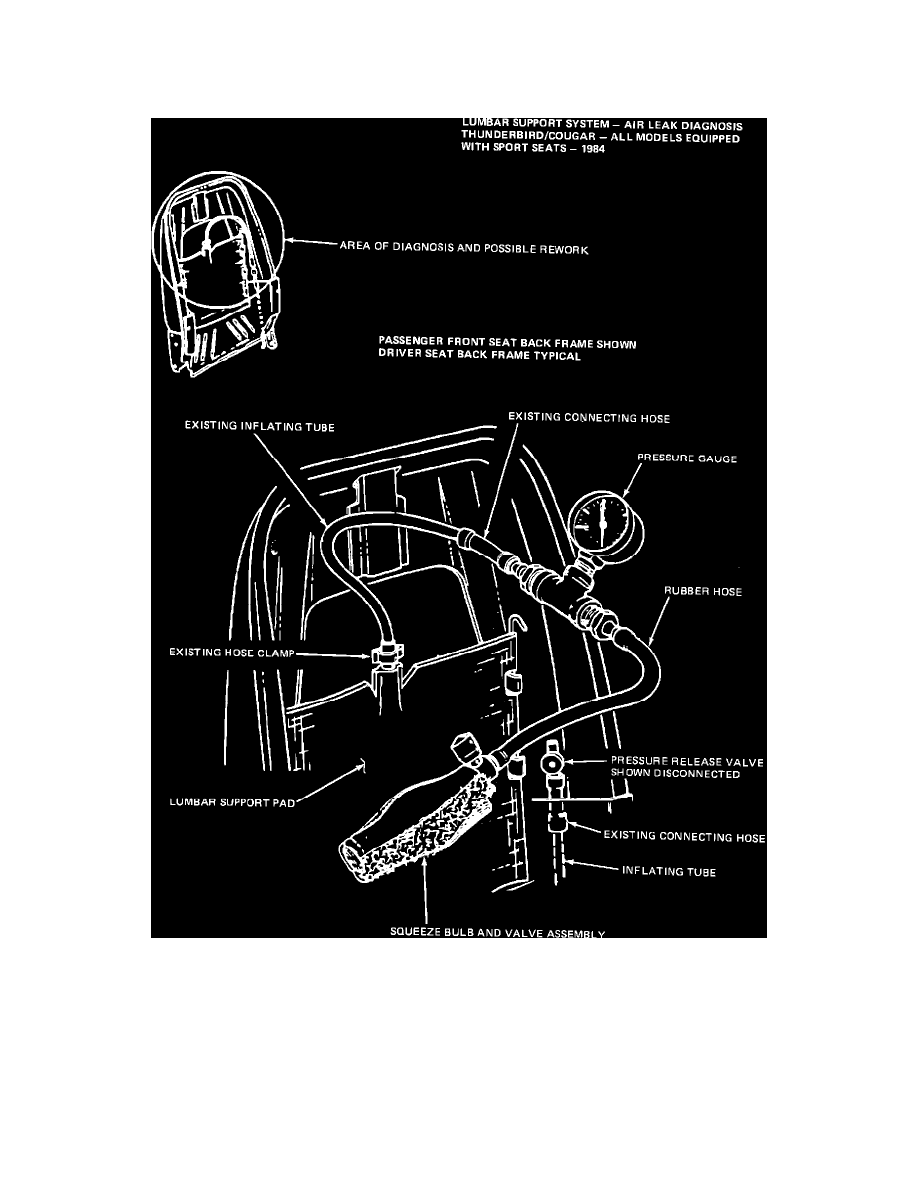
FIGURE 9
14.
Remove the lumbar support system's pressure relief valve (if so equipped). Then, install the squeeze bulb and valve assembly and the pressure
gauge as shown in Figure 9.
15.
Inflate the lumbar support system to 4 P.S.I.
16.
If the lumbar support system retains an acceptable amount of pressure (specified in Step 5) replace the pressure relief valve (if so equipped) if the
system does not retain an acceptable amount of pressure, proceed to Step 17.
17.
Replace the lumbar support pad as outlined in Section 41-28 of the 1984 Thunderbird/Cougar Car Shop Manual. Then, retest the lumbar support
pad to verify that the system has been serviced.
18.
Install the lumbar support system's relief valve (if so equipped) and the inflating tube.
19.
Install the front seat back pad and trim cover as outlined in Section 41-28 of the 1984 Thunderbird/Cougar Car Shop Manual.