
Thunderbird V8-4.6L VIN W (1997)
14. Remove all excess grease from CV joint and boot mating surfaces. Position rear axle shaft inner boot over CV joint. Move CV joint in and out, as
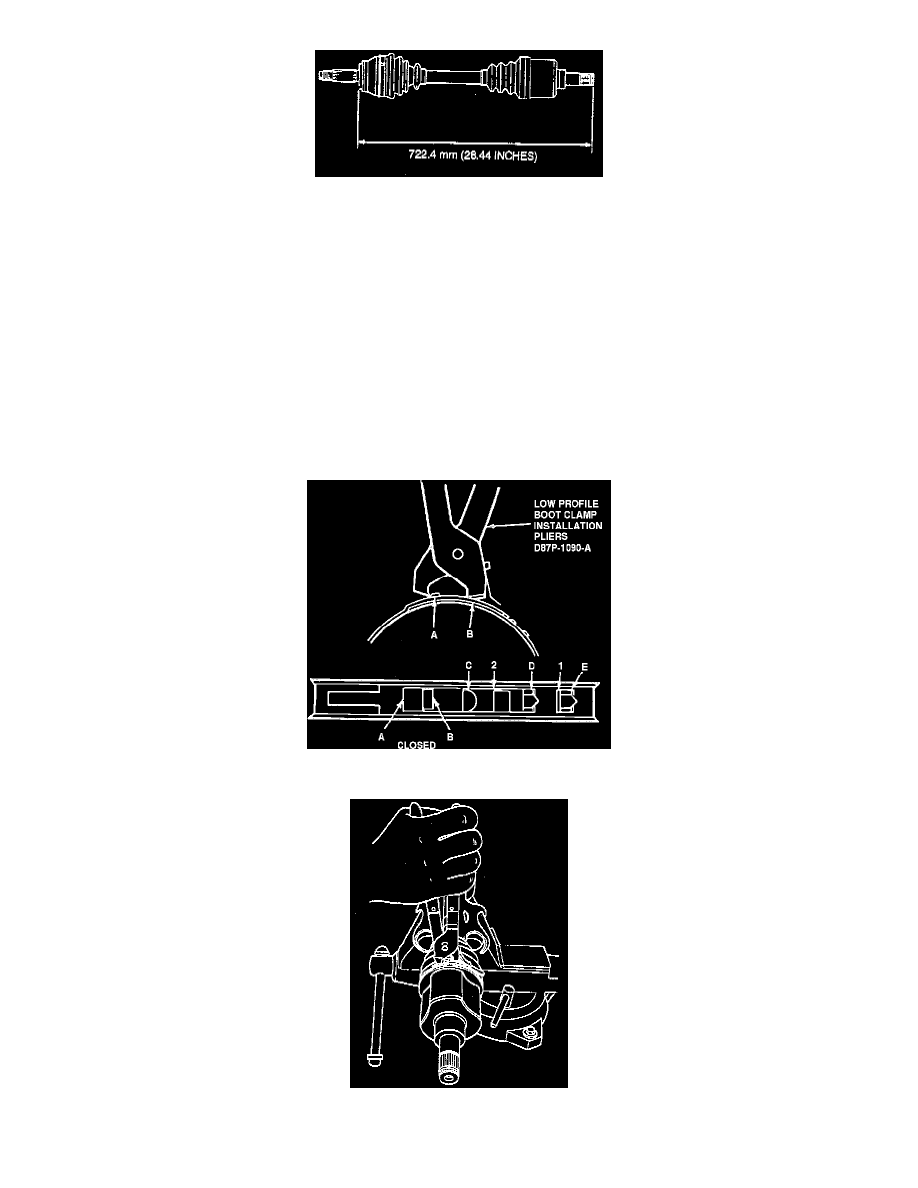
necessary, to adjust to length shown in the illustration.
NOTE: Before installing axle shaft boot clamp, make sure any air pressure which may have built up in rear axle shaft inner boot is relieved. Insert
a dulled screwdriver blade between rear axle shaft inner boot and outer bearing race to allow trapped air to escape from rear axle shaft inner boot.
The air should be released from the rear axle shaft inner boot only after adjusting to the specified dimension.
15. Make sure rear axle shaft inner boot is seated in its groove and position outer (small) axle shaft boot clamp.
16. Install large inboard axle shaft boot clamp as follows:
NOTE: A low profile axle shaft boot clamp is used on the inboard CV joint. To maintain proper clearance, reuse or replace with a low profile
axle shaft boot clamp.
a. With axle shaft boot clamp boot seated in groove, place clamp over front wheel driveshaft joint boot.
b. Engage hook (C) in window.
c. Using Boot Clamp Pliers D87P-1090-A or equivalent, place pincer jaws in closing hooks (A and B).
Fig. 16 CV Boot Clamp Installation
d. Secure axle shaft boot clamp by drawing closing hooks together. When windows (1 and 2) are above locking hooks (D and E), spring tab will
press windows over locking hooks and engage axle shaft boot clamp.