| PINPOINT TEST C : POOR ENGINE PERFORMANCE |
| TEST CONDITIONS | DETAILS/RESULTS/ACTIONS |
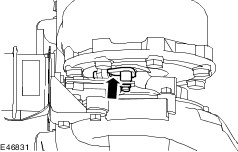
| C1: CHECK THE VACUUM DIAPHRAGM UNIT ACTUATOR ROD MOVEMENT |
| | 1 Start the engine. |
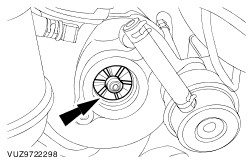
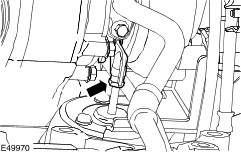
| | 2 Vehicles with 2.0L deisel engine: Observe the vane control lever. |
| | 3 Vehicles with 2.4L deisel engine: Raise and support the vehicle.
REFER to: Lifting (100-02 Jacking and Lifting, Description and Operation).
|
| | 4 Observe the vane control lever. |
| | Does the diaphragm actuator rod travel its maximum distance and the vane control lever reach its stop? Yes No |
| C2: CHECK THE TURBOCHARGER BOOST PRESSURE |
| | 1 Vehicles with 2.4L deisel engine: Lower the vehicle. |
| | 2 All vehicles: Stop the engine. |
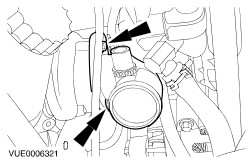
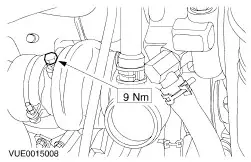
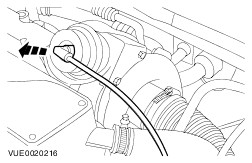
| | 3 Vehicles with 2.0L deisel engine: Disconnect the vacuum line from the vacuum diaphragm unit. |
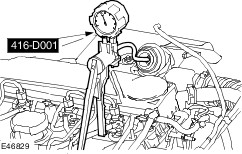
| | 4 Install the special tool to the vacuum diaphragm unit. |
| | 5 Vehicles with 2.4L deisel engine: Disconnect the vacuum line from the vacuum diaphragm inline connector. |
| | 6 Install the special tool to the vacuum diaphragm inline connector. |
| | 7 All vehicles: Using WDS datalogger, PCM function, select the signals for RPM# and MAP. |
| | 8 Start the engine. |
| | 9 Using the output state control option (RPM#) on WDS, raise the engine speed to between 3600 rpm and 3700 rpm. |
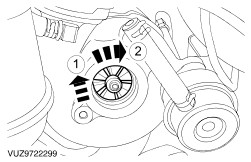
| | 10 Operate the special tool until the vane control lever reaches its stop. |
| | 11 Observe the reading of the WDS datalogger MAP signal. |
| | Is the MAP reading a minimum of 1.95 bar? Yes NO fault is indicated with the turbocharger or its control systems. To continue diagnostics,
REFER to: Fuel Charging and Controls (303-04G Fuel Charging and Controls - 2.4L Duratorq-TDCi (Puma) Diesel, Diagnosis and Testing).
No CHECK the exhaust gas recirculation (EGR) valve for partial obstruction or sticking open. REPAIR or INSTALL new as required. TEST the system for normal operation.CHECK the air induction system for leaks or blockages. REPAIR or INSTALL new as required. TEST the system for normal operation.If no fault is found with the EGR valve or air intake system, INSTALL a new turbocharger.
REFER to: Turbocharger - 2.0L Duratorq-Di (Puma) Diesel/2.0L Duratorq-TDCi (Puma) Diesel/2.0L Duratorq-TDDi (Puma) Diesel (303-04D Fuel Charging and Controls - Turbocharger, Removal and Installation) /
Turbocharger - 2.4L Duratorq-Di (Puma) Diesel/2.4L Duratorq-TDCi (Puma) Diesel (303-04D Fuel Charging and Controls - Turbocharger, Removal and Installation).
|
| C3: CHECK THE VACUUM DIAPHRAGM UNIT |
| | 1 Vehicles with 2.4L deisel engine: Lower the vehicle. |
| | 2 All vehicles: Stop the engine. |
| | 3 Vehicles with 2.0L deisel engine: Disconnect the vacuum line from the vacuum diaphragm unit. |
| | 4 Install the special tool to the vacuum diaphragm unit. |
| | 5 Vehicles with 2.4L deisel engine: Disconnect the vacuum line from the vacuum diaphragm inline connector. |
| | 6 Install the special tool to the vacuum diaphragm inline connector. |
| | 7 All vehicles: Operate the special tool and observe the diaphragm actuator rod. |
| | Does the diaphragm actuator rod travel its maximum distance and the vane control lever reach its stop? Yes CHECK the vacuum diaphragm unit vacuum control pipe for leaks or restriction. INSTALL a new pipe as required. If no fault is found, continue the diagnostic using WDS. No INSTALL a new turbocharger.
REFER to: Turbocharger - 2.0L Duratorq-Di (Puma) Diesel/2.0L Duratorq-TDCi (Puma) Diesel/2.0L Duratorq-TDDi (Puma) Diesel (303-04D Fuel Charging and Controls - Turbocharger, Removal and Installation) /
Turbocharger - 2.4L Duratorq-Di (Puma) Diesel/2.4L Duratorq-TDCi (Puma) Diesel (303-04D Fuel Charging and Controls - Turbocharger, Removal and Installation).
TEST the system for normal operation. |