
Windstar V6-232 3.8L (1995)
Heater Core: Service and Repair
REMOVAL AND INSTALLATION
1. Disconnect battery ground cable, then drain cooling system.
2. Remove cowl top vent panel to allow clearance, then in engine compartment, disconnect heater hoses from core.
3. Remove cassette box, center instrument panel support trim and cup holder.
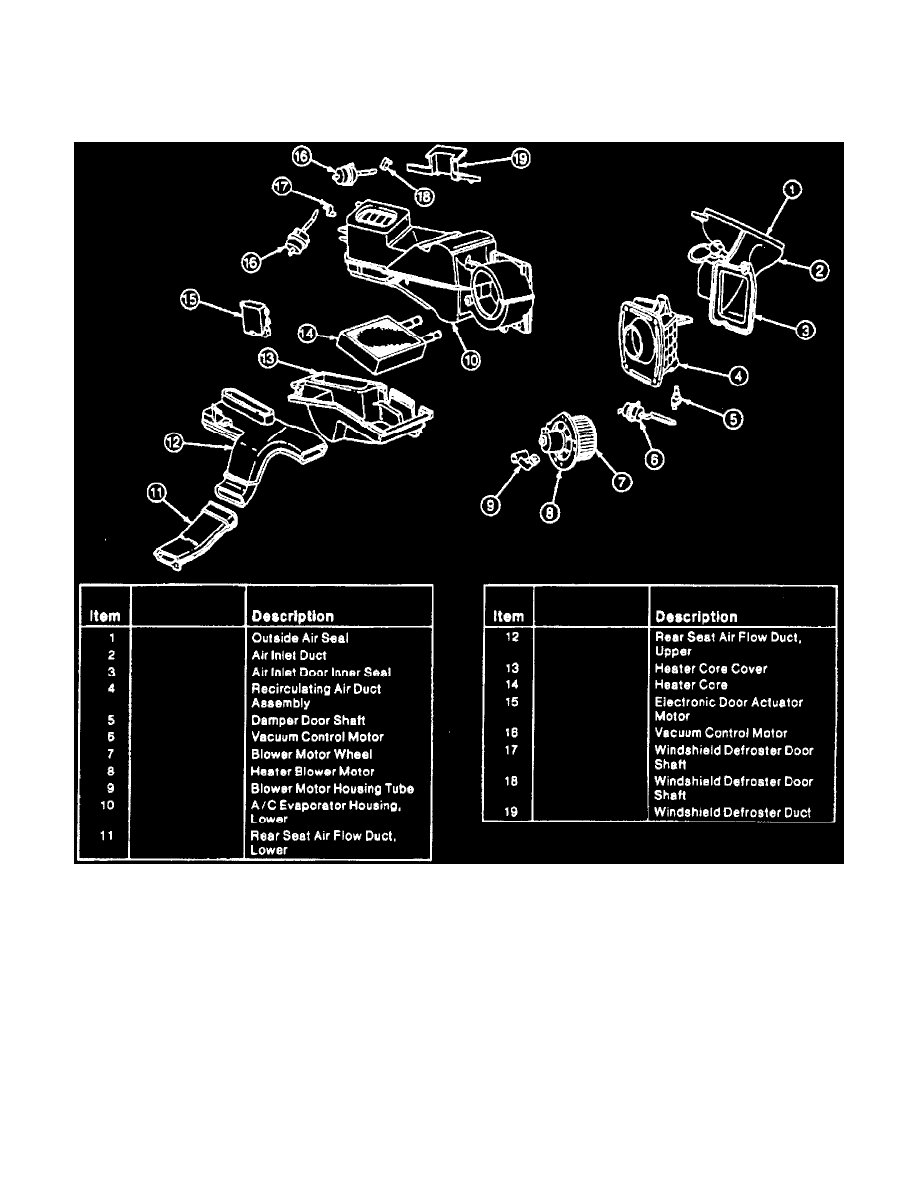
Fig. 4 Air Duct Components
4. Remove rear seat air flow ducts.
5. On models with keyless entry, disconnect wiring harness.
6. Remove center instrument panel support brackets. See: Instrument Panel, Gauges and Warning Indicators/Instrument Cluster / Carrier/Service and
Repair
7. On models with climate control, disconnect vacuum control connector
8. Remove heater floor duct, then remove heater core cover.
9. Remove heater core from air box.
10. Reverse procedure to install, noting the following
a. Always use new heater core and core tube seals.
b. Bleed cooling system.
NOTE: Vehicle specific information about operation, stored in PCM using battery backed up memory, may be lost when battery is
disconnected. If this occurs poor engine performance, stalling and other driveability problems may occur. It may be necessary to drive the