
Windstar V6-232 3.8L (1995)
-
To prevent damage to the safety belt webbing when cutting through the slot in the belt guide, place a smooth, flat, hard object such as a metal ruler
between the webbing and the back side of the belt guide.
2. Remove the belt guide by carefully prying the belt guide away from the sheet metal.
3. Remove the D-ring cover.
4. Remove the nut from front safety belt D-ring.
5. Lift floor carpet and remove bolt retaining floor anchor to front floor pan.
6. Remove front safety belt retractor bolt.
7. Remove front safety belt retractor.
8. Remove the damaged bolt for the anchor reinforcement and discard.
INSTALLATION
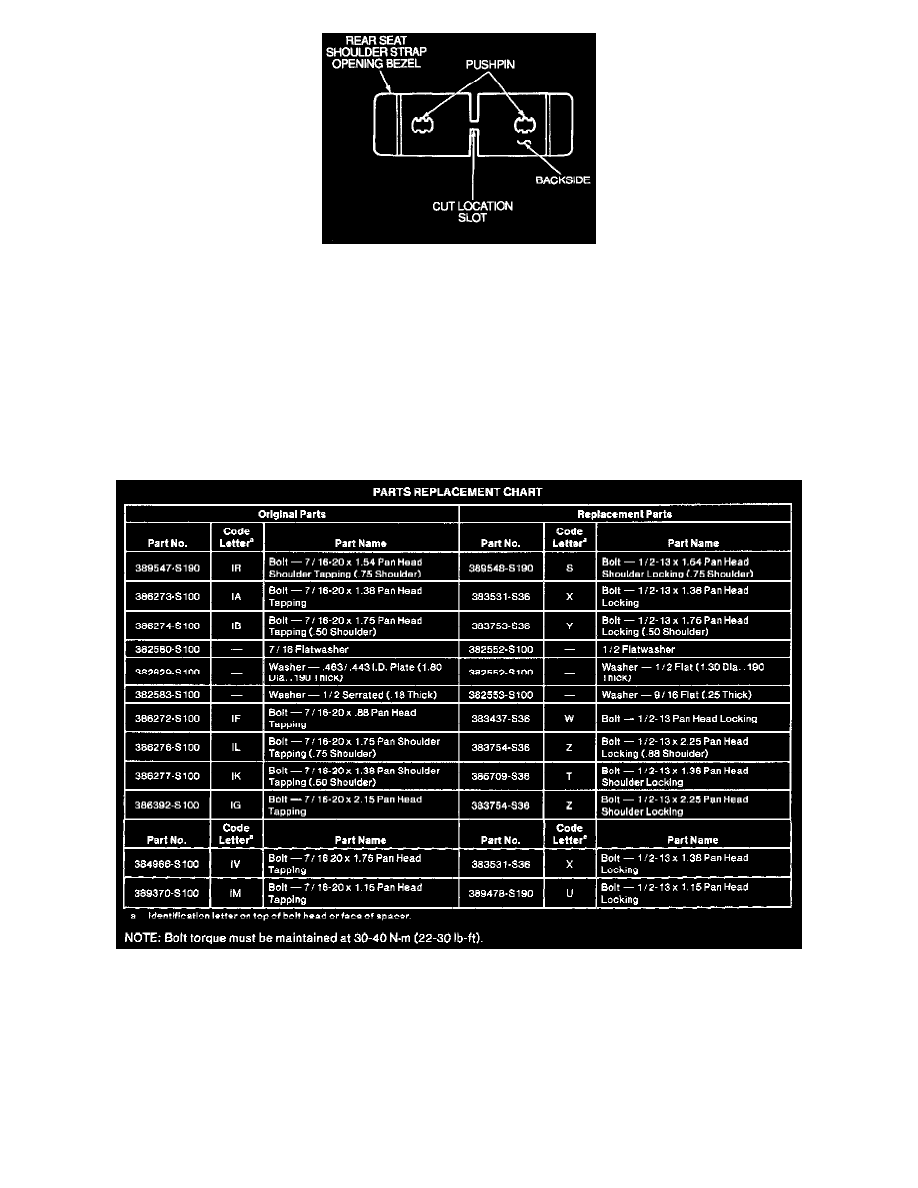
Parts Replacement Chart
1. Position the retractor assembly to the vehicle. Install a new bolt with the same part number as indicated in the Parts Replacement Chart. Tighten to
30-40 Nm (22-30 lb-ft).
2. Position safety belt guide to vehicle and install the bolt. Tighten bolt to 30-40 Nm (22-30 lb-ft).
3. Install the front seat shoulder strap guide cover.
4. Install the belt guide.
5. Feed the safety belt through the slot in the quarter trim panel.
6. Install the quarter trim panel.
7. Position the floor anchor anti-rotation tab to the bead in the front floor pan. Install the bolt. Tighten the bolt to 30-40 Nm (22-30 lb-ft).