
Windstar V6-232 3.8L (1995)
Braking Sensor/Switch: Service and Repair
REMOVAL
1. Disconnect wire harness at connector from stoplight switch.
NOTE: Locking tabs must be lifted before connector can be removed.
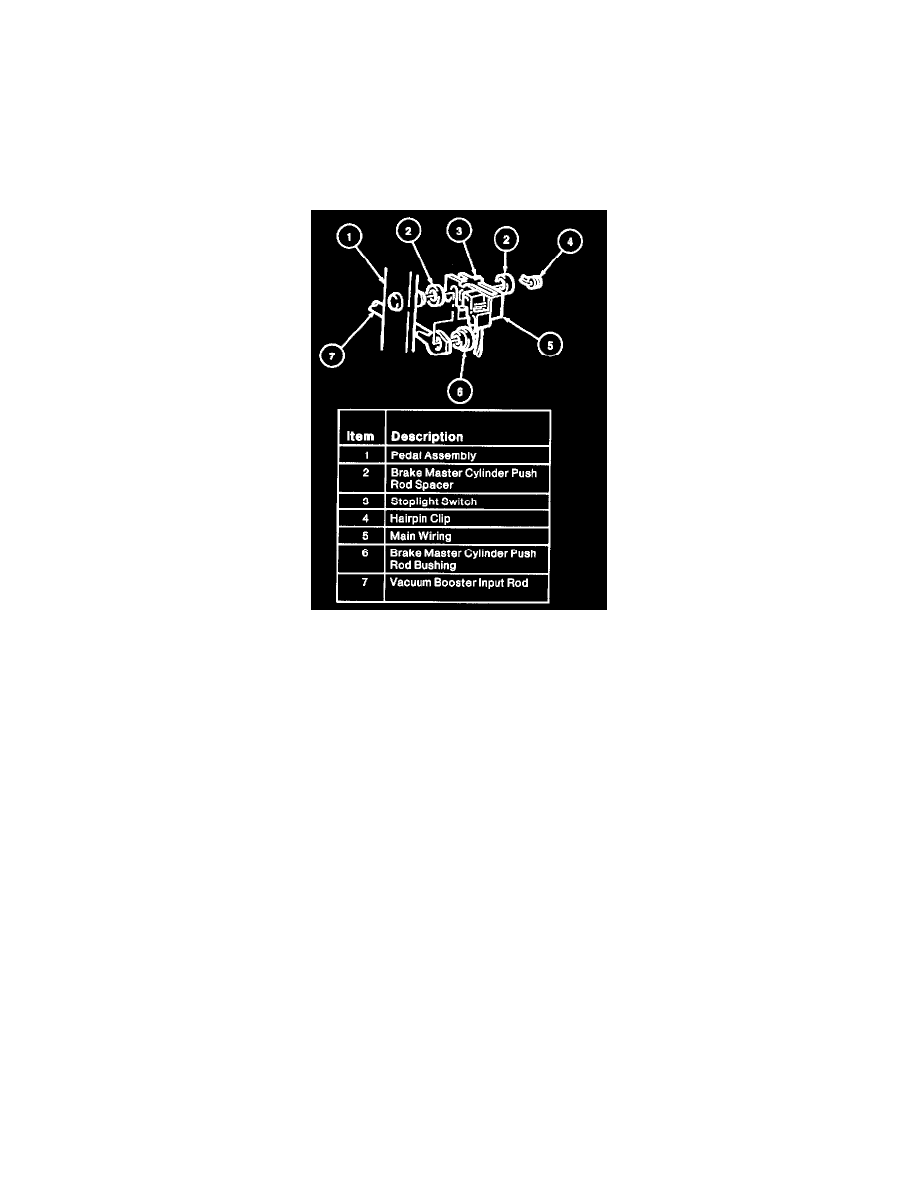
2. Remove the hairpin clip and slide stoplight switch, push rod, nylon washer and brake master cylinder push rod bushing away from the brake pedal.
3. Remove the brake master cylinder push rod spacer and then the stoplight switch by sliding stoplight switch up or down.
NOTE: Since the switch side plate nearest the brake pedal is slotted, it is not necessary to remove the vacuum booster input rod and one brake
master cylinder push rod bushing from the brake pedal pin.
INSTALLATION
1. Position stoplight switch so the U-shaped side is nearest the brake pedal and directly over/under the pin. Then slide switch up/down trapping the
vacuum booster input rod and bushing between the switch side plates.
2. Push stoplight switch and push rod assembly firmly toward brake pedal arm.
3. Assemble outside white plastic washer to pin and install hairpin clip to hold entire assembly.
CAUTION: To prevent component failure, do not substitute other types of pin clips. Use only factory supplied hairpin clips.
4. Assemble the connector to the stoplight switch.
5. Check stoplight switch for proper operation. Stoplamps should illuminate with less than 27 Nm (6 lbs.) applied to brake pedal at pad.
CAUTION: Stoplight switch wire harness must have sufficient length to travel with stoplight switch during full stroke of brake pedal. If wire
length is too short, reroute or repair harness as required.