
Metro L3-61 1.0L (1990)
Brake Caliper: Service and Repair
REMOVAL
1.
Disconnect negative battery cable.
2.
Remove approximately 2/3 of brake fluid from master cylinder.
3.
Raise and support vehicle.
4.
Mark relationship between front wheel and axle, then remove wheel and tire assembly.
5.
If caliper assembly is to be serviced, remove inlet fitting attaching bolt, copper washer, and inlet fitting from caliper housing. Plug opening in inlet
fitting to prevent fluid loss and contamination. Do not crimp brake hose, as this may damage internal structure of hose. If only shoe and
lining assemblies are to be replaced, do not disconnect brake line fitting from caliper.
6.
Remove caliper slide pins and the caliper. If only shoe and lining assemblies are to be replaced, suspend caliper from chassis using suitable
hanger. Do not allow caliper to hang by brake hose.
7.
Remove shoe and lining assembly.
8.
Remove bracket attaching bolts and the bracket.
9.
Remove slide pin boot from bracket.
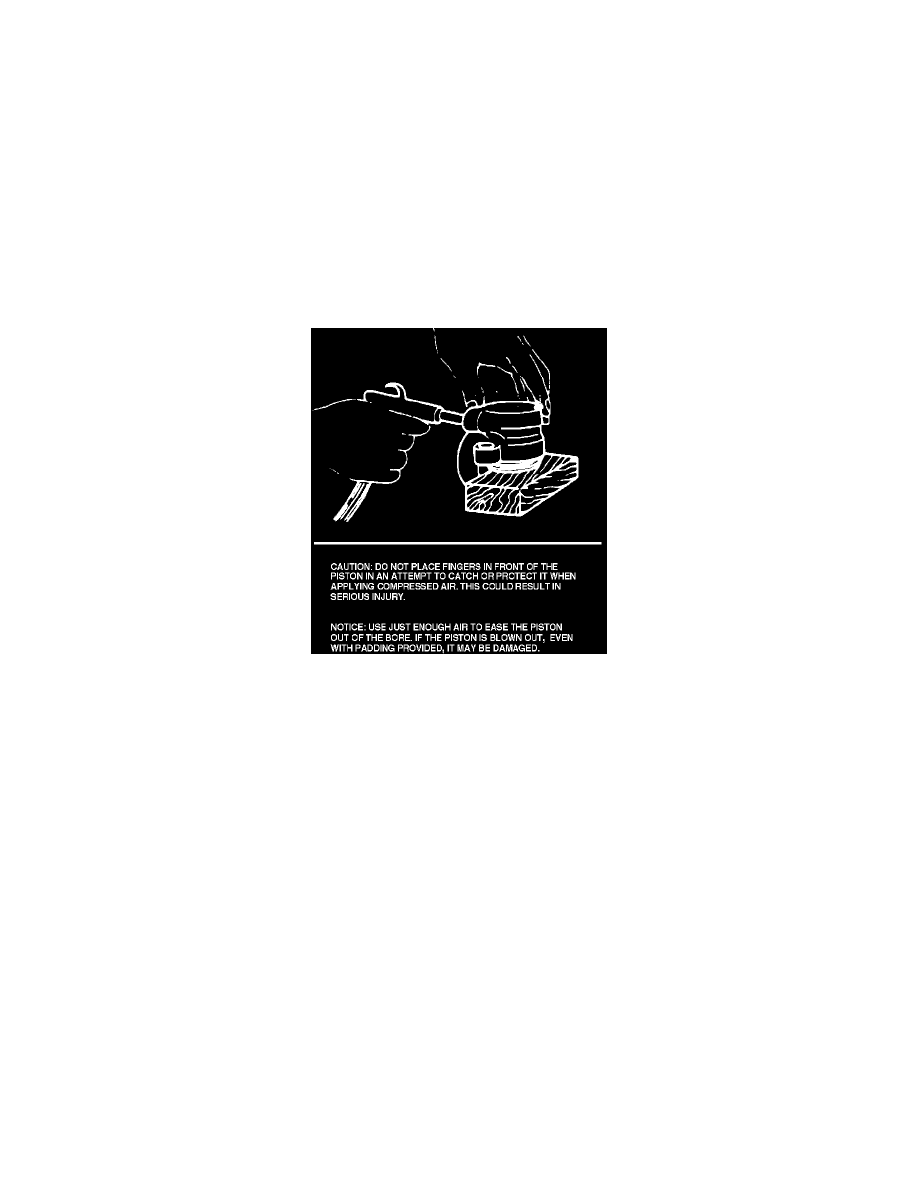
Fig. 3 Removing Caliper Piston
DISASSEMBLY
1.
Remove caliper assembly as outlined previously, then drain brake fluid from caliper.
2.
Use clean shop towels to pad interior of caliper assembly, then remove piston by directing compressed air into caliper brake hose inlet hole, Fig. 3.
Use just enough air pressure to ease piston out of bore. Do not place fingers in front of piston for any reason when applying compressed
air. This could result in serious personal injury.
3.
Remove dust boot from piston.
4.
Using a small piece of wood or plastic, remove piston seal from bore. Do not use a metal tool of any kind to remove seal as it may damage
bore.
5.
Remove bleeder valve.
6.
Inspect piston for scoring, nicks, corrosion, and wear and replace as needed.
7.
Inspect caliper housing and seal groove for corrosion, nicks, scoring and excessive wear, and use crocus cloth to polish away corrosion from
housing bore. Replace caliper housing if corrosion in and around seal groove will not clean up with crocus cloth.
8.
Clean all parts with denatured alcohol. Dry with unlubricated compressed air. Blow out all passages in housing and bleeder valve.
ASSEMBLY
1.
Apply suitable grease to piston seal and cylinder wall, then install the seal. Check to ensure piston seal is not twisted.
2.
Apply suitable grease to sliding portion of piston and install dust boot.
3.
Insert edge of dust boot into boot groove, then slowly force piston fully into cylinder.
4.
Install bleeder valve.
INSTALLATION
1.
Apply suitable grease to inner face of slide pin boot.
2.
Install slide pin boot to bracket.