
Metro L3-61 1.0L (1990)
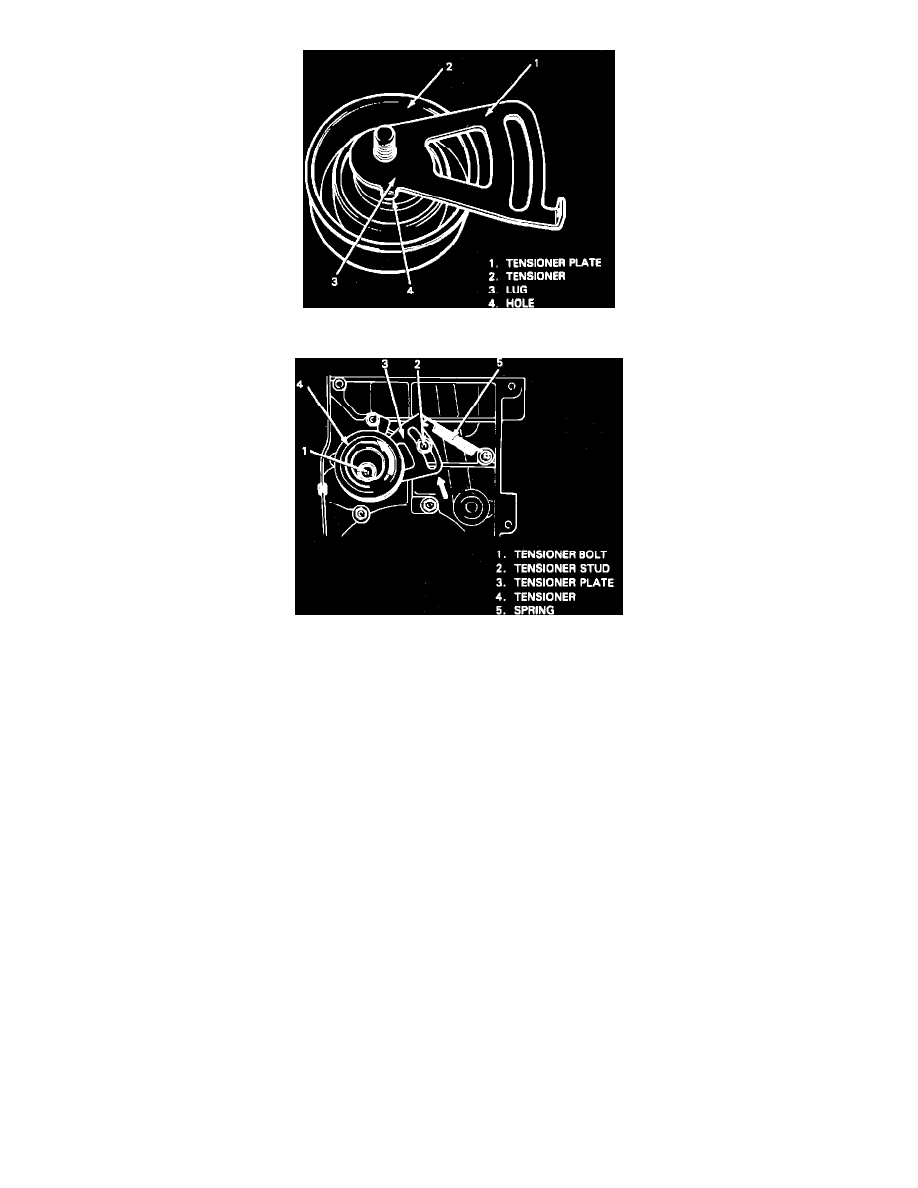
Fig. 7 Tensioner Assembly
Fig. 8 Checking Tensioner Plate Movement
INSTALLATION
1. Position lug on tensioner plate to hole in tensioner, Fig. 7.
2. Position tensioner and tensioner plate to engine, then install and hand tighten attaching bolt. Ensure that tensioner and tensioner plate move in the
same direction, Fig. 8. If movement is not as indicated, remove tensioner and reinsert tensioner plate lug into tensioner.
3. Ensure camshaft and crankshaft timing marks are aligned, Fig. 6.
4. With tensioner plate pushed upward, install timing belt over camshaft and crankshaft pulleys. Arrow on timing belt should face toward
direction of crankshaft rotation. When installing timing belt, keep drive side of belt free of slack.
5. Install tensioner spring and damper, then hand tighten tensioner stud.
6. Rotate crankshaft two revolutions clockwise direction to remove slack from belt. Ensure slack is removed from drive belt and that camshaft
and crankshaft timing marks are aligned.
7. Tighten tensioner stud, then tighten tensioner bolt to torque listed under SPECIFICATIONS/MECHANICAL
SPECIFICATIONS/TIGHTENING SPECIFICATIONS.
8. Install timing belt outer cover and crankshaft pulley. Ensure seal is between oil pump housing and water pump.
9. Install water pump pulley and drive belt.
10. Install right hand side fender apron extension, then lower vehicle and connect battery ground cable.