
Metro L3-61 1.0L (1990)
1.
Disconnect negative battery cable. Be sure to record radio settings prior to disconnecting cable so settings can be reset in step 8.
2.
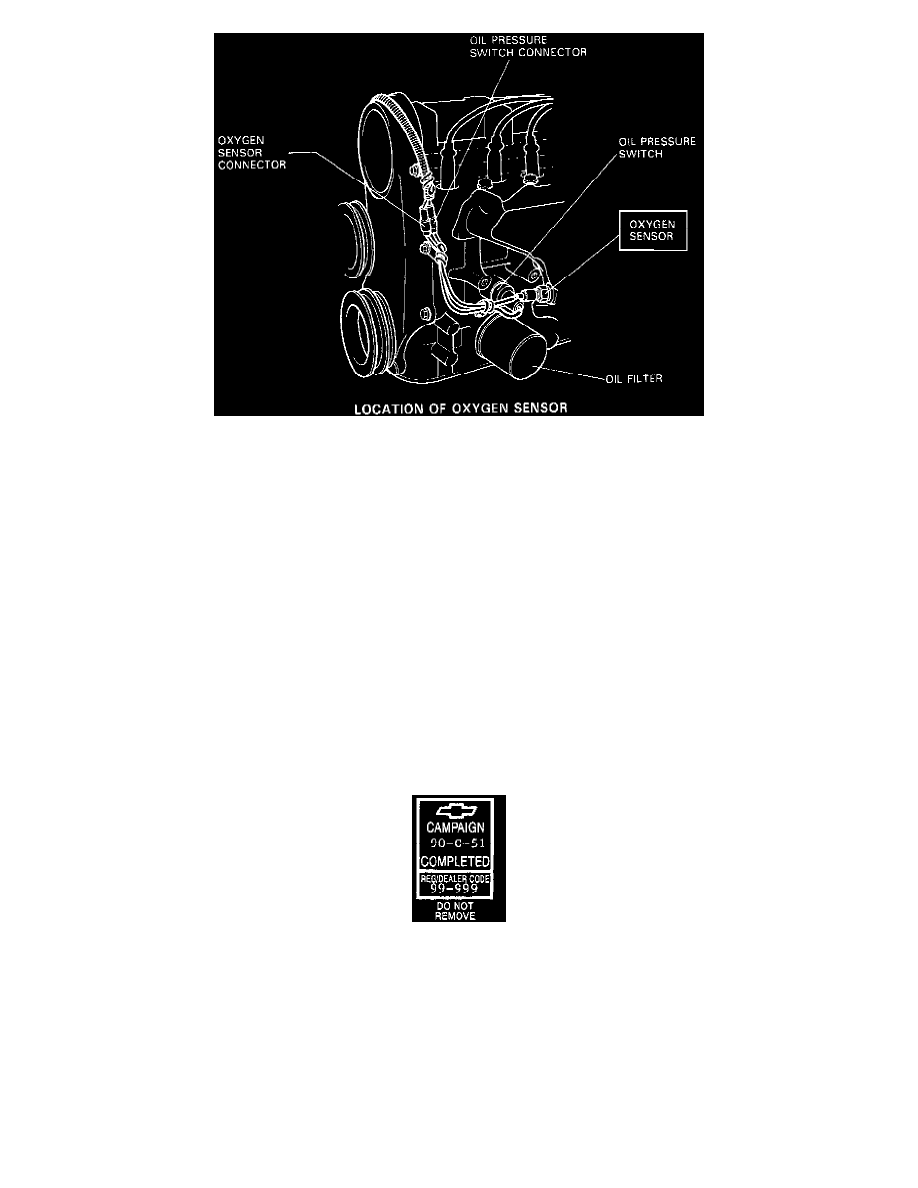
Disconnect oxygen sensor electrical connector.
3.
After exhaust system has cooled, spray penetrating oil (allow to soak in) on threaded portion of oxygen sensor.
4.
Unscrew & remove oxygen sensor from exhaust manifold.
5.
Apply a SMALL amount of anti-seize compound on threads prior to installation of new oxygen sensor. Be certain no anti-seize compound is
applied to base of oxygen sensor.
6.
Torque sensor to 45-55 N-m (33-39.5 lb.ft.).
7.
Reconnect oxygen sensor electrical connector.
8.
Connect negative battery cable. Reset clock and radio settings.
9.
Install Campaign Identification Label.
Campaign Identification Label
CAMPAIGN IDENTIFICATION LABEL
Each vehicle corrected in accordance with the instructions outlined in this Product Campaign Bulletin will require a "Campaign Identification Label".
Each label provides a space to include the campaign number and the five (5) digit dealer code of the dealer performing the campaign service. This
information may be inserted with a typewriter or a ball point pen.
Each "Campaign Identification Label" is to be located on the radiator core support in an area which will be visible when the vehicle is brought in for
periodic servicing by the owner. Additional "Campaign Identification Labels" can be obtained from DAC.
Apply "Campaign Identification Label" only on a clean, dry surface.
Warranty Information