
Metro L4-079 1.3L VIN 9 TBI (1995)
11.
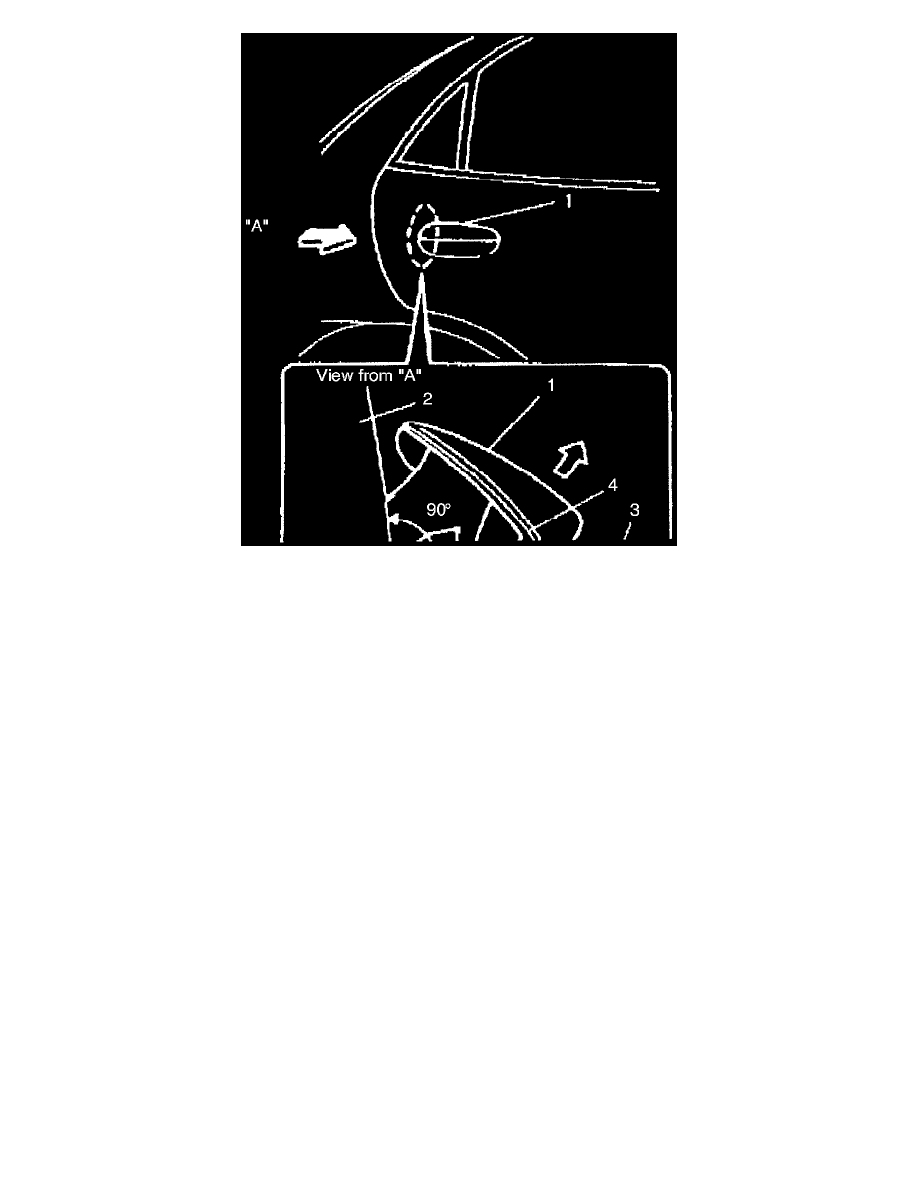
Measure door latch release position according to the following procedure (See Figure 7):
A.
Lock door latch by pushing in its claw with a screwdriver. If a click is heard twice, it is locked securely.
B.
Apply a scale so that it is at a right angle to door surface and contacts outside handle as shown in this bulletin.
C.
Operate outside handle until a click is heard, and measure dimension (a) [Spec: 14-18 mm (0.56-0.70 in.)].
12.
If measurement is not within specifications, remove push rod from "One Touch Clip" and adjust accordingly. If measurement is within
specification, proceed to Step 13.
13.
Install rear door handle rod.
14.
Check interior and exterior rear door handle operation with inside door lock UNLOCKED.
15.
Check interior and exterior rear door handle operation with inside door lock LOCKED.
16.
Apply small amount (1cc) of grease to door latch spring.
17.
Install water deflector, interior door trim panel and window regulator handle following applicable Service Manual Procedure, Section 10-6, Rear
Door Trim.
18.
Perform steps 1 through 17 on other rear door.
19.
Install Campaign Identification Label.
Campaign ID Label & Claim Information
CAMPAIGN IDENTIFICATION LABEL
Each vehicle corrected in accordance with the instructions outlined in this Product Campaign Bulletin will require a "Campaign Identification Label".
Each label provides a space to include the campaign number
and the five (5) digit dealer code of the dealer performing the campaign service. This information may be
inserted with a typewriter or a ball point pen.
Each "Campaign Identification Label" is to be located on the radiator core support in an area which will be visible when the vehicle is brought in for