
Metro L4-079 1.3L VIN 9 TBI (1995)
Water Pump: Service and Repair
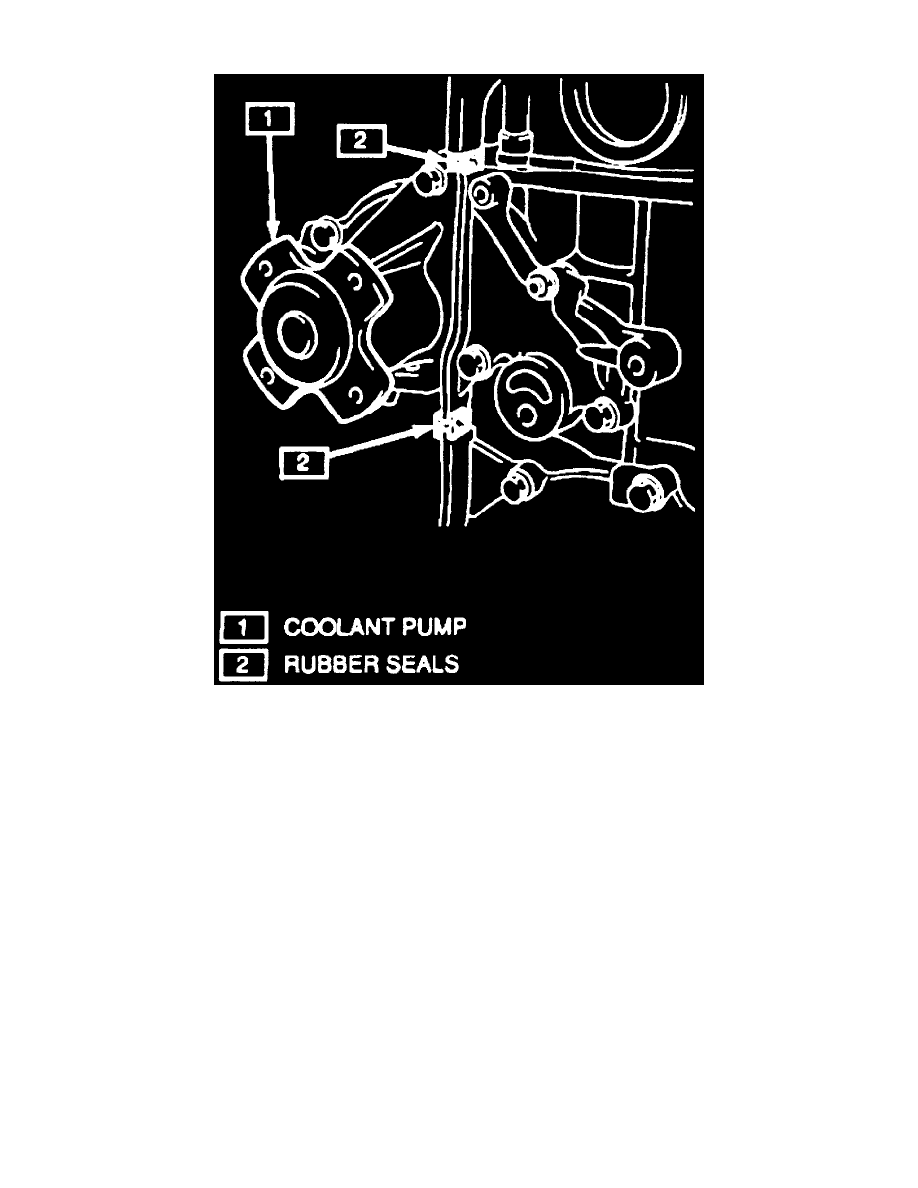
Fig. 19 Water Pump Rubber Seals
REMOVAL
1. Disconnect battery ground cable.
2. Drain cooling system.
3. Remove air cleaner assembly.
4. On models with A/C, remove compressor suction pipe bracket.
5. On all models, loosen, but do not remove, water pump bolts.
6. Raise and properly support vehicle.
7. Remove right lower splash shield.
8. On models with A/C, remove compressor drive belt.
9. Remove lower alternator cover plate, loosen alternator adjusting bolt, and remove water pump/alternator drive belt.
10. Remove crankshaft pulley and water pump pulley.
11. Remove dipstick tube.
12. Remove upper alternator adjusting bracket from water pump.
13. Remove rubber seals from water pump, Fig. 19 .
14. Remove water pump mounting bolts and nuts, and water pump.
INSTALLATION
1. Install water pump on engine block, ensuring to use new gasket.
2. Install rubber seals between water pump and oil pump, and between water pump and cylinder head,
3. Install upper alternator adjusting bracket to water pump and tighten to specifications.
4. Install dipstick tube.
5. Install timing belt.
6. Install and hand tighten water pump pulley.
7. Install crankshaft pulley.