
Metro L4-079 1.3L VIN 9 TBI (1995)
Shift Solenoid: Service and Repair
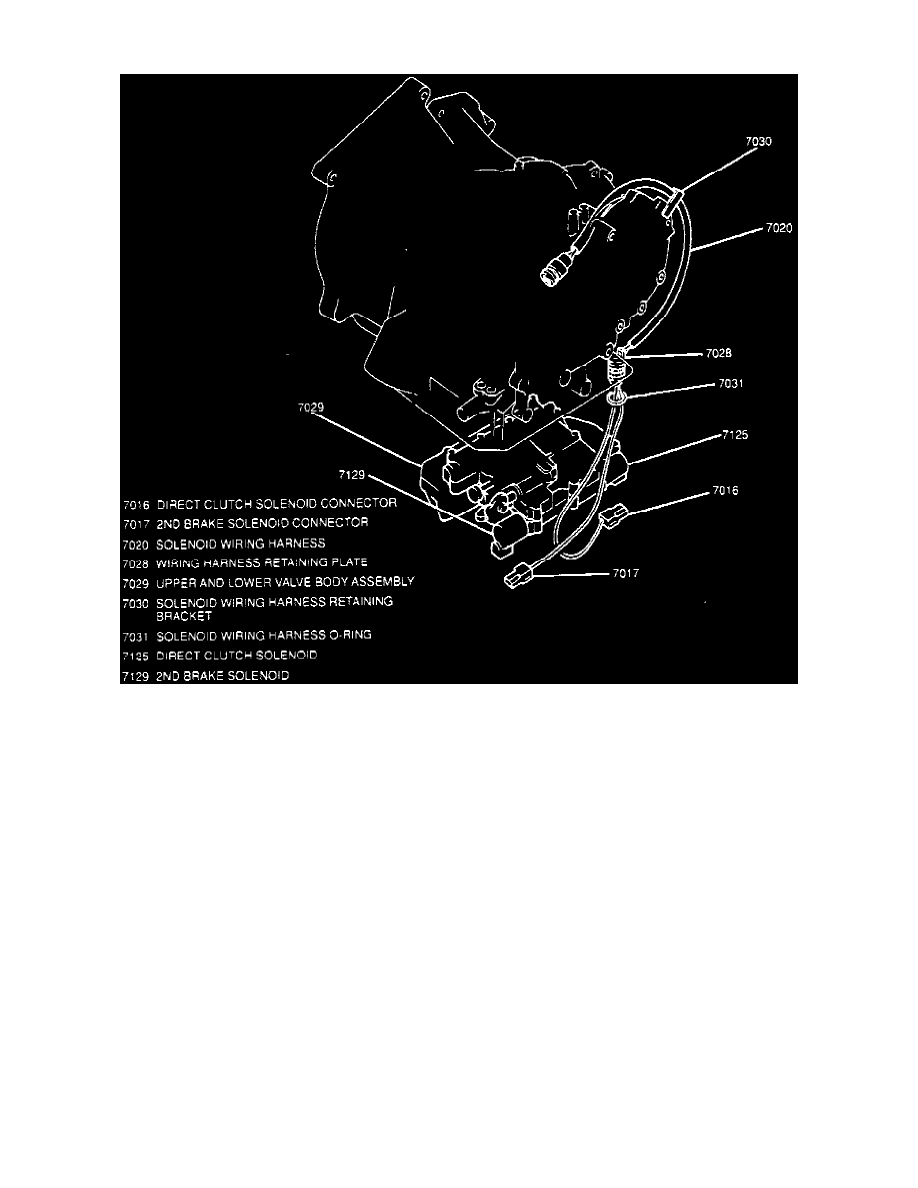
Fig. 21 Shift Solenoids & Wiring Harness.
REPLACE
1. Disconnect battery ground cable.
2. Raise and support vehicle.
3. Drain transaxle fluid, then remove transaxle oil pan.
4. Disconnect electrical connectors from direct clutch and 2nd brake solenoids.
5. Remove direct clutch solenoid and 2nd brake solenoid to lower valve body attaching bolts, Fig. 21.
6. Remove solenoid wiring harness retaining nut and plate.
7. Pull wiring harness out of transaxle case.
8. Reverse procedure to install, noting the following:
a. Torque solenoid wiring harness retaining plate nut to specification.
b. Tighten solenoid wiring harness retaining bracket bolt to specification.
c. Tighten direct clutch and 2nd brake solenoid to lower valve body attaching bolts to specification.
d. Tighten transaxle oil pan bolts to specification.
e. Coat transaxle oil pan drain plug with Loctite pipe sealant part No. 1052080 or equivalent, tighten drain plug to specification.
f.
Refill transaxle with fluid and check level.