
Metro L4-079 1.3L VIN 9 TBI (1995)
Constant Velocity Joint: Service and Repair
Disassemble and Assemble
Constant Velocity Joint & Seal
Do not disassemble outboard joint. If any malfunction is detected in this component, replace as an assembly.
Thoroughly inspect parts for wear prior to assembly. Replace any excessively worn parts. Do not wash boots in solvent. Ensure wheel-side joint
assembly and tripot joint housing are washed and air dried, and that the boots are cleaned with a cloth.
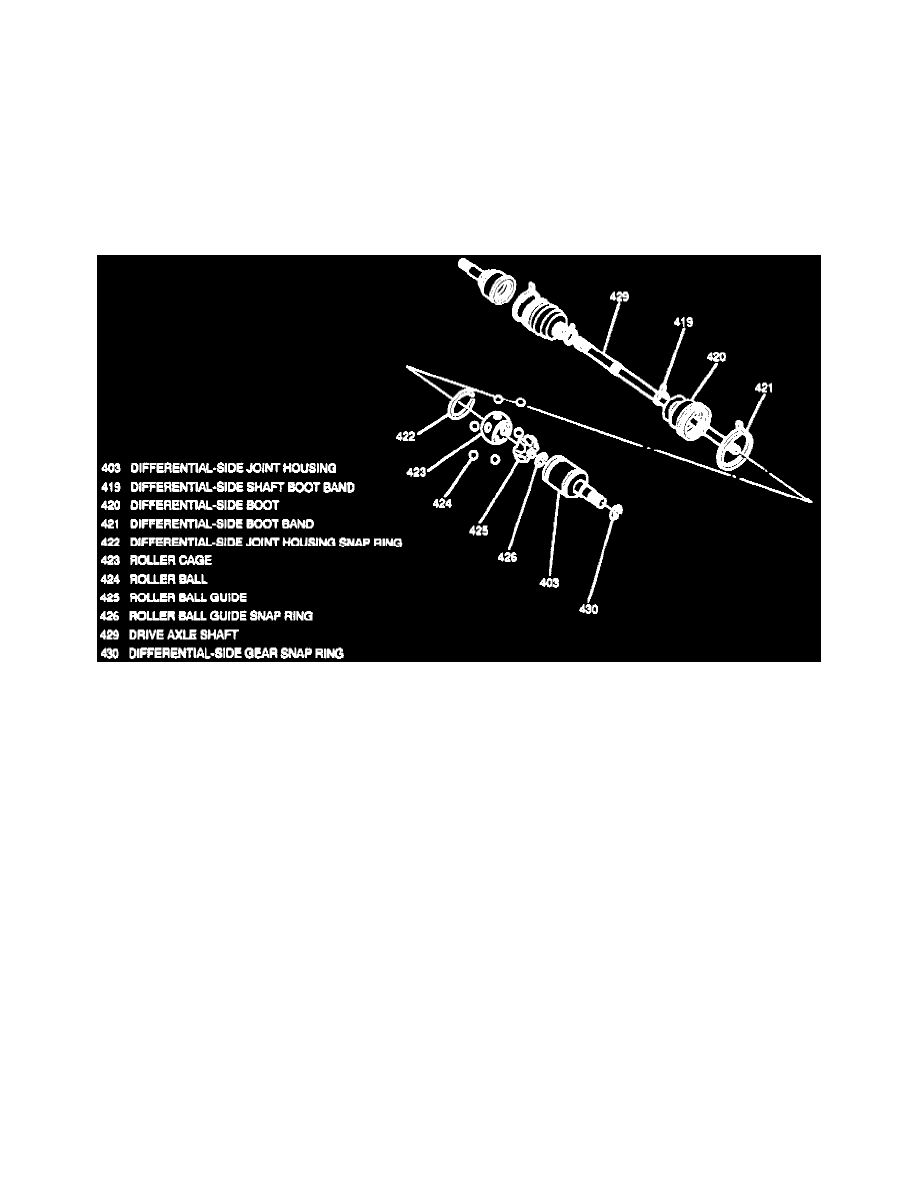
Double Offset Inner Joint & Boot
Fig. 11 Exploded View Of Double Offset Inner Joint.
DISASSEMBLE
NOTE: Place match marks on all components before removal from shaft.
1. Remove large band from boot Fig. 11, then pull boot back from outer joint housing.
2. Remove snap ring from joint outer housing, then the outer housing from shaft.
3. Remove roller ball guide snap ring from shaft, then the roller ball guide from shaft.
4. Remove balls from cage.
5. Rotate ball guide in cage 90degrees until flats align, then rotate guide and remove from cage.
6. Remove small band from boot, then the boot from shaft.
ASSEMBLE
1. Clean components thoroughly, then lubricate joint components with 1.0-1.4 oz. of suitable joint grease. Pack joint housing and boot with
remaining grease.
2. Ensure match marks are aligned.
3. Install boot with small band to shaft.
4. Assemble cage and balls to ball guide.
5. Install ball guide to shaft and secure with snap ring.
6. Install outer housing over ball guide assembly, then secure with snap ring.
7. Install boot and large band to outer housing.
8. Ensure boot is not stretched, collapsed, twisted or kinked when installing boot bands.
Tripot Inner Joint & Boot