
Prizm L4-1800cc 1.8L DOHC (1993)
Evaporative Emission Control Canister: Service and Repair
REMOVAL
1.
Remove negative battery cable.
2.
Remove intake air temperature sensor connector.
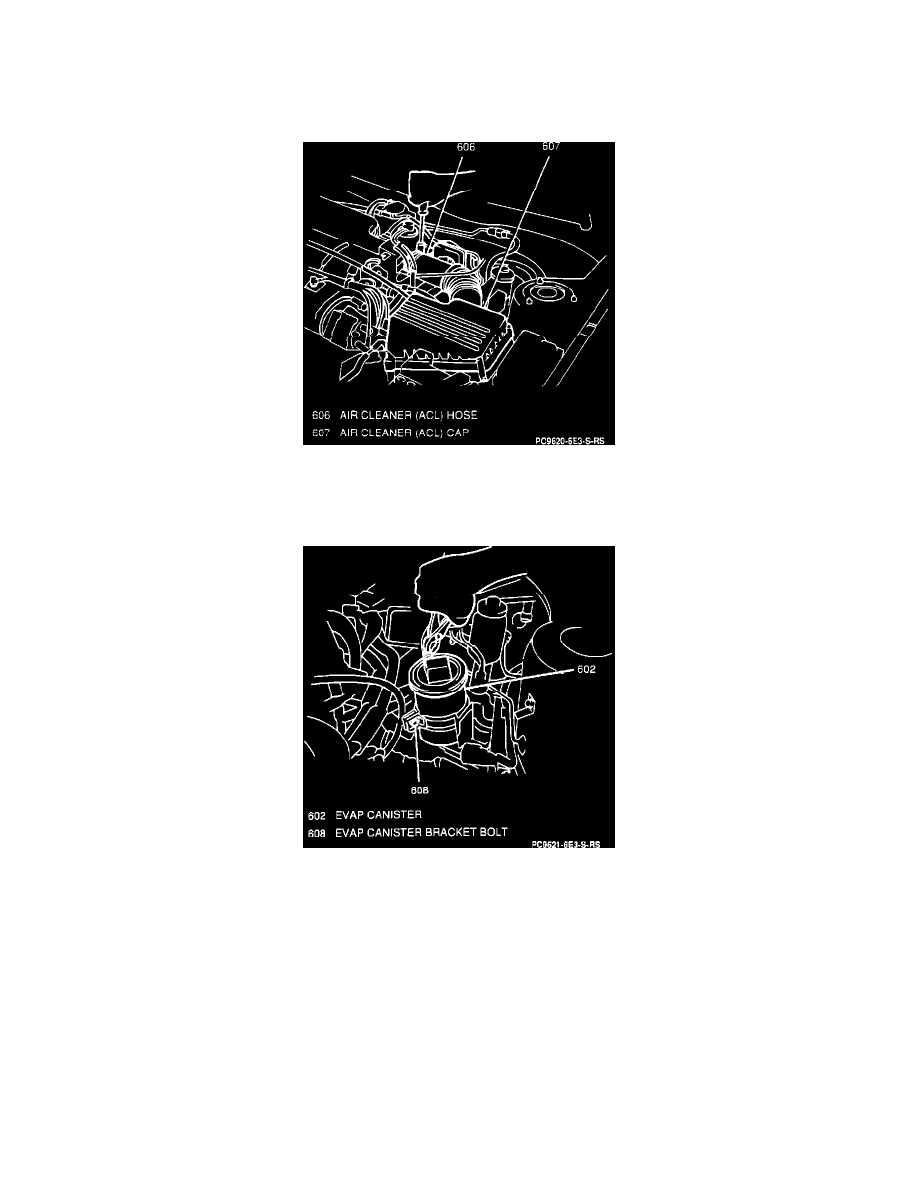
EVAP Canister Removal
3.
Loosen air cleaner (ACL) hose clamp and ACL cap clips.
4.
Remove ACL cap and hose from engine compartment.
EVAP Canister Removal
5.
Remove two clamps and vacuum hoses from canister.
6.
Remove EVAP hoses from canister.
7.
Remove one vacuum hose from canister.
8.
Remove one bolt and canister from mounting bracket.
INSTALLATION
1.
Install canister to bracket; secure with one bolt.
2.
Connect one vacuum hose to canister.
3.
Connect two EVAP hoses; secure with two clamps.
4.
Install ACL cap and hose.
5.
Connect ACL hose and and cap clips.
6.
Connect intake air temperature sensor connector.
7.
Connect negative battery cable.